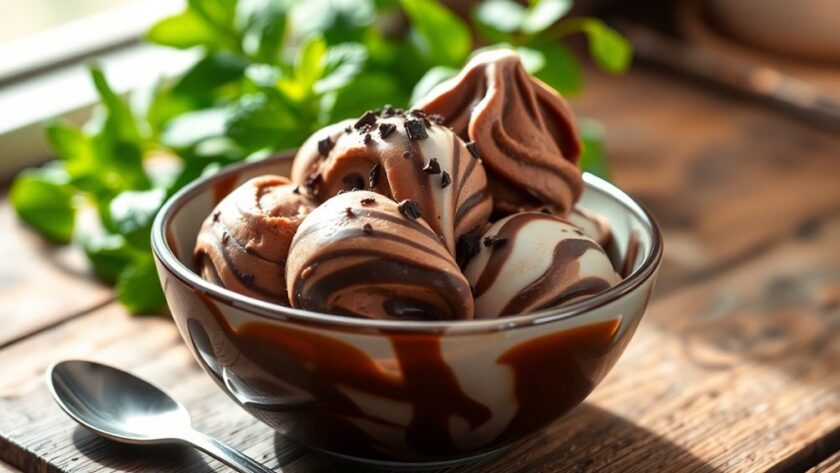
If you’re craving a rich, creamy treat, no-churn chocolate ice cream is your answer! Just whip together heavy cream and sweetened condensed milk, then stir in melted chocolate or cocoa powder. Freeze it, and you’ll be enjoying a delightful dessert in no time. You can even get creative with mix-ins and toppings to elevate your experience. Want tips for achieving the perfect texture and flavor variations? Keep exploring for more delicious ideas!
The Simple Ingredients You Need for No-Churn Chocolate Ice Cream
To whip up your own no-churn chocolate ice cream, you only need a handful of simple ingredients. Start with heavy cream and sweetened condensed milk for a creamy base. For that rich chocolate flavor, add cocoa powder or melted chocolate—both work wonders! Interestingly, granulated sugar can also provide a balanced sweetness to your ice cream if you decide to incorporate it. If you want to customize, consider ingredient substitutions like using almond milk for a dairy-free option or swapping in flavored extracts for a twist. You can even mix in chocolate chips or nuts if you’re feeling adventurous. Just keep in mind that these choices can alter the texture and sweetness, so taste as you go. With these essentials, you’ll create a delicious treat that’ll satisfy your chocolate cravings in no time! Additionally, incorporating nutritious ingredients can elevate both flavor and health benefits, making your ice cream even more enjoyable while providing balance in ingredients for the perfect treat.
How to Make No-Churn Chocolate Ice Cream Step by Step
Get ready to indulge in homemade no-churn chocolate ice cream with this straightforward step-by-step guide.
First, whip together heavy cream and sweetened condensed milk until well combined. The creamy texture of the heavy cream enhances the richness of your ice cream. To elevate the flavor, consider adding seasonal flavors for a unique twist.
Next, melt your favorite chocolate—dark, milk, or any chocolate variations you love—and let it cool slightly.
Fold the melted chocolate into the cream mixture, ensuring it’s fully incorporated.
Pour everything into a suitable container and smooth the top.
Cover it tightly and freeze for about 6 hours or until firm.
As you enjoy this treat, think about ice cream history, which dates back centuries, evolving into the delightful dessert you’re about to savor. Incorporating natural sweeteners can enhance your dessert experience with added nutrients.
Now, scoop and share your delicious creation with friends and family!
Tips for Achieving the Creamiest Texture
To get the creamiest texture in your no-churn chocolate ice cream, start with high-quality ingredients. You’ll also want to incorporate air wisely during mixing to create a light and fluffy base. Additionally, using Dutch-processed cocoa powder can enhance both flavor and color, making your treat even more delightful. Finally, don’t skip the step of chilling your mixture thoroughly before freezing; it makes all the difference! Additionally, consider using nutrient-rich ingredients to enhance both flavor and texture, resulting in an even more indulgent treat. Including protein-packed snacks can help meet your dietary needs while indulging in desserts.
Use High-Quality Ingredients
Using high-quality ingredients is essential for achieving the creamiest texture in your no-churn chocolate ice cream.
When it comes to chocolate quality, the better the chocolate, the richer the flavor. Here are three tips for ideal ingredient sourcing:
- Choose premium cocoa powder: It makes a noticeable difference in taste and creaminess.
- Select whole milk or cream: Higher fat content leads to a smoother texture, so don’t skimp here!
- Use pure vanilla extract: This elevates the overall flavor profile, enhancing the chocolate. Incorporating the role of sugar can also enhance the overall richness of your ice cream.
Incorporate Air Wisely
While many might overlook the importance of incorporating air, it plays a crucial role in achieving that creamy texture you crave in no-churn chocolate ice cream.
To master air incorporation, start by whipping your cream until soft peaks form; this adds volume and lightness. Don’t rush it—take your time to gently fold in other ingredients like sweetened condensed milk. This method helps maintain that airy consistency, enhancing the overall texture.
If you’re feeling adventurous, you can even use a whisk to introduce more air during mixing. Just remember, the goal is to keep it light and fluffy without deflating your mixture.
Proper air incorporation is key to delivering that smooth, indulgent experience you want.
Chill Your Mixture Thoroughly
Achieving the creamiest texture in your no-churn chocolate ice cream hinges on thoroughly chilling your mixture before freezing. This step is essential and can make all the difference.
Here are some effective cooling methods to take into account:
- Refrigerate: Let your mixture chill in the fridge for at least 2 hours. This helps it cool evenly.
- Ice Bath: Place your bowl in an ice bath for quicker cooling. Stir occasionally to promote even temperature.
- Freezer Pre-Chill: If you’re short on time, pop the mixture in the freezer for 30 minutes, stirring halfway through.
These ice cream techniques guarantee a smoother, creamier result, preventing ice crystals from forming.
Flavor Variations to Elevate Your Chocolate Ice Cream
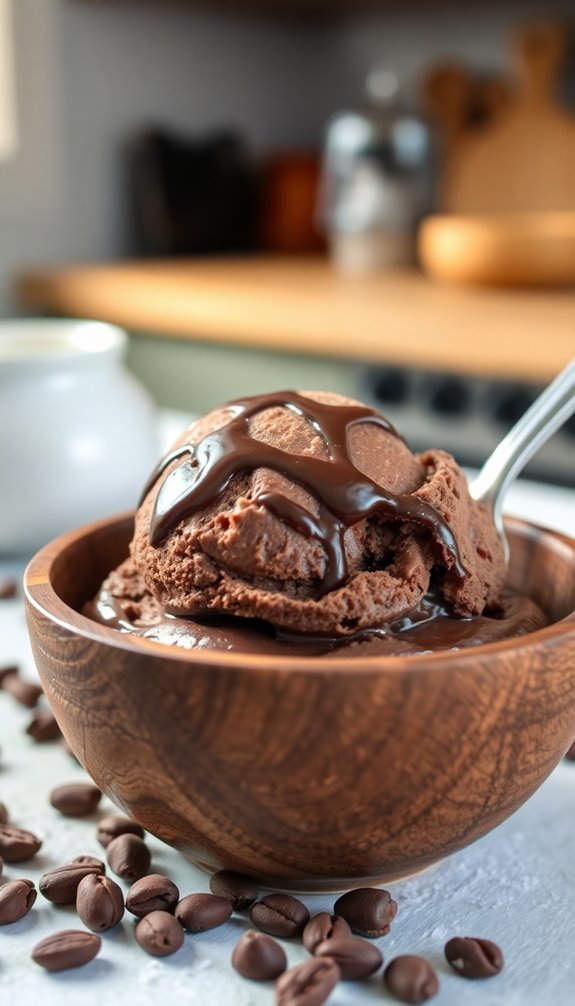
To transform your no-churn chocolate ice cream into a gourmet treat, consider adding unique flavor variations that can elevate its richness. Experiment with flavor pairings like orange zest or espresso for a delightful twist.
You can also try ingredient swaps, using almond milk or coconut cream for health alternatives. For texture enhancements, fold in indulgent mix-ins like crushed cookies or nuts.
Spice additions, such as cinnamon or chili powder, will bring warmth and depth. Seasonal flavors like peppermint in winter or fresh berries in summer can keep your ice cream exciting.
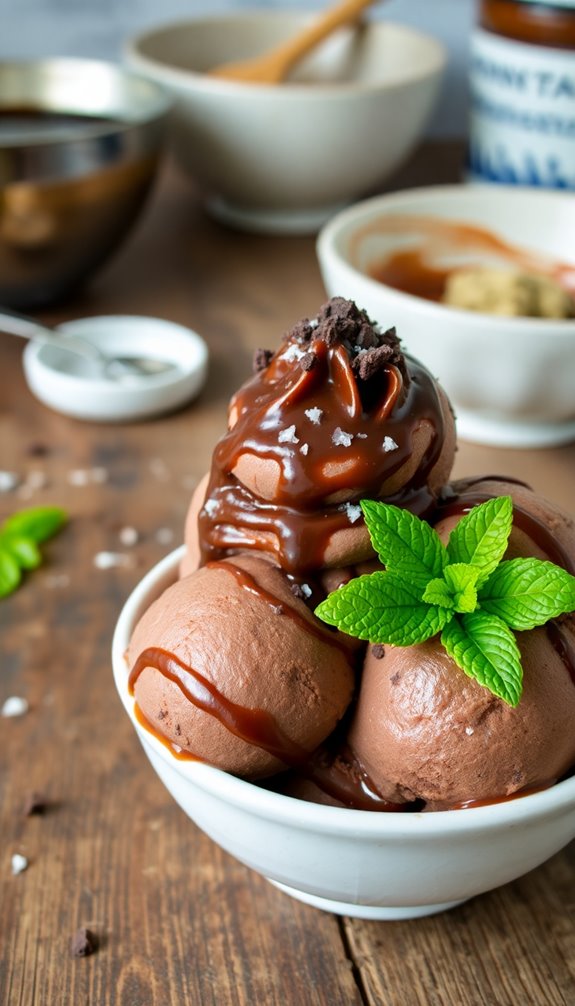
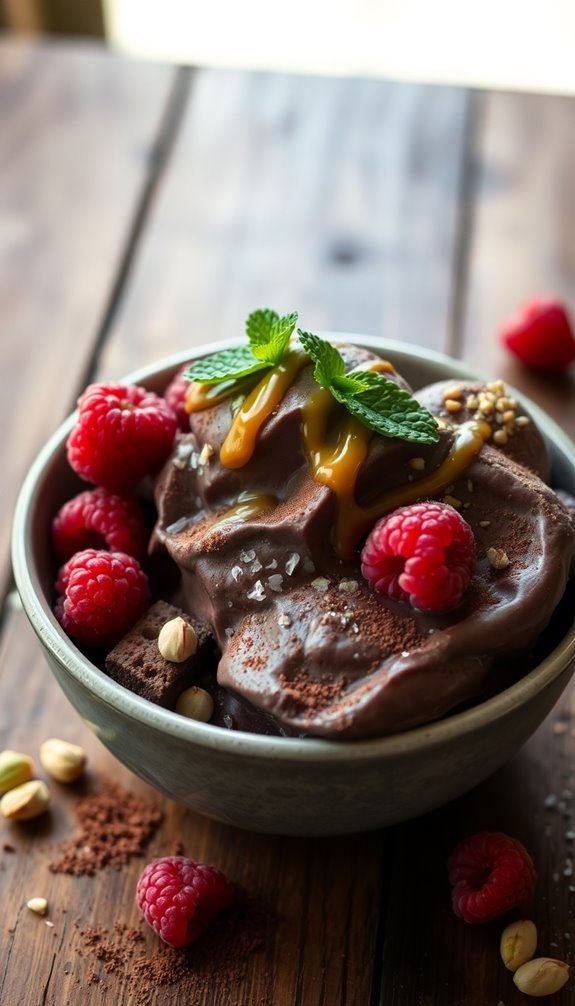
Finally, don’t forget topping combinations; a drizzle of caramel or a sprinkle of sea salt can take your dessert to a whole new level. Enjoy your creative journey!
Creative Toppings That Pair Perfectly With Chocolate Ice Cream
After experimenting with flavor variations, the next step in elevating your no-churn chocolate ice cream lies in the domain of toppings.
Get creative and transform each scoop with these delicious ideas:
Get inspired to elevate your no-churn chocolate ice cream with creative toppings that add flavor and fun!
- Gourmet Sauces: Drizzle indulgent chocolate or caramel sauce for a rich finish.
- Unique Crunches: Add nutty additions like toasted almonds or crunchy pretzels for texture.
- Fruity Accents: Top with fresh berries or banana slices to balance the sweetness.
You can also play with savory contrasts like sea salt, or sprinkle on some exotic spices for an unexpected kick.
Don’t forget playful sprinkles for that fun factor!
These toppings not only enhance the flavor but also make your dessert visually appealing.
Enjoy crafting your perfect bowl!
How to Store and Preserve Your Homemade Ice Cream
To keep your homemade ice cream fresh, it’s essential to store it at the right temperature.
Make sure your freezer is set to zero degrees Fahrenheit or lower and use an airtight container to prevent ice crystals from forming.
With the right storage methods, you can enjoy your delicious treat for weeks to come.
Ideal Freezer Temperature
While you might be enthusiastic to dig into your homemade no-churn chocolate ice cream, storing it at the right freezer temperature is essential for preserving its creamy texture and rich flavor.
To achieve ideal ice cream consistency, keep your freezer settings in check. Here are three tips for optimal storage:
- Set your freezer temperature to around -10°F (-23°C) for the best results.
- Avoid opening the freezer frequently; fluctuating temperatures can create ice crystals and affect texture.
- Use a thermometer to monitor your freezer’s temperature regularly, ensuring it stays consistent.
Airtight Container Tips
Storing your homemade no-churn chocolate ice cream in an airtight container is essential for maintaining its creamy texture and flavor.
Choose a container made from materials like glass or food-grade plastic, as these provide excellent durability and insulation. Confirm the container has a tight-fitting lid to create an airtight seal, which prevents ice crystals from forming and keeps your ice cream smooth.
Before sealing, press a piece of parchment paper directly onto the surface of the ice cream to minimize air exposure. Label your container with the date, so you know when to enjoy it.
Troubleshooting Common No-Churn Ice Cream Issues
When you whip up a batch of no-churn chocolate ice cream, it can be frustrating to encounter issues like ice crystals or a grainy texture. Here are some common pitfalls and how to fix them:
- Texture Issues: Verify you’re using the right mixing techniques. Overwhipping cream can lead to a grainy texture.
- Ingredient Substitutions: Substituting heavy cream with lighter options can affect the creaminess. Stick to full-fat ingredients for better results.
- Freezing Tips: Allow your ice cream to freeze for at least 6 hours to achieve the best consistency.
To avoid storage problems, use an airtight container and maintain a consistent serving temperature.
Following these guidelines will help you achieve a smoother, more flavorful no-churn treat!
Serving Suggestions for Every Occasion
When it comes to serving your no-churn chocolate ice cream, the possibilities are endless.
You can elevate your dessert with fun toppings, creative presentations, and seasonal flair.
Let’s explore some perfect pairings and ideas that’ll impress your guests at any occasion.
Perfect Pairings With Toppings
While indulging in your no-churn chocolate ice cream, consider elevating the experience with thoughtful toppings that complement its rich flavor.
Here are three perfect pairings:
- Classic Combo: Drizzle warm chocolate sauce over a dollop of whipped cream, then sprinkle with crushed nuts for a delightful crunch.
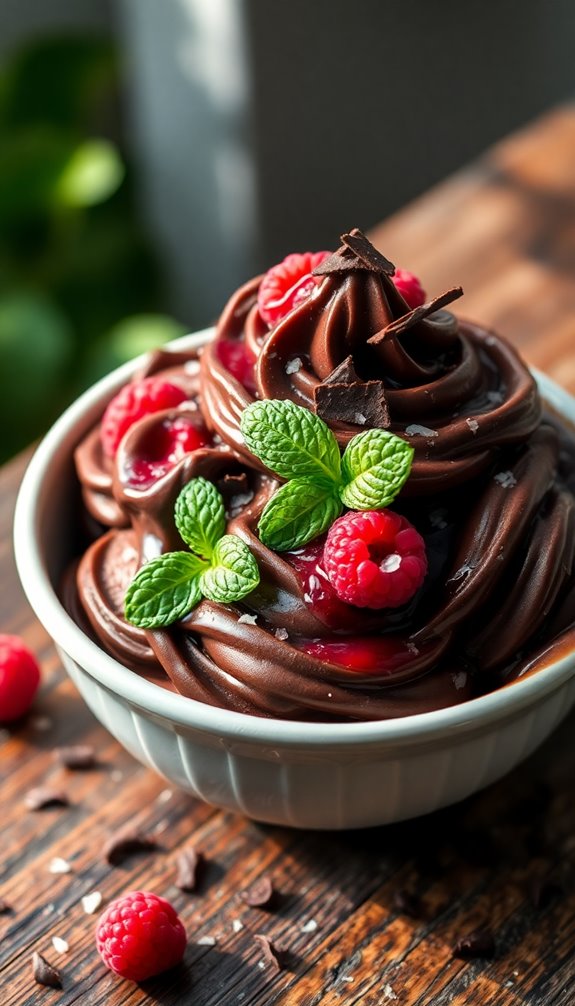
- Fruity Delight: Top your scoop with a vibrant fruit compote and fresh berries, adding a revitalizing contrast to the chocolatey base.
- Decadent Treat: Add a layer of cookie crumbles, marshmallow fluff, and a caramel drizzle, finishing it off with a sprinkle of sea salt for that perfect sweet-savory balance.
Experiment with these toppings, and you’ll discover combinations that turn your dessert into an unforgettable treat!
Fun Dessert Presentation Ideas
To make your no-churn chocolate ice cream truly shine, consider creative presentation ideas that impress your guests. Serve it in fun ice cream cones for a playful touch, or use elegant dessert plates to elevate the experience.
Drizzle rich chocolate sauces over the top and add a scoop of whipped cream for added flair. Play with flavor pairings by offering a side of fresh fruit or nuts, enhancing both taste and presentation.
Don’t forget edible garnishes like mint leaves or edible flowers for that extra pop. Use themed decorations to match your occasion, and sprinkle on festive sprinkles to delight everyone.
Presenting your ice cream in charming serving bowls can also create a cozy, inviting atmosphere. Enjoy your delicious masterpiece!
Seasonal Serving Suggestions
As you plan your seasonal gatherings, think about how no-churn chocolate ice cream can be tailored to fit any occasion. Here are three delicious serving suggestions:
- Summer Gatherings: Pair your ice cream with seasonal toppings like fresh berries and whipped cream for a revitalizing treat.
- Cozy Nights: Serve it alongside warm brownies or cookies for a comforting dessert during chilly evenings.
- Festive Occasions: Elevate your holiday treats by adding crushed peppermint or festive sprinkles for a cheerful twist.
Whether it’s an ice cream party or a family celebration, no-churn chocolate ice cream adapts beautifully to each season.
With the right seasonal flavors and toppings, you’ll create memorable moments everyone will love!
Why You’ll Prefer Homemade Over Store-Bought
You’ll likely find that homemade chocolate ice cream outshines store-bought varieties in both flavor and texture.
One of the biggest homemade benefits is that you control the ingredients, ensuring high-quality cocoa and real cream. This results in a richer, creamier dessert that’s hard to beat.
Store-bought options often contain preservatives and artificial flavors, leading to an inferior taste and texture. Plus, making it at home means you can customize the sweetness to your liking, which isn’t always possible with pre-packaged ice cream.
You’ll also enjoy the satisfaction of creating something delicious yourself. With just a few simple ingredients, you’ll understand why homemade is the way to go for a truly indulgent treat.
FAQs About No-Churn Chocolate Ice Cream?
Homemade chocolate ice cream not only offers superior flavor but also sparks curiosity about the no-churn method. Here are some FAQs to clear things up:
1. What are the no churn benefits?
You save time and effort, skipping the ice cream maker while still achieving creamy perfection.
2. Can I use chocolate alternatives?
Absolutely! You can experiment with cocoa powder, dark chocolate, or even vegan chocolate for unique flavors.
3. How long does it take to freeze?
Typically, it takes about 4-6 hours to firm up, but overnight is best for that perfect scoop.
Embrace these insights and get ready to enjoy a deliciously simple no-churn chocolate treat!
Conclusion
You’ll find that making no-churn chocolate ice cream isn’t just a treat; it’s a delightful coincidence that brings friends and family together. Imagine this: a warm summer evening, laughter echoing, and everyone savoring your creamy creation. As the sun sets, you’ll realize that the simple act of making ice cream has turned into a cherished memory. So go ahead, whip up this indulgent dessert, and let those moments unfold—you’ll love every scoop!