
You can effortlessly impress your guests by whipping up delicious desserts in advance. Consider decadent chocolate mousse cups, classic vanilla panna cotta with berry sauce, and no-bake cheesecake bites for easy serving. Rich brownies that freeze well also make for a fantastic make-ahead treat. For something light and colorful, try a fruity trifle or a fluffy banana cream pie. Explore even more delightful options that guarantee stress-free hosting ahead!
Decadent Chocolate Mousse Cups
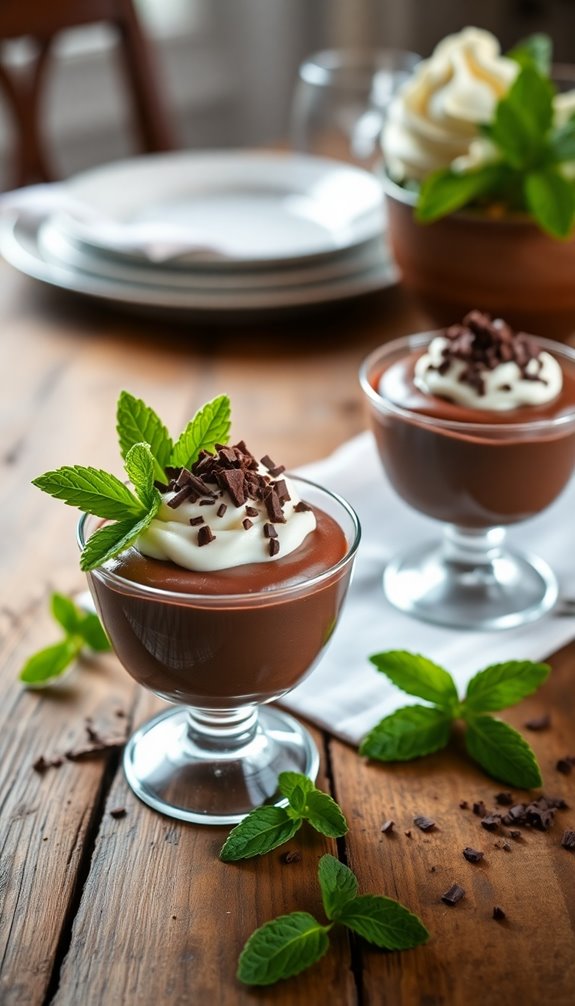
If you’re looking to impress your guests with a dessert that feels luxurious yet is simple to prepare, decadent chocolate mousse cups are the perfect choice. Utilizing essential chocolate techniques, like tempering and folding, you’ll create a rich and airy texture that melts in the mouth. Tiramisu, with its luxurious layers of chocolate, serves as a reminder of the art of dessert-making in Italian cuisine. Each serving of tiramisu contains approximately 327 calories, making it a delicious yet indulgent choice for dessert lovers.
Start with high-quality chocolate for the best flavor, and don’t hesitate to experiment with mousse variations. You could add a hint of espresso for depth or incorporate orange zest for a revitalizing twist. Consider pairing the mousse with a No-Bake White Chocolate Cheesecake for a delightful dessert combination that will elevate your hosting experience.
Once prepared, chill the mousse in individual cups, allowing the flavors to meld. Serve topped with whipped cream or shaved chocolate for an elegant finish. Your guests won’t believe you made this delightful treat ahead of time!
Classic Vanilla Panna Cotta With Berry Sauce
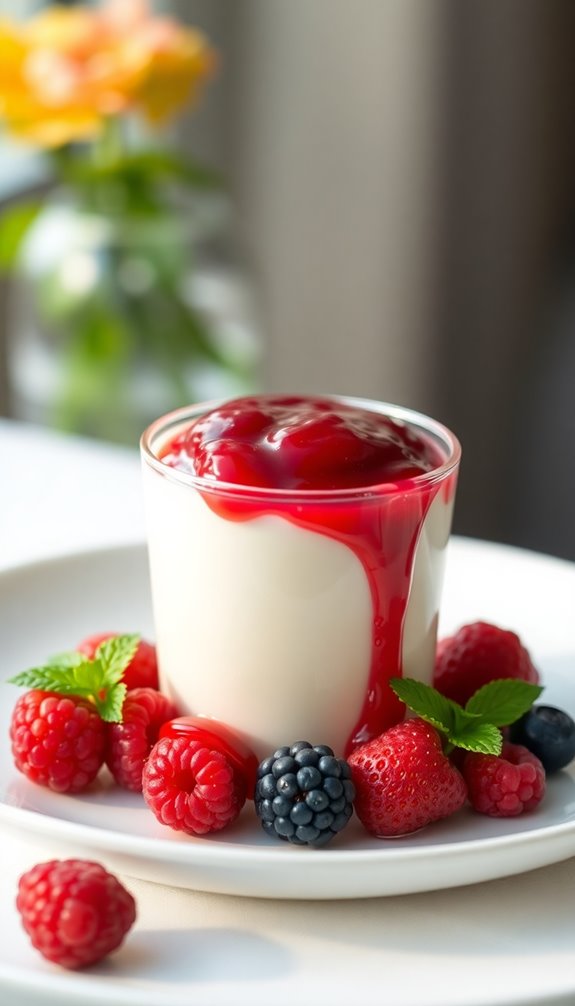
After indulging in those decadent chocolate mousse cups, you might want to try something equally impressive but with a different flavor profile. Classic vanilla panna cotta is the perfect choice. Its creamy texture creates a delightful contrast to the tartness of berry sauce, making it a crowd-pleaser. This dessert is somewhat similar to a no-bake cheesecake due to its rich and creamy consistency. 7-layer bars can also be a great addition to your dessert table, offering a different texture and flavor experience.
You can easily make panna cotta variations by infusing it with flavors like espresso or citrus, but the classic vanilla remains timeless. Additionally, panna cotta is versatile and can be flavored with traditional Italian flavors like citrus zest or almond, enhancing its appeal.
For the berry sauce, combine your favorite fruits—think strawberries, raspberries, or blueberries—with a touch of sugar and lemon juice. Let it simmer until it thickens, and you’ll have a stunning topping.
This dish not only looks elegant but can also be prepared ahead of time, ensuring stress-free hosting!
No-Bake Cheesecake Bites for Easy Serving
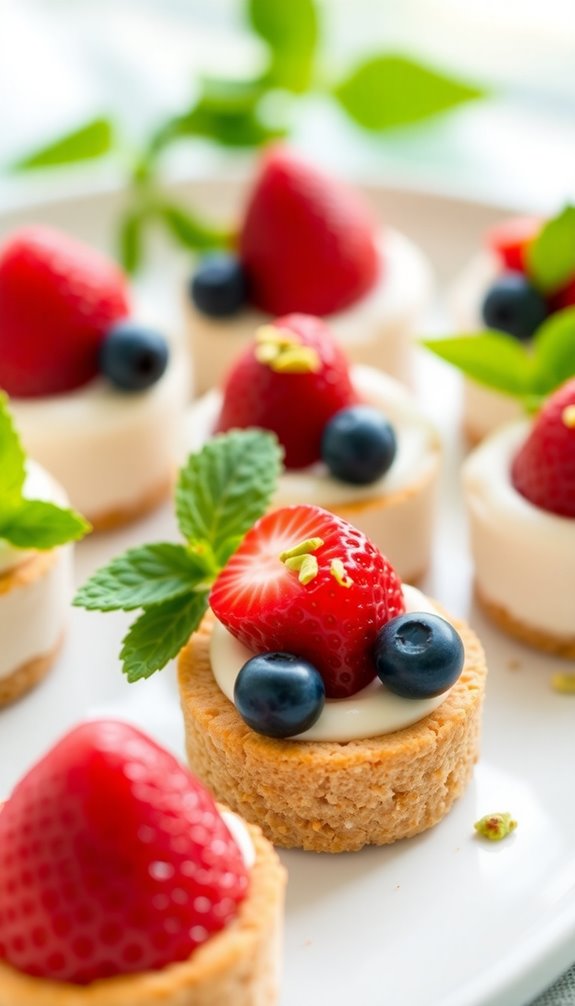
No-bake cheesecake bites are a game-changer for easy entertaining. You can whip them up in no time and customize flavors to suit any taste. Plus, we’ll share some perfect serving suggestions to impress your guests! These delightful treats can be made ahead of time, allowing you to focus on stress-free hosting while your guests enjoy a delicious dessert. They are made with a buttery graham cracker crust that serves as a flavorful base, enhancing the overall taste and presentation. Additionally, the right gluten-free flour blend can ensure that everyone, including those with dietary restrictions, can enjoy these sweet bites.
Quick Preparation Tips
While you might think preparing desserts takes a lot of time, no-bake cheesecake bites prove that delicious treats can come together quickly and effortlessly.
Start by gathering your ingredients: cream cheese, sugar, and your favorite toppings.
With just a few simple steps, you can achieve quick assembly. Blend the cream cheese and sugar until smooth, then scoop the mixture into bite-sized portions.
Roll them in graham cracker crumbs or chocolate shavings for that classic cheesecake touch.
The best part? You’ll have minimal cleanup since you’re only using a mixing bowl and a baking sheet.
Chill them in the fridge, and you’ll have a delightful dessert ready to impress your guests without the hassle of baking. To elevate your dessert offerings, consider pairing these bites with guilt-free gluten-free cookies that cater to various dietary preferences.
Flavor Variations to Try
If you’re looking to elevate your no-bake cheesecake bites, experimenting with flavor variations can make all the difference.
Try incorporating seasonal fruits like strawberries or blueberries for a fresh twist. You can also explore flavor pairing by mixing in a splash of vanilla extract or a hint of almond for added depth.
If you want a richer taste, consider using chocolate cream cheese instead of the regular variety. Don’t hesitate to make ingredient substitutions; for example, swap out traditional graham crackers with crushed Oreos or nut-based crusts for a unique touch.
Perfect Serving Suggestions
When you’re ready to serve your no-bake cheesecake bites, presentation can enhance their appeal and make them even more inviting.
Start with elegant dessert plating—consider using small, colorful plates or a tiered serving stand to showcase your bites beautifully. For a touch of sophistication, garnish each bite with a fresh berry or a drizzle of chocolate sauce.
Use serving utensils that complement your theme; small tongs or dessert forks can make it easier for guests to enjoy without fuss.
Encourage guests to mix and match flavors for a fun experience. With these thoughtful presentation ideas, you’ll create a delightful dessert display that will impress your guests and keep the atmosphere stress-free.
Enjoy hosting!
Rich Brownies That Freeze Well
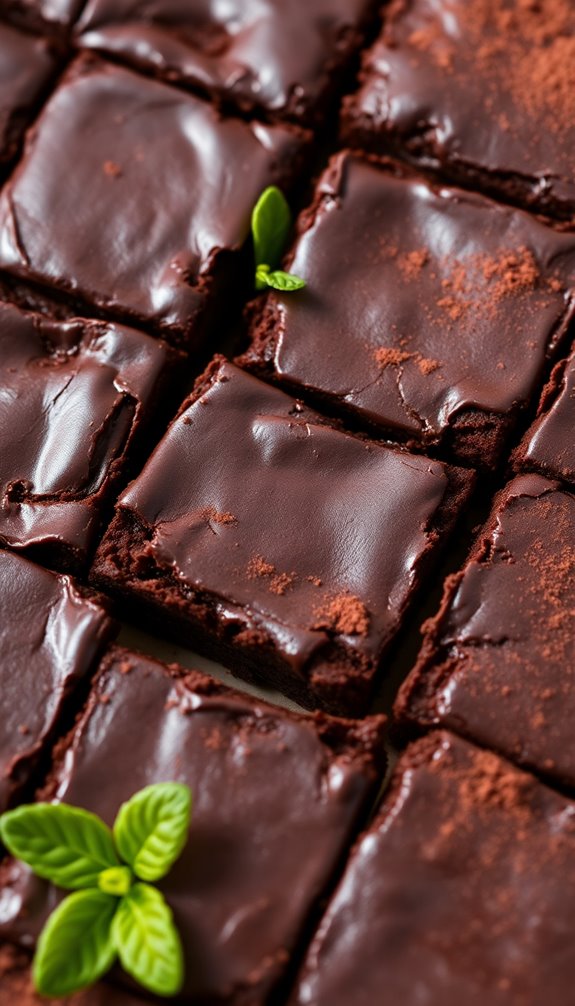
If you love brownies but want to save some for later, freezing them is a smart choice.
You’ll learn the best freezing techniques to keep those rich flavors intact, plus some creative serving suggestions and toppings to elevate your treat.
Get ready to enjoy delicious brownies anytime!
Freezing Techniques Explained
To guarantee your rich brownies maintain their deliciousness after freezing, mastering a few simple techniques is essential.
Here are some effective freezing methods:
- Cool Completely: Allow your brownies to cool at room temperature before freezing. This prevents condensation and maintains texture.
- Wrap Well: Use plastic wrap to tightly cover each brownie, followed by aluminum foil for extra protection. This keeps them from freezer burn.
- Label and Date: Place the wrapped brownies in a freezer-safe bag or container, labeling it with the date. This helps you keep track of freshness.
When it’s time to indulge, use proper thawing techniques by moving them to the fridge overnight or letting them sit at room temperature for about an hour.
Enjoy your stress-free hosting!
Serving Suggestions and Toppings
After you’ve successfully frozen your rich brownies, it’s time to think about how to serve them for maximum enjoyment.
Start by placing the brownies on elegant serving platters; this instantly elevates their appeal. You can warm them slightly in the oven for that fresh-baked taste.
As for garnish ideas, consider a drizzle of caramel or chocolate sauce to enhance their richness. Fresh berries or a scoop of vanilla ice cream can add a revitalizing contrast.
If you want to impress, sprinkle some sea salt on top for a delightful flavor kick. Don’t forget to dust with powdered sugar for a touch of sweetness.
With these simple serving suggestions, your brownies will be the star of any gathering!
Fruity Trifle for a Light and Colorful Option
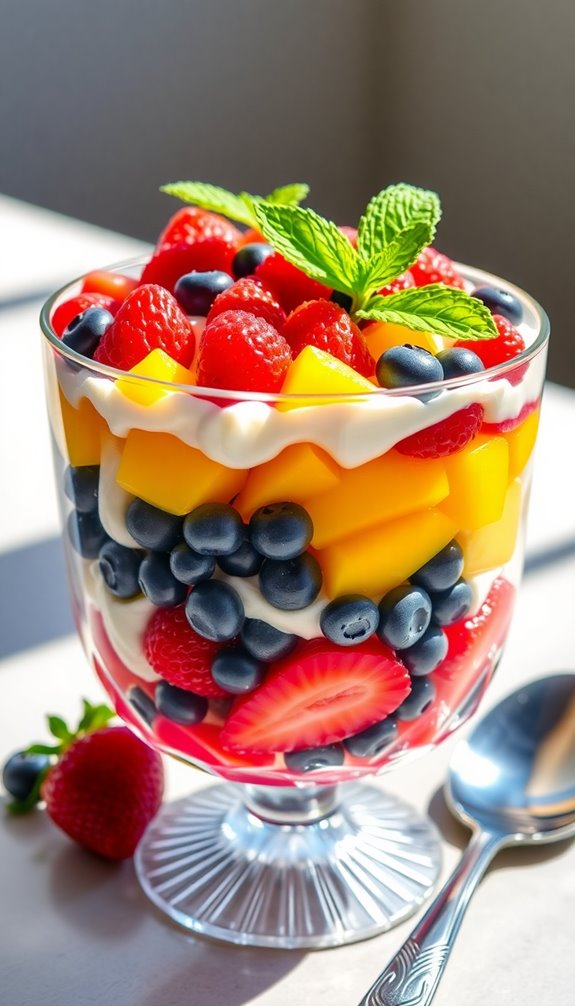
While desserts often lean toward the heavy side, a fruity trifle offers a light and colorful alternative that’s perfect for any occasion.
You can easily customize it with different trifle variations and layering techniques, making it a showstopper on your table.
Here’s how to create a delightful trifle:
- Fresh Fruits: Use vibrant berries, sliced peaches, or juicy mangoes for that pop of color.
- Creamy Layers: Alternate layers of whipped cream or yogurt to add a luscious texture.
- Cake or Cookies: Incorporate sponge cake or crushed cookies for a satisfying crunch.
With its eye-catching presentation and invigorating flavors, a fruity trifle isn’t just a dessert—it’s a celebration in a bowl!
A fruity trifle is more than just dessert; it’s a vibrant celebration that brings joy to any gathering!
Enjoy making it ahead for a stress-free hosting experience.
Homemade Chocolate Chip Cookie Dough Freezer Bars
Making homemade chocolate chip cookie dough freezer bars is a breeze. You’ll appreciate the simple preparation steps that get you to the delicious end result quickly.
Plus, knowing how to store them in the freezer will keep your treats fresh and ready for whenever you crave a sweet bite.
Easy Preparation Steps
If you want a delicious treat at your fingertips without the hassle of baking from scratch, these Homemade Chocolate Chip Cookie Dough Freezer Bars are the perfect solution.
Using easy dessert techniques, you can whip these up in no time for stress-free hosting. Here’s how:
- Mix your favorite cookie dough ingredients in a bowl until smooth and creamy.
- Fold in chocolate chips until they’re evenly distributed throughout the dough.
- Spread the mixture into a lined baking dish, pressing it down gently to create an even layer.
Once you’ve done that, pop them in the freezer.
In just a few hours, you’ll have a scrumptious treat ready to serve whenever you need it!
Freezer Storage Tips
To keep your Homemade Chocolate Chip Cookie Dough Freezer Bars fresh and delicious, proper storage is key. First, cut the bars into individual portions before freezing.
Use parchment paper to separate layers, preventing them from sticking together. For ideal freezing methods, place the bars in an airtight container or freezer-safe bag. Remove as much air as possible to prevent freezer burn.
Label each container with the date to keep track of freshness, and try to use them within three months for the best taste.
When you’re ready to enjoy, simply thaw them in the fridge or at room temperature. This approach makes freezer meal planning a breeze, ensuring you always have a sweet treat on hand for any occasion!
Easy Fruit Tart With Whipped Cream
While you might think creating a stunning dessert requires hours in the kitchen, an easy fruit tart with whipped cream proves otherwise.
This dessert dazzles with vibrant colors and fresh flavors, making it perfect for any occasion.
To make your fruit tart shine, consider these steps:
- Choose your crust: Opt for a buttery pastry or a graham cracker base to suit your taste.
- Pick seasonal fruit: Use ripe strawberries, juicy peaches, or tangy kiwi for a revitalizing twist.
- Whip up the cream: Lightly sweetened whipped cream adds a luxurious finish that complements the tartness of the fruit.
With endless fruit tart variations, you can impress your guests without the stress of last-minute baking!
Creamy Coconut Cream Pie Made Ahead
Creamy coconut cream pie is a delightful dessert that’s not only rich in flavor but also incredibly easy to make ahead of time.
Start by preparing a crispy coconut crust that’ll provide a perfect base for your pie. You can make this crust a day or two in advance and store it in the fridge.
For the pie filling, whip together coconut milk, sugar, and cornstarch, then gently fold in whipped cream and toasted coconut. This filling can also be prepared ahead and stored in the fridge.
When you’re ready to serve, simply assemble the pie by pouring the filling into the crust. Top with extra whipped cream and coconut flakes for a stunning presentation that’ll impress your guests!
Savory and Sweet Mini Pavlovas
After enjoying the rich flavors of a coconut cream pie, you might want to explore something equally delightful yet different—savory and sweet mini pavlovas.
These light, airy desserts are perfect for hosting and can be made ahead of time. Here are some irresistible mini pavlova flavors and toppings to contemplate:
- Savory Options: Top with creamy goat cheese, roasted red peppers, and a sprinkle of fresh herbs for a unique twist.
- Sweet Combinations: Pair with whipped cream, fresh berries, and a drizzle of chocolate sauce for a classic treat.
- Unexpected Flavors: Try a lemon curd filling topped with basil for a revitalizing surprise.
Whichever you choose, your guests will love these delightful mini pavlovas!
Delicious Lemon Bars for a Zesty Treat
If you’re craving a dessert that balances sweetness with a revitalizing zing, delicious lemon bars are the perfect choice.
These treats combine a buttery crust with a smooth, tangy filling that bursts with citrus flavor. The key ingredient, fresh lemon zest, elevates the taste, giving each bite a delightful aroma and brightness.
You can prepare them in advance, allowing the flavors to meld beautifully in the fridge. When it’s time to serve, just cut them into squares, dust with powdered sugar, and watch your guests savor every bite.
Their zesty profile makes lemon bars an invigorating option that’s sure to impress. With minimal effort, you’ll create a standout dessert that adds a cheerful touch to your gathering!
Indulgent Tiramisu That Gets Better With Time
While you might think of tiramisu as a last-minute dessert, it actually shines when prepared ahead of time. The flavors meld beautifully, creating a rich indulgence that’s hard to resist.
Tiramisu is best when made ahead, allowing the flavors to meld into a rich, irresistible treat.
Here’s how to elevate your tiramisu experience:
- Experiment with tiramisu variations: Try using espresso, flavored liqueurs, or even chocolate for a unique twist.
- Layer it right: Alternate between creamy mascarpone and coffee-soaked ladyfingers for that perfect texture.
- Chill it well: Let it sit in the fridge overnight so the coffee flavoring intensifies, resulting in a truly decadent dessert.
This make-ahead treat will have your guests raving long after the last bite.
Enjoy the stress-free hosting that comes with this delightful dessert!
Make-Ahead Apple Crisp With Oat Topping
If you’re looking for a comforting dessert that you can prep in advance, make-ahead apple crisp with oat topping is a fantastic choice. You’ll need a few essential ingredients, and I’ll guide you through the step-by-step preparation. Plus, I’ll share storage tips to keep it fresh until you’re ready to enjoy it.
Essential Ingredients Required
To whip up a delicious make-ahead apple crisp with oat topping, you’ll need a handful of essential ingredients that come together seamlessly.
Gather your essential pantry staples and must-have tools to make the process smooth.
- Apples: Choose tart varieties like Granny Smith for that perfect balance of sweetness and acidity.
- Oats: Rolled oats create a hearty, crunchy topping that complements the tender apples beautifully.
- Brown Sugar: This adds rich sweetness and depth, enhancing the overall flavor of your crisp.
With these key ingredients in hand, you’re all set to create a scrumptious dessert that will impress your guests and make your hosting experience stress-free!
Step-by-Step Preparation
Preparing your make-ahead apple crisp with oat topping is a simple process that yields delicious results. Start by preheating your oven to 350°F.
Peel and slice your apples, then mix them with sugar, cinnamon, and a splash of lemon juice in a bowl.
For the oat topping, combine oats, flour, brown sugar, and melted butter in another bowl.
Layer the apple mixture in a baking dish, followed by the oat topping. Bake for about 40 minutes until golden brown and bubbly.
Once cooled, you can store it in the fridge. This step-by-step guide guarantees you’ll use effective preparation techniques, making your hosting experience stress-free while delighting your guests with a warm, comforting dessert!
Storage Tips For Freshness
After you’ve baked your delicious apple crisp with oat topping, proper storage will help maintain its freshness and flavor. Here are some quick tips to keep it tasty:
- Use airtight storage containers: They prevent moisture control and keep the crisp from getting soggy. Consider vacuum packing for extra freshness.
- Label dates: Write down expiration dates on your containers to track how long it’s been stored.
- Store at ideal temperatures: Refrigerate if you won’t eat it within a couple of days, but let it cool completely first.
Following these refrigeration tips and being mindful of ingredient placement will guarantee your apple crisp stays delightful until it’s time to serve!
Simple Chocolate Pots De Crème
Three simple ingredients come together to create a rich and indulgent dessert: chocolate, cream, and eggs. To make these chocolate pots de crème, you’ll melt high-quality chocolate to infuse it with deep chocolate flavoring.
Whisk the cream and eggs together, then combine them with the melted chocolate, blending until smooth. Pour the mixture into small pots or ramekins for a stunning dessert presentation.
Chill them in the fridge for a few hours, allowing the flavors to meld and the texture to set. When you’re ready to serve, garnish with whipped cream or a sprinkle of cocoa powder.
Your guests will love this elegant treat, and you’ll appreciate how easy it’s to prepare ahead of time!
Vanilla Bean Rice Pudding for Comfort
If you’re craving a warm and creamy dessert, vanilla bean rice pudding is the perfect choice.
You can master its texture with a few simple tips, explore delicious flavor variations, and discover easy ways to store it for later.
Let’s explore how to make this comforting treat a staple in your dessert rotation.
Creamy Texture Tips
To achieve that perfect creamy texture in your vanilla bean rice pudding, focus on choosing the right ingredients and techniques. You want a silky, velvety finish that makes each bite melt in your mouth.
Here are three tips for achieving that creamy consistency and balancing the texture:
- Use Arborio rice: This short-grain rice releases starch, creating a naturally creamy base.
- Incorporate whole milk and cream: A mix of these will enhance richness and smoothness.
- Cook low and slow: Gentle heat allows the rice to absorb liquids thoroughly, preventing clumping.
With these steps, you’ll create a delightful pudding that impresses your guests and keeps stress at bay.
Enjoy the comforting, creamy texture you’ve crafted!
Flavor Variations Ideas
While vanilla bean rice pudding is a comforting classic, experimenting with flavor variations can elevate it to new heights.
Consider adding seasonal spices like cinnamon, nutmeg, or cardamom to infuse warmth and depth into each bite. If you want to change things up, try mixing in a splash of almond extract or a hint of citrus zest for a revitalizing twist.
Don’t forget about unique toppings! Fresh berries, caramelized bananas, or a drizzle of honey can bring your rice pudding to life. For an extra crunch, sprinkle some toasted nuts or coconut flakes on top.
These small adjustments will make your rice pudding unforgettable while still keeping that comforting essence you love. Enjoy the creativity!
Easy Storage Solutions
After exploring flavor variations, it’s important to think about how to store your vanilla bean rice pudding for maximum enjoyment.
Effective dessert organization can make all the difference, and with some creative storage solutions, you’ll keep your pudding fresh and delightful.
Here’s how to do it:
- Mason Jars: Portion out servings in individual jars; they’re perfect for both storage and presentation.
- Airtight Containers: Use these for larger batches, ensuring your pudding stays creamy and prevents drying out.
- Freezer Bags: For long-term storage, freeze portions in zip-top bags, laying them flat for easy stacking.
Elegant Éclairs Filled With Pastry Cream
Éclairs, with their glossy chocolate tops and delicate choux pastry shells, are a classic French dessert that impresses at any gathering.
You can easily make these elegant treats ahead of time, filling them with your favorite pastry cream flavors like vanilla, chocolate, or coffee.
To add variety, consider experimenting with eclair variations, such as incorporating fruit purees or flavored extracts into the cream.
Once baked, store the shells in an airtight container to keep them crisp. Fill them just before serving to maintain their texture.
Your guests will love the delightful surprise of rich pastry cream inside each bite.
With a little planning, you’ll have a stunning dessert that showcases your hosting skills without the last-minute stress!
Easy S’mores Dip for Fun and Flavor
S’mores dip is the ultimate crowd-pleaser, capturing all the nostalgic flavors of the classic campfire treat in a warm, gooey form.
You can whip it up ahead of time and serve it in a beautiful dip presentation that’ll impress your guests. Here’s how to make it even more exciting with s’mores variations:
- Chocolate: Melt rich chocolate or use Nutella for a different twist.
- Marshmallows: Top with mini marshmallows and broil until golden brown.
- Dippers: Serve with graham crackers, pretzels, or fresh fruit for added crunch.
This easy s’mores dip will satisfy everyone’s sweet tooth and create a fun, interactive dessert experience.
Enjoy the compliments as your guests partake!
Fluffy Banana Cream Pie That Stays Fresh
If you’re looking for a dessert that remains fresh and delicious even after a day or two, a fluffy banana cream pie is the perfect choice.
This pie’s creamy filling, made from simple banana pie ingredients like ripe bananas, heavy cream, and vanilla, stays flavorful in the fridge. For pie crust options, consider a classic graham cracker crust or a flaky pastry crust that complements the filling beautifully.
Once assembled, refrigerate it to let the flavors meld while keeping the bananas from browning. This dessert not only impresses your guests but also allows you to enjoy stress-free hosting.
Serve it chilled, and watch everyone savor each bite of your delightful, fluffy banana cream pie!
Rich Espresso Brownie Trifle for Coffee Lovers
For coffee lovers craving a decadent treat, a rich espresso brownie trifle combines layers of fudgy brownies, espresso-infused whipped cream, and chocolate ganache to create an indulgent dessert that’s perfect for making ahead.
This coffee trifle isn’t just delicious; it’s visually stunning, too. Envision this:
- Decadent espresso brownies that melt in your mouth, bringing a deep chocolate flavor.
- Lusciously whipped cream infused with espresso, adding a light yet rich coffee kick.
- Silky chocolate ganache drizzled on top, creating a glossy finish that tempts every guest.
Prepare this trifle ahead of time, let it chill, and serve it to wow your friends.
You’ll enjoy stress-free hosting while they savor each delightful spoonful!
Light and Airy Angel Food Cake With Fresh Berries
While you might think of heavy desserts during the colder months, a light and airy angel food cake with fresh berries is a revitalizing option for any occasion.
This delicate cake, made from whipped egg whites and sugar, offers a fluffy texture that’s perfect for warm gatherings. You can prepare it ahead of time, allowing the flavors to meld beautifully.
Top your angel food cake with a vibrant berry compote, combining strawberries, blueberries, and raspberries for a burst of freshness.
The sweet-tart compote complements the cake’s subtle sweetness, creating a delightful contrast. Serve it chilled for an invigorating treat that’ll impress your guests.
With minimal effort, you’ll provide a stunning dessert that’s sure to be a hit!
Refreshing Frozen Yogurt Bark With Toppings
After enjoying the lightness of angel food cake, you might crave something equally rejuvenating but with a different twist.
Enter revitalizing frozen yogurt bark! It’s simple to make and perfect for stress-free hosting. Just spread your favorite frozen yogurt on a baking sheet and sprinkle it with some tasty toppings.
Here are three delicious ideas to elevate your bark:
- Fresh fruit – think sliced strawberries, blueberries, or bananas for a burst of flavor.
- Nuts – add chopped almonds or walnuts for a satisfying crunch.
- Chocolate drizzle – a swirl of melted dark chocolate creates a decadent finish.
Once frozen, break it into pieces for a delightful treat that’ll impress your guests!
Conclusion
As you prepare these delightful desserts, think of each one as a little beacon of joy, lighting up your gathering with sweetness and ease. By making them ahead, you’re not just serving treats; you’re offering a taste of serenity amidst the hustle of hosting. Let these creations symbolize the love and care you’ve poured into your gathering, turning every bite into a cherished memory. Embrace the calm, and watch your guests indulge in the magic of your thoughtful preparations.