You can whip up a moist red velvet cake without buttermilk by combining whole milk with vinegar, which mimics the acidity buttermilk provides. Start by mixing your dry ingredients, like flour and cocoa powder, with your wet ingredients. You'll want to use vegetable oil to keep the cake moist. Don't forget the red food coloring for that classic look! Bake your cake until a toothpick comes out clean, and top it off with a creamy frosting for the perfect finish. If you want more tips and tricks for getting it just right, you'll find plenty more options ahead.
Recipe Overview
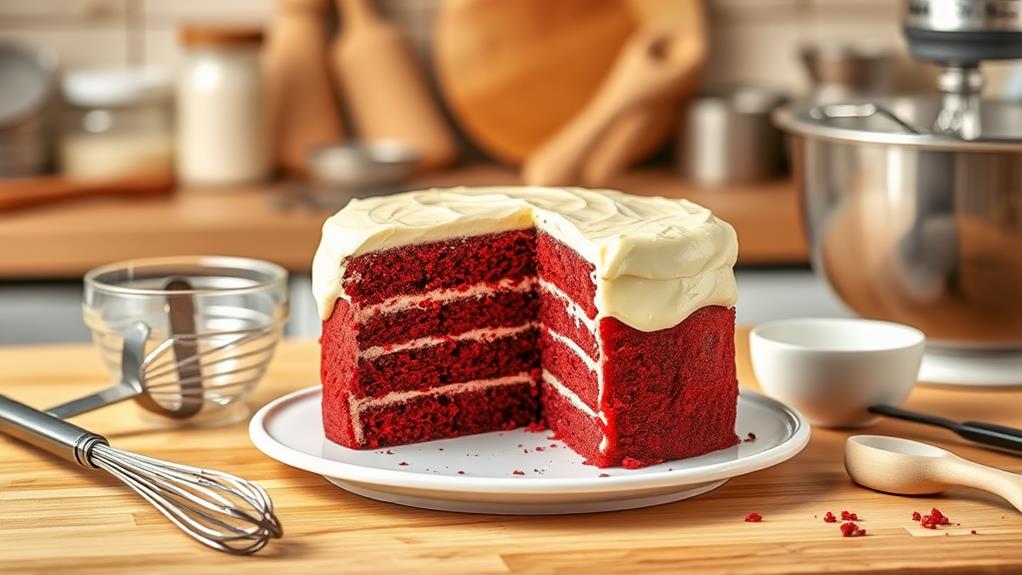
When you plunge into this moist red velvet cake recipe, you'll discover a delightful balance of flavors and textures that makes it a favorite for any occasion.
This recipe achieves its signature moistness without buttermilk by cleverly combining whole milk and vinegar. This mixture creates the necessary acidity, allowing the cake to rise beautifully.
You'll love the unique blend of cocoa powder and vanilla extract, which adds a subtle chocolatey flavor that perfectly complements the cake's vibrant red hue. To achieve this iconic color, you'll need red food coloring; liquid or gel works best.
With a prep and cook time of just about 1 hour and 10 minutes, this recipe is accessible for all skill levels and yields 12 scrumptious servings.
As you follow the steps laid out in the recipe card, you'll mix the flour mixture seamlessly with the wet ingredients for a smooth batter.
Once baked, you can elevate your moist red velvet cake with a luscious cream cheese icing or even try a vanilla buttercream for a different twist.
Whichever way you choose to enjoy it, this cake is sure to impress!
Ingredients and Substitutions
Gathering the right ingredients is essential for achieving that moist red velvet cake you're aiming for. Start with all-purpose flour and granulated sugar, which form the base of your cake. Cocoa powder adds that classic hint of chocolate flavor, while vegetable oil guarantees tenderness and moisture.
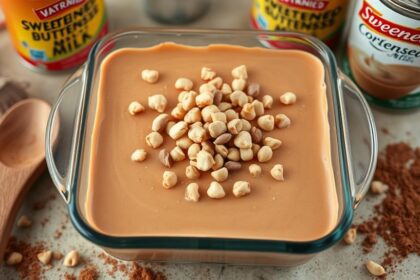
You'll also need eggs for structure and a mixture of whole milk and apple cider vinegar to mimic buttermilk's acidity and richness. Whole milk is ideal, but feel free to use skim or almond milk as substitutions if needed.
To make your cake even more delightful, consider using gluten-free flour for those who may have dietary restrictions.
For the vibrant red hue, opt for gel food coloring, as it provides a richer color than liquid alternatives. If you prefer a natural option, beetroot juice can work, but keep in mind it might slightly alter the flavor.
If you're looking for a lighter texture, you can substitute cake flour for all-purpose flour, though all-purpose flour is best for moisture retention.
Baking Instructions
Before you plunge into baking, preheat your oven to 350°F (180°C) and prepare two 9-inch round cake pans by greasing them and lining the bottoms with parchment paper. This will help your red velvet cake come out easily once it's baked.
For the best results, consider using a mixture of fats, as the combination can enhance the cake's texture and flavor, similar to how the right fat enhances pie crusts.
In a mixing bowl, combine 2.25 cups of all-purpose flour, 3 tablespoons of cocoa powder, 1.5 teaspoons of baking soda, and 1 teaspoon of salt. Make sure they're well sifted for a light texture.
In a separate bowl, mix 1 cup of whole milk and 1 tablespoon of vinegar, then add 0.5 cup of vegetable oil, 1.25 cups of sugar, and 2 large eggs. Stir until fully incorporated, and gradually add the dry ingredients.
Don't forget to mix in 2 teaspoons of red food coloring for that vibrant hue.
Now, pour the batter evenly into your prepared pans. Bake for 22-25 minutes. To check for doneness, use a toothpick inserted into the center; it should come out clean.
Once baked, let your cakes cool completely before frosting.
- Baking is about precision.
- Enjoy the process.
- Share your creations!
Cream Cheese Frosting
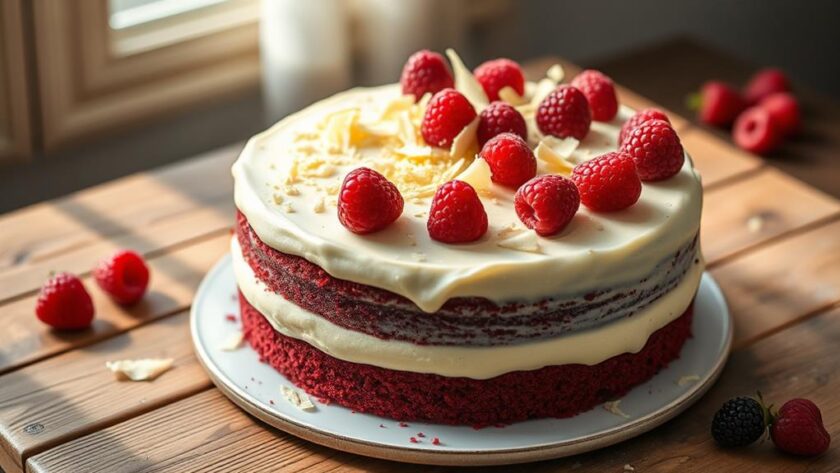
Cream cheese frosting is the perfect partner for your moist red velvet cake, delivering a rich, tangy flavor that enhances every bite. This decadent topping beautifully complements the vibrant color of the cake, making it a showstopper at any gathering.
To make this delightful topping, you'll need softened cream cheese, unsalted butter, powdered sugar, and vanilla extract. Start by ensuring both your cream cheese and butter are at room temperature for a smooth texture. In a mixing bowl, combine 450 grams of softened cream cheese with 225 grams of unsalted butter. Beat them together until fluffy, then gradually add 500 grams of powdered sugar, mixing until fully incorporated.
Don't forget to splash in a teaspoon of vanilla extract to elevate the flavor. If you'd like a thicker frosting, consider adding optional cornstarch, which provides stability without making it overly sweet. A pinch of salt can also enhance the overall flavor depth, balancing the sweetness of the powdered sugar.
This cream cheese frosting not only complements your red velvet cake but also makes it visually appealing when piped or spread evenly. With these simple steps, you'll create a frosting that's as delicious as it's beautiful, perfect for any occasion.
For further inspiration, check out the swirling techniques that can elevate your dessert presentation.
Decoration Techniques
When it comes to decorating your red velvet cake, mastering the crumb coat is essential for a smooth finish.
To enhance the visual appeal, consider experimenting with creative plating techniques that can elevate your cake's presentation.
You'll want to guarantee your frosting has the right consistency for easy application, and consider creative garnishing options that'll make your cake stand out.
Let's explore these techniques to elevate your cake's presentation!
Crumb Coat Application
To achieve a smooth and professional-looking finish on your moist red velvet cake, start by applying a crumb coat. This thin layer of frosting seals in any loose crumbs on the surface, guaranteeing they don't mix with your final layer. Use a large scoop of frosting to cover the top and sides evenly, creating a solid base.
After applying the crumb coat, it's essential to refrigerate the cake for about 30 minutes. This allows the frosting to set and firm up, preventing any crumbs from disrupting your beautiful finish.
Once the crumb coat is set, you can apply a thicker layer of frosting over the top and sides. Use an offset spatula or bench scraper to smooth it out for that polished look.
Here are some tips to bear in mind while crumb coating:
- Guarantee even coverage to create a smooth base.
- Refrigerate to firm up and enhance the finish.
- Use leftover cake crumbs for added decoration or a charming border.
With these techniques, you'll create a lovely, professional-looking cake that's sure to impress!
Frosting Consistency Tips
After you've perfected your crumb coat, getting the right frosting consistency is key for a stunning finish.
Start by confirming your butter and cream cheese are at room temperature. This guarantees easier blending and leads to a smoother frosting. When mixing, add powdered sugar gradually. This prevents lumps and helps you achieve a thicker texture, perfect for decorating the cake.
If you find that your frosting becomes too soft while you're working, don't worry—simply refrigerate it briefly to firm up. Once it's at the right consistency, use a spatula or an offset knife to spread a smooth layer over your cake.
Applying that thicker final layer over your chilled crumb coat gives you a professional finish.
Lastly, think about visual appeal when it comes to decoration. Sprinkles or chocolate shavings can elevate the look of your cake, making it truly eye-catching.
Creative Garnishing Ideas
With a little creativity, you can elevate your moist red velvet cake into a stunning centerpiece for any occasion. Start by applying a crumb coat to seal in the crumbs, providing a smooth base for your flavored frosting.
Then, get playful with decorations that add texture and color contrast.
Here are some ideas to inspire you:
- Cake Crumbs: Use the crumbs from trimming your layers as a decorative sprinkle around the edges or on top of the frosting.
- Piping Decorative Rosettes: Create elegant swirls with a star tip, and don't forget to dust them with edible glitter for that sophisticated finish.
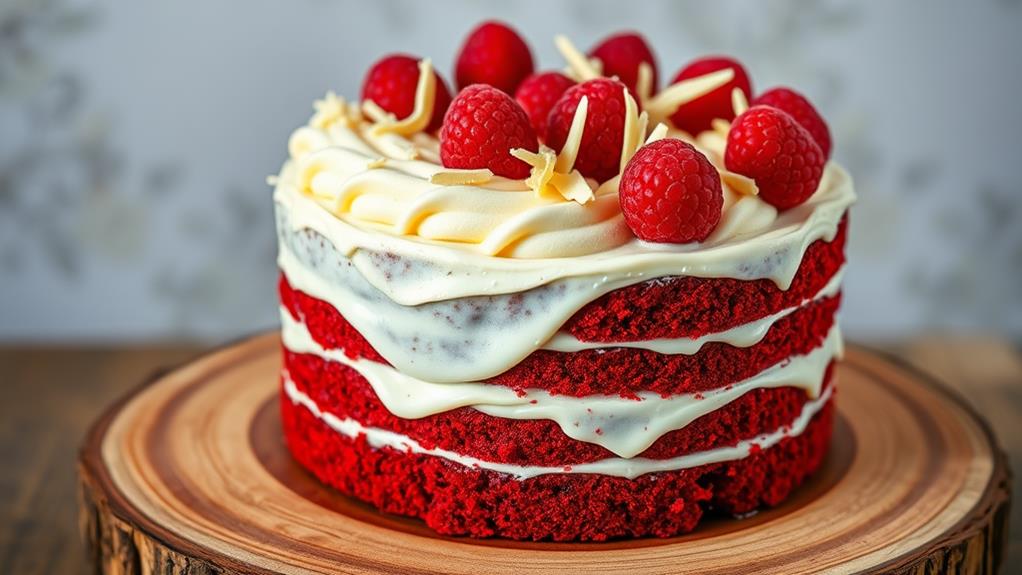
- Fresh Berries and Chocolate Shavings: Add these on top for a burst of color and flavor, enhancing both the presentation and taste.
Consider incorporating seasonal motifs or personalized decorations to make your cake even more special.
Whether it's hearts for Valentine's Day or festive colors for holidays, these touches will make your cake truly unforgettable!
Serving Suggestions
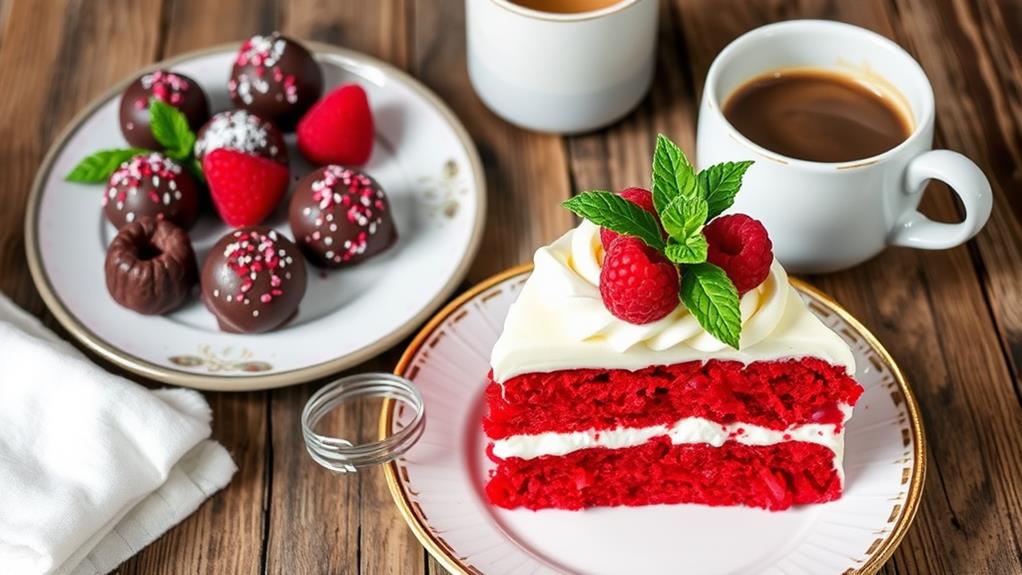
Serving moist red velvet cake can elevate any occasion, and there are plenty of delightful ways to present it. Start by placing a generous slice on each plate and adding a scoop of vanilla ice cream. This combination enhances the cake's rich flavor while providing a delightful contrast in temperature and texture.
For a touch of festive flair, consider adding a side of Norwegian Kransekake or drizzling a bit of honey syrup over the plate to complement the cake. Pair your cake with a hot beverage, like honey lemon tea or coconut hot chocolate, to balance the sweetness and complement its chocolaty undertones.
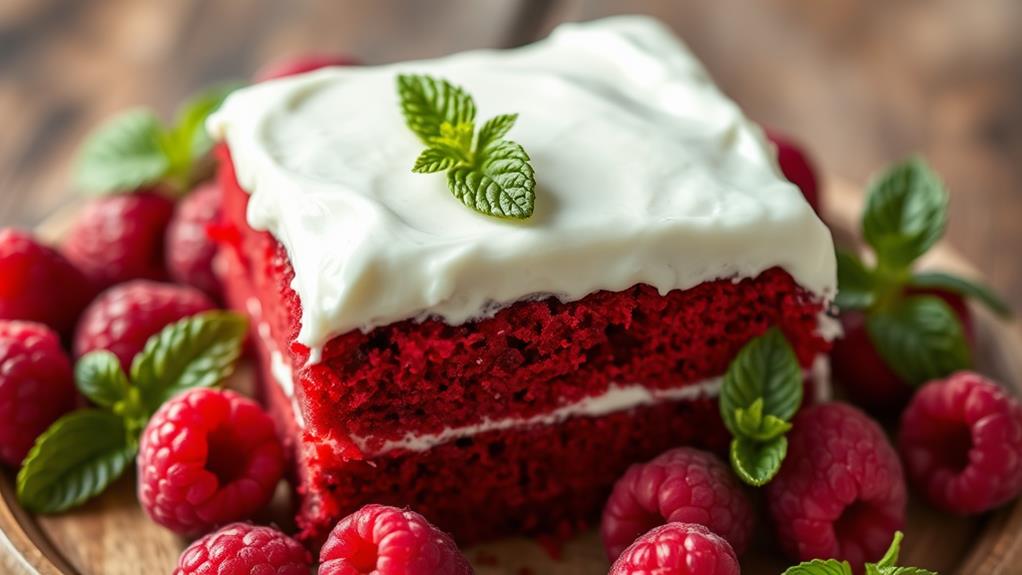
For an eye-catching presentation, garnish each slice with fresh berries, such as raspberries or strawberries. Their fruity tartness beautifully contrasts with the cake's sweetness, adding a pop of color to your serving. Serve the cake at room temperature for ideal flavor and texture; if it's been refrigerated, allow it to sit out a bit before serving.
If you're celebrating a special occasion, take it a step further by decorating the cake with chocolate shavings or festive sprinkles. Not only does this enhance the visual appeal, but it also adds another layer of indulgence to your moist red velvet cake, making every bite even more memorable. Enjoy!
Nutritional Information
Enjoying a slice of moist red velvet cake comes with a few nutritional considerations worth noting. This delightful dessert is rich in flavors and textures, but it also packs a significant calorie count and other nutrients that you should keep in mind.
- A typical slice contains approximately 574 calories, so it's a treat best enjoyed in moderation.
- With about 82 grams of carbohydrates per serving, this cake provides a substantial energy boost.
- Each slice has around 44 grams of fat, including 20 grams of saturated fat, contributing to its indulgent moist texture.
Additionally, consider the cholesterol content, as each slice contains about 108 mg. If you're keeping an eye on your dietary cholesterol, this is important.
You'll also find just 1 gram of fiber and 19 grams of sugar per serving, which means it leans towards being a sweeter option with limited fiber.
Knowing the nutritional information helps you enjoy your red velvet cake while being mindful of your overall dietary needs.
Whether it's a special occasion or just a sweet craving, savoring this cake can be part of a balanced diet when approached thoughtfully.
Common Questions
When it comes to baking red velvet cake, common questions often arise about ingredients and techniques. One frequent query is about the buttermilk substitute. You can achieve the necessary acidity by combining whole milk and vinegar, allowing the baking soda to activate properly.
Don't worry; the absence of buttermilk won't compromise the cake's moistness and fluffiness, thanks to the right ratios of flour and oil.
Another common question revolves around flavor. For that subtle chocolate taste, using cocoa powder is essential, even in a red velvet cake without buttermilk.
Additionally, when it comes to color, opt for gel food coloring instead of liquid. This choice helps maintain the vibrant red hue without affecting the batter's consistency.
Regarding baking time, you'll find it remains the same, typically between 22-35 minutes. To guarantee your cake is perfectly baked, always perform a toothpick test. Insert a toothpick into the center; if it comes out clean or with just a few crumbs, your cake is ready to enjoy.
With these tips, you're well on your way to mastering this classic cake recipe!
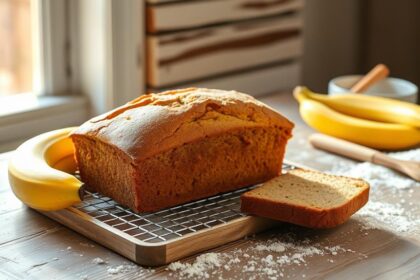
Additional Recipe Ideas
Baking red velvet cake opens up a world of creative possibilities beyond the classic layer cake. If you want to mix things up, consider making red velvet cupcakes using the same batter recipe. You'll yield about 24 cupcakes, so just remember to reduce your baking time to 15-20 minutes.
For added texture and richness, throw in some mini chocolate chips or pecans into the batter.
Here are a few alternative ideas to elevate your red velvet experience:
- Try a red velvet sheet cake by adapting the recipe for a 9×13 pan, adjusting the baking time to 30-35 minutes for even cooking.
- Experiment with alternative frostings like vanilla buttercream or chocolate ganache to complement the cake's unique flavor.
- Use beetroot juice as a natural substitute for red food coloring, giving you a vibrant color and a subtle flavor.
Don't forget about the classic cream cheese frosting recipe! These variations will keep your baking exciting while ensuring your moist red velvet cake remains a favorite.
Conclusion
You've now mastered a moist red velvet cake without buttermilk, proving that creativity in the kitchen can lead to delicious results. Imagine hosting a birthday party where your unique cake becomes the highlight, sparking conversations and smiles among friends and family. This experience not only showcases your baking skills but also strengthens connections over a shared love for good food. So, don't hesitate to experiment; you never know the joy your creations might bring!