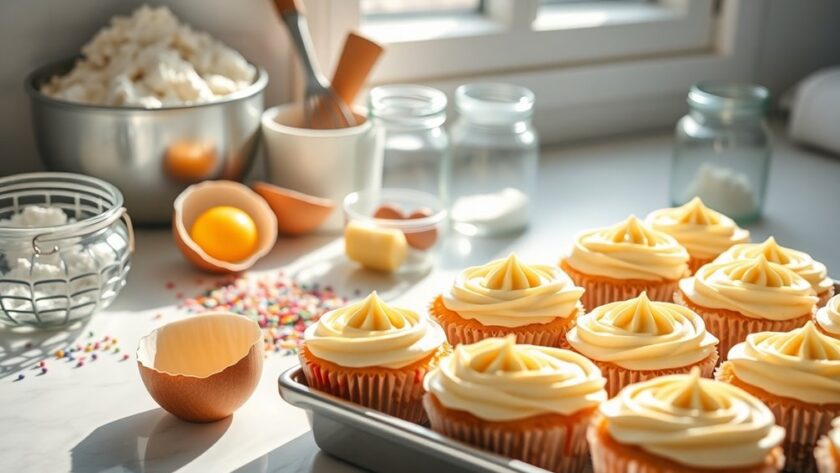
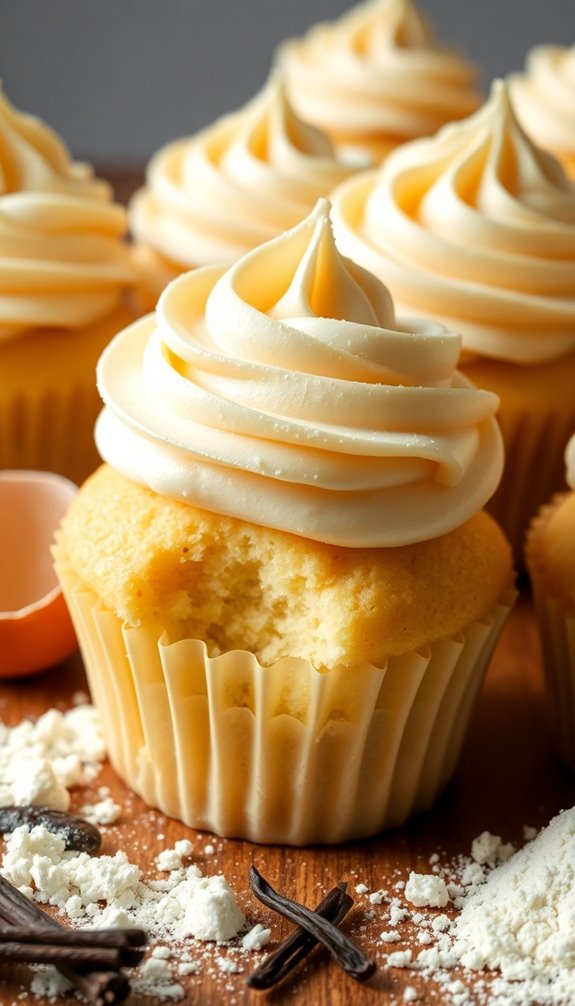
To bake the fluffiest vanilla cupcakes every time, start with cake flour, sour cream, and fresh egg whites. Measure your ingredients accurately to avoid density and mix at room temperature for a lighter batter. Use the creaming method to create air pockets and don’t overmix. Preheat your oven for even baking, fill liners two-thirds full, and cool completely before frosting. By following these tips, you’ll elevate your cupcake game even further.
The Secret Ingredients for Fluffy Cupcakes
When you want to bake fluffy vanilla cupcakes, the right ingredients make all the difference. Start with cake flour; its fine texture gives your cupcakes that light, airy quality. To enhance sweetness and balance flavors, you might also consider incorporating a mix of spices like cinnamon or nutmeg, similar to how they elevate apple pie. Additionally, using gluten-free options can broaden your baking repertoire for those with dietary restrictions.
Don’t skimp on the vanilla extract, as it enhances the flavor beautifully. Incorporating sour cream adds moisture and richness, while using egg whites instead of whole eggs helps maintain that fluffiness.
If you prefer milk alternatives, options like almond or oat milk work great without compromising taste. Finally, be mindful of sugar types—granulated sugar creates a lighter crumb, while brown sugar can add a touch of depth.
Keep an eye on your baking temperature; a consistent, moderate heat guarantees even rising and prevents dense cupcakes. Additionally, using room temperature ingredients can help achieve a smooth batter and enhance the overall texture.
Happy baking!
How to Properly Measure Your Ingredients
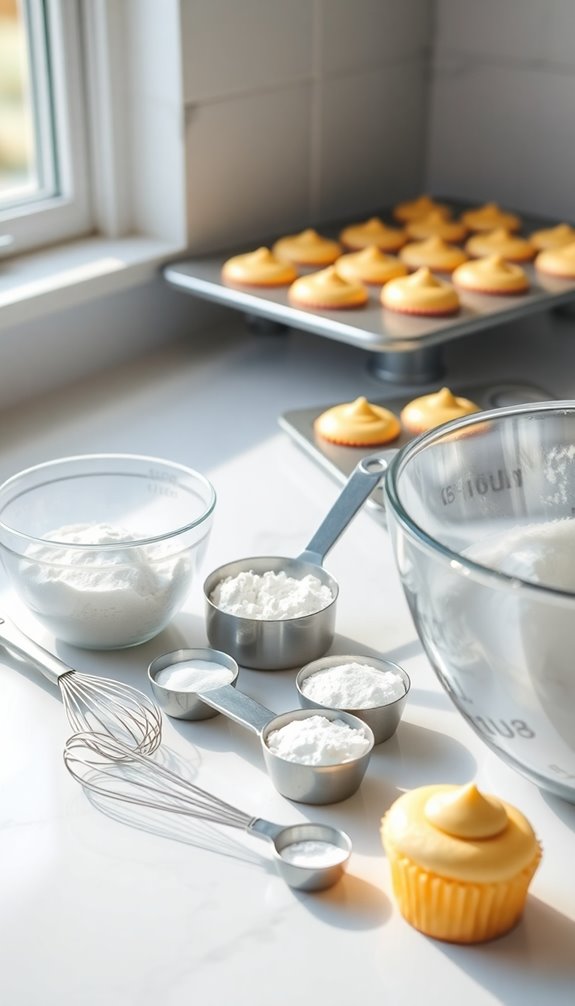
Properly measuring your ingredients is essential for baking success, especially for fluffy vanilla cupcakes. Start by using the right measuring tools—liquid measuring cups for liquids and dry measuring cups for solids.
For dry ingredients, spoon them into the cup without packing them down. Level off the top with a straight edge for accuracy. When measuring flour, use the scoop-and-sweep method to avoid compacting it, which can lead to incorrect ingredient ratios. Accurate measurements, as discussed in ingredient densities and measurement variability, ensure that your cupcakes rise beautifully every time. Additionally, using room temperature ingredients can further enhance the texture of your cupcakes. To maintain optimal cookie texture, be mindful that the same precision applies to cupcake batter as it does to cookie dough.
For smaller quantities, use measuring spoons and verify you’re precise. Remember, baking is a science, and even slight deviations can affect your cupcakes’ texture.
Why Room Temperature Matters for Baking?
Understanding why room temperature matters for baking can elevate your vanilla cupcakes to the next level. When your ingredients are at room temperature, they blend together more smoothly, creating a consistent batter. Cold butter, for instance, can lead to uneven mixing, resulting in dense cupcakes. By allowing eggs and butter to warm up, you facilitate better emulsification, which promotes a lighter texture. Additionally, achieving a chewy-crisp balance in your batter can enhance the overall mouthfeel of your cupcakes.
Room temperature also helps sugar dissolve more effectively, enhancing the overall sweetness and flavor of your cupcakes. Furthermore, it allows for even baking, preventing the outside from cooking faster than the inside. For optimal results, consider using quality ingredients like Ghirardelli chocolate chips, which can significantly enhance flavor and texture across various recipes. Moreover, maintaining accurate measurements of your ingredients ensures that the batter achieves the perfect consistency and rise.
The Role of Mixing Techniques in Cupcake Texture
Mixing techniques play an essential role in achieving the perfect cupcake texture. Different mixing methods, like creaming and folding, have a significant texture impact.
When you cream butter and sugar, you’re creating air pockets that enhance aeration importance, leading to lighter cupcakes. Pay attention to beating duration; too short might leave lumps, while overmixing pitfalls can result in dense batter.
For ingredient incorporation, mix just until combined to maintain a smooth batter consistency. Incorporating dry ingredients using gentle folding techniques helps preserve air, ensuring your cupcakes rise beautifully. Additionally, understanding the impact of chilling dough before baking can further elevate your baking results.
Choosing the Right Baking Powder and Baking Soda
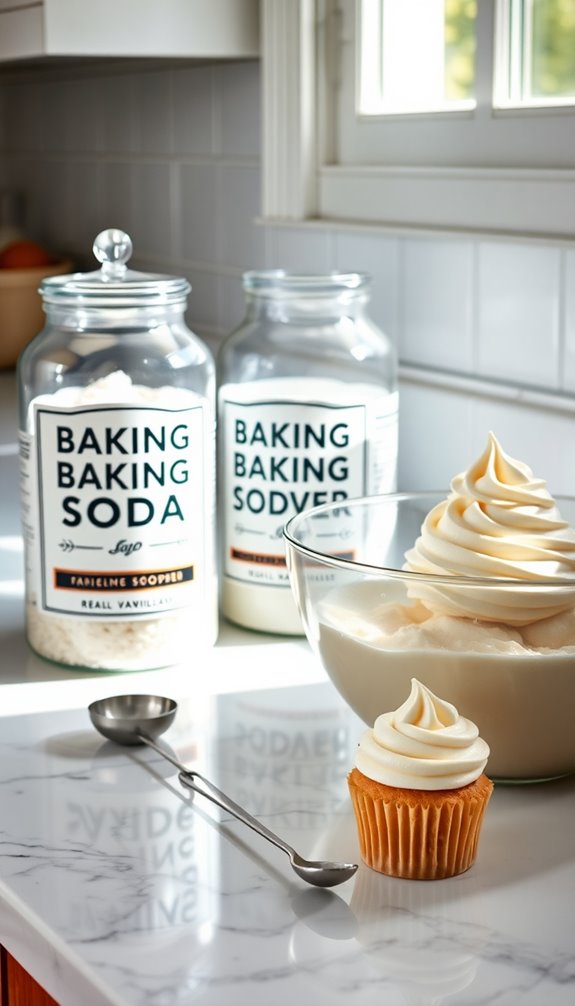
When it comes to baking your vanilla cupcakes, the right leavening agents make all the difference.
You’ll want to understand the types of baking powder available and how baking soda plays its essential role.
Choosing wisely guarantees your cupcakes rise perfectly and have that light, airy texture you crave.
Baking Powder Types
Choosing the right baking powder and baking soda can make a significant difference in your vanilla cupcakes’ texture and rise.
There are two main baking powder types: single-acting and double-acting. Single-acting baking powder activates with moisture, so you need to bake immediately after mixing.
Double-acting baking powder, on the other hand, contains two leavening agents that react at different temperatures. This means you can mix your batter and let it sit for a bit before baking, giving you more flexibility.
Baking soda is another leavening agent that requires an acid to activate. Knowing which type to use will help you achieve those light, fluffy cupcakes every time, ensuring they rise perfectly in the oven.
Baking Soda Role
Baking soda plays an essential role in achieving the perfect vanilla cupcakes. As a powerful leavening agent, it reacts with acidic ingredients, creating carbon dioxide bubbles that help your cupcakes rise. Understanding the baking science behind this reaction can elevate your baking game.
When you combine baking soda with buttermilk or vinegar, you kickstart this process, giving your cupcakes that light, fluffy texture you crave.
However, balance is key. Too much baking soda can lead to a soapy flavor or dark crust, while too little won’t provide enough lift. Always measure accurately and choose the correct leavening agents for your recipe.
With this knowledge, you’re well on your way to baking the fluffiest vanilla cupcakes every time!
How to Avoid Common Cupcake Baking Mistakes
Even the most seasoned bakers can stumble upon common pitfalls while making vanilla cupcakes. To avoid issues, stick to the recommended baking temperature; an oven that’s too hot or too cold can ruin your batch.
Be cautious with ingredient substitutions; not all replacements yield the same results. Pay attention to your mixing times—overmixing can lead to dense cupcakes due to gluten development.
Be mindful of ingredient swaps and mixing times to ensure light, fluffy cupcakes without the risk of density.
Consider your oven placement; center is best for even baking. Always use fresh ingredients; stale baking powder or flour can impact rise and flavor.
Finally, master your cooling techniques; letting cupcakes cool in the pan too long can create sogginess. By being mindful of these details, you’ll bake the fluffiest vanilla cupcakes every time!
The Importance of Preheating Your Oven
Preheating your oven is essential for baking perfect vanilla cupcakes.
It guarantees an even baking temperature, which helps your cupcakes rise beautifully. Plus, it activates your ingredients properly and saves you time in the kitchen.
Even Baking Temperature
While you might be enthusiastic to plunge into baking, taking the time to preheat your oven is vital for achieving that perfect batch of vanilla cupcakes.
When you preheat, you guarantee even baking temperature, which is fundamental for a fluffy texture. Without it, your cupcakes may rise unevenly or develop a dense crumb.
Check your oven calibration regularly; a miscalibrated oven can lead to inconsistent heat distribution, ruining your cupcakes. An oven that’s too hot can dry them out, while one that’s too cool might leave them underbaked.
Proper Ingredient Activation
To achieve the best results in your vanilla cupcakes, activating your ingredients properly is crucial.
Preheating your oven isn’t just a suggestion; it sets the stage for perfect texture and rise. When your oven’s hot, ingredients work together more effectively, allowing for the right ingredient ratios to shine.
Here are key points to remember:
- Preheat your oven: This guarantees even heat distribution, essential for proper baking.
- Mind the activation timing: Adding ingredients at the right moments enhances their effectiveness.
- Check your oven’s temperature: An accurate reading prevents under or over-baking.
Time Efficiency Benefits
Getting your oven hot before you start baking not only impacts the final product but also saves you time in the kitchen. By preheating, you guarantee your cupcakes rise properly and bake evenly, avoiding the need for extra baking time. This is a key element of effective time management.
While your oven heats, you can prep your ingredients, mix your batter, and clean up your workspace, utilizing multitasking strategies to streamline the process. This way, you’re not wasting precious minutes waiting for the oven to reach the right temperature.
Instead, you’ll have everything ready to pop in as soon as it’s hot, making your baking experience smoother and quicker. So, preheat that oven and get baking efficiently!
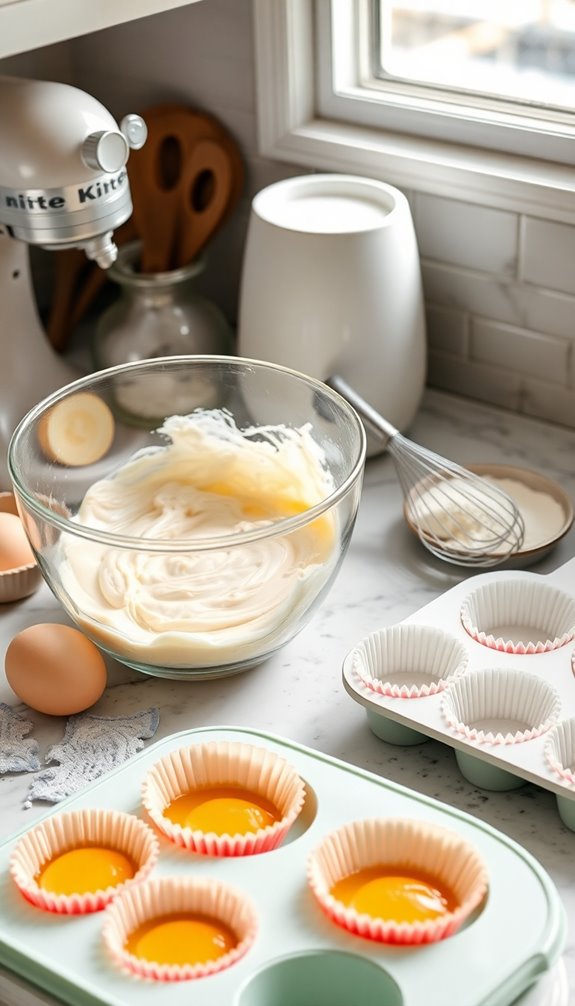
Tips for Perfectly Filling Your Cupcake Liners
Filling your cupcake liners perfectly can make all the difference in achieving that bakery-style look. To get it just right, consider these tips:
- Choose the right cupcake liner types: Greaseproof liners work best to prevent sticking and guarantee even baking.
- Use filling techniques: A standard ice cream scoop fills each liner evenly, guaranteeing consistent size and baking. Alternatively, a piping bag can help create less mess.
- Don’t overfill: Aim for about two-thirds full. This allows room for your cupcakes to rise without spilling over.
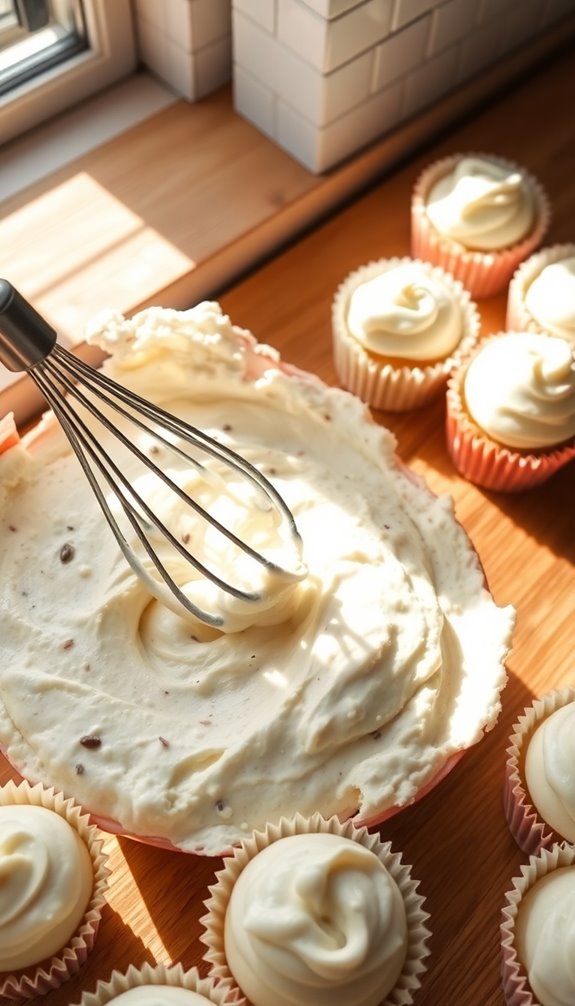
How to Cool and Frost Your Cupcakes Like a Pro
Cooling and frosting your cupcakes properly can elevate them from simple treats to showstoppers. Once your cupcakes are baked, let them cool in the pan for about 5-10 minutes before transferring them to a wire rack. This cooling method prevents sogginess and guarantees a light texture.
Allow them to cool completely before frosting.
When it’s time to frost, choose your favorite frosting techniques. You can use a spatula for a rustic look or a piping bag for a more polished finish. Consider using different tips to create swirls or rosettes.
Remember to frost only when the cupcakes are cool; warm cupcakes can melt the frosting, ruining your hard work. Enjoy your beautifully frosted creations!
Storing Your Cupcakes for Maximum Freshness
To keep your cupcakes fresh and delicious, it’s essential to store them properly right after they’ve cooled. Use airtight cupcake containers for ideal storage, as they prevent moisture loss and keep your treats fluffy.
Here are some tips to help you:
- Room Temperature: Store unfrosted cupcakes in a cool, dry place for up to three days.
- Refrigeration: If you’ve frosted them, place them in the fridge to maintain freshness, but cover them well to avoid drying out.
- Freezing: For longer storage, freeze unfrosted cupcakes in airtight containers; they’ll last up to three months.
Conclusion
So there you have it—baking the fluffiest vanilla cupcakes isn’t rocket science, right? Just a few simple secrets and techniques, and you’ll be a cupcake pro in no time! Ironically, you might find it’s the little details that matter most. Who knew that room temperature eggs and precise mixing could transform your baking? Now, go ahead and whip up those cupcakes, but don’t be surprised if they disappear faster than you can say “fluffy!”