Yes, you can definitely make cookies on the stove using skillet baking! This method gives you crispy exteriors and gooey interiors in just 15 to 17 minutes. You'll need a large non-stick skillet, and it's best to preheat it on low heat. Space out your cookie dough and cover the skillet to guarantee even cooking. With some flavor variations and techniques, you'll whip up delicious cookies in no time. Discover more tips and tricks to perfect your stovetop baking!
What Is Skillet Baking?
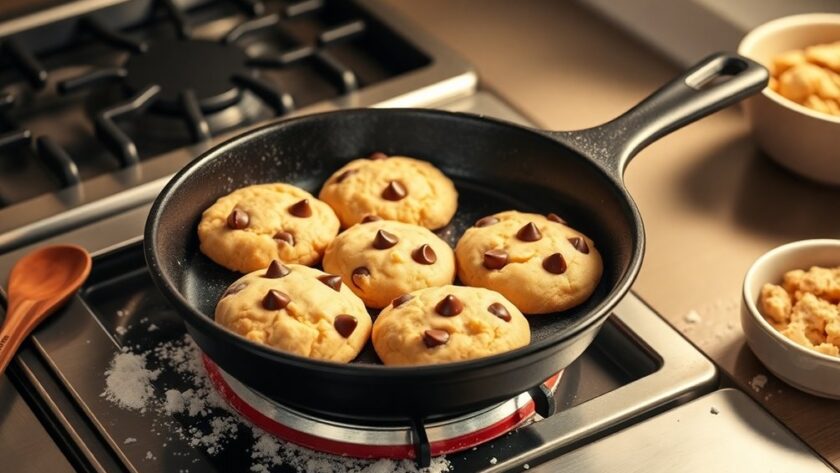
Skillet baking is a convenient way to whip up delicious cookies and other treats right on your stovetop, especially if you don't have an oven. This method involves using a large non-stick skillet, ideally 12 inches, to create cookies with a delightful contrast of crisp exteriors and gooey interiors. You'll cook on low heat for about 15 to 17 minutes, watching for the bottoms to become crisp while the tops set just right. It's important to avoid overcrowding the skillet to maintain even cooking temperatures. Plus, skillet baking offers you the flexibility to customize your dough with various ingredients, and you can prepare it in advance to enhance flavor and texture. Incorporating nutrient-rich swaps can further elevate your skillet cookies, making them healthier without sacrificing taste. For example, using gluten-free flour instead of traditional flour can create a deliciously unique texture. Additionally, incorporating healthy fats like almond butter can improve overall flavor and nutrition. Enjoy the ease and creativity this technique brings!
Benefits of Making Cookies on the Stovetop
Making cookies on the stovetop offers a range of benefits that can make your baking experience more enjoyable and efficient. For those with limited baking equipment or small living spaces, stovetop cookie making eliminates the need for an oven. You'll enjoy cookies with a crisp exterior and gooey in the middle, delivering a unique texture that oven-baked cookies can't match. Plus, the total preparation and cooking time is only about 15-20 minutes, allowing you to satisfy your sweet tooth quickly. This method also encourages experimentation with different ingredients, making it easy to customize recipes to your taste. Additionally, you can whip up small batches, reducing waste and enabling you to enjoy fresh cookies without the commitment of a full batch. Incorporating healthier ingredients can further enhance your stovetop cookies, allowing for creative expression in every bite.
Essential Equipment for Stovetop Cookie Baking

To bake cookies on the stovetop, you'll need the right equipment to guarantee success.
A large non-stick skillet is your best bet, but if you don't have one, a greased regular skillet will do. To enhance your cookie's flavor, consider incorporating sugar-free sweeteners that are suitable for diabetics. Additionally, you might want to experiment with unique flavor combinations to elevate your cookie experience. Don't forget essential utensils like a cookie scoop for perfect portioning and a lid to maintain moisture while cooking. Additionally, ensure that all ingredients are gluten-free to achieve the best results in your cookie baking.
Skillet Type Selection
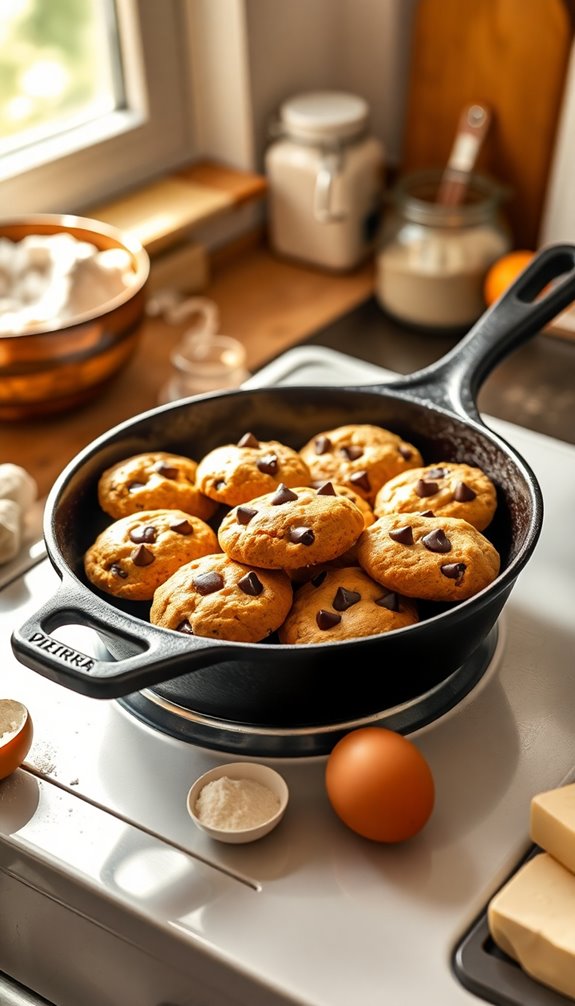
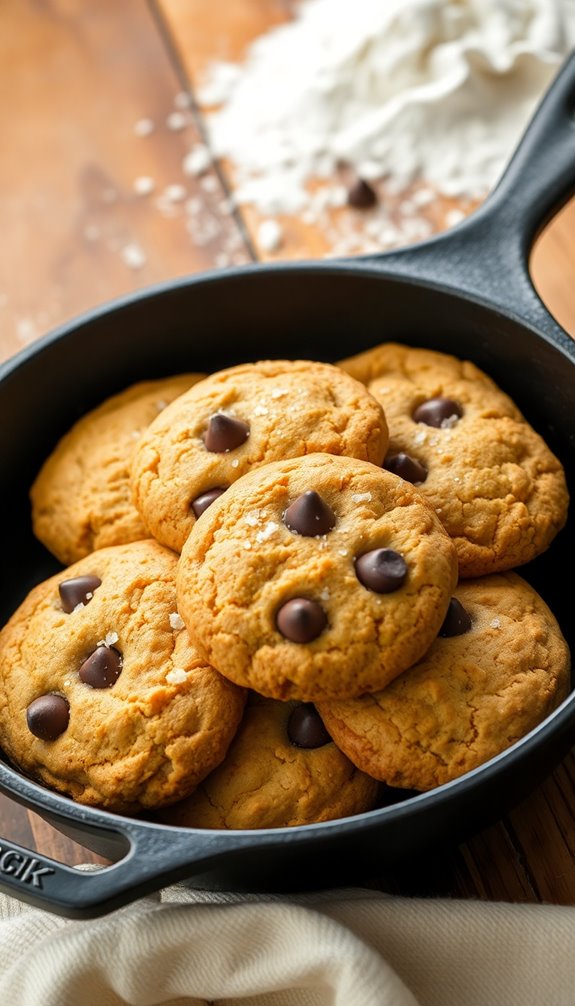
When selecting the right skillet for stovetop cookie baking, what factors should you consider? First, opt for a large non-stick skillet (around 12 inches) to cook up to four cookies at once without overcrowding. If you don't have a non-stick option, lightly grease your pan with oil or butter to keep your cookies from sticking.
Here are a few more tips to guarantee great results:
- Start with a cool skillet to prevent excessive spreading of the dough.
- Be mindful of the skillet's color; dark skillets may give cookies darker bottoms, while lighter ones promote even baking.
- Experiment with different skillet types and sizes to achieve your desired cookie texture and doneness.
Enjoy your skillet type selection journey!
Heat Source Considerations
While selecting the right heat source for stovetop cookie baking, it's important to reflect on how it impacts the cooking process.
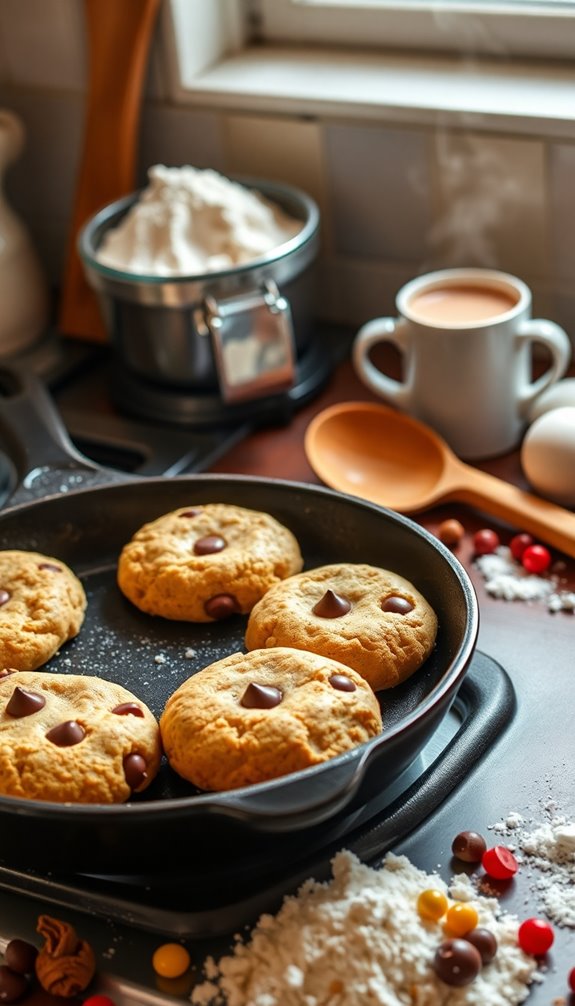
Using a large 12-inch non-stick skillet will allow you to cook up to four cookies at a time without overcrowding. Preheat your skillet on the second-lowest heat setting to achieve even cooking. Maintaining low heat throughout is vital; higher temperatures can lead to burnt bottoms and uneven cooking.
If you don't have a non-stick skillet, lightly grease the pan with oil or butter. Additionally, consider the skillet's material—dark skillets may yield darker bottoms, which can affect the texture of your cookies.
Essential Utensils Needed
Having the right utensils on hand can make a significant difference in your stovetop cookie baking experience. A few essential items will guarantee your cookies turn out delicious and perfectly baked.
- A large non-stick skillet (ideally 12 inches) for even cooking.
- A lid or aluminum foil to cover the skillet, retaining heat and moisture.
- A cooling rack for transferring cookies after cooking.
If you don't have a non-stick skillet, lightly greasing a regular one with oil or butter will help prevent sticking.
Additionally, a cookie scoop or rounded tablespoon is invaluable for portioning uniform dough onto the skillet.
With these utensils, you'll set yourself up for success in your stovetop cookie adventures!
Choosing the Right Skillet for Cookies
When it comes to baking cookies in a skillet, size really matters. A 12-inch non-stick skillet is your best bet for even cooking and preventing overcrowding. If you don't have one, a regular skillet will work too, but make sure to grease it to keep the cookies from sticking. For added flavor, consider incorporating spices like cardamom, which can enhance the cookie's taste profile similar to traditional baked goods. Additionally, using cold butter in your cookie dough can help achieve a tender texture that mimics the flakiness of a pie crust. The proper mixing techniques used in preparing your cookie dough can also significantly influence the final texture and consistency of your cookies.
Size Matters for Skillets
Choosing the right skillet size is essential for baking cookies that turn out perfectly. A large non-stick skillet, ideally around 12 inches in diameter, allows for even cooking and prevents overcrowding.
Here are some tips to keep in mind:
- Limit the number of cookies to 4 at a time to maintain ideal pan temperature.
- Adjust cookie quantity if using a smaller skillet to avoid uneven cooking.
- If you don't have a non-stick skillet, lightly grease it with oil or butter.
Non-Stick vs. Regular
The type of skillet you use can greatly influence your cookie-baking experience. Non-stick skillets are your best bet for stovetop cookie baking. They require little to no added grease, making for easy release and quick cleanup.
If you opt for a regular skillet, remember to lightly grease it with oil or butter to prevent sticking and guarantee even cooking. A large non-stick skillet, around 12 inches, lets you bake up to four cookies at a time without overcrowding.
Keep in mind that dark skillets can give your cookies darker bottoms due to heat absorption, while light-colored skillets promote an even cooking surface. Experimenting with both types can help you find your perfect cookie texture!
Perfect Temperature for Stovetop Cookies
How can you achieve the perfect temperature for stovetop cookies? Start by preheating your skillet on the second to lowest heat setting. This guarantees even cooking without burning your cookies.
Maintain this low temperature throughout the cooking process, allowing the cookies to firm up without browning too quickly. The infusion of almond extract can elevate the flavor profile of your cookies, adding a delightful nutty undertone that complements the oats.
Cook your stovetop cookies for 15 to 17 minutes, flipping them halfway through when the edges turn golden.
Slightly underdone cookies will continue to firm up as they cool, so keep an eye on their doneness. Aim for a total cooking time of around 16 minutes for the best results. Baking techniques can also be adapted for stovetop methods, ensuring consistent quality.
With these tips, you'll master the perfect temperature for delicious stovetop cookies!
Step-by-Step Guide to Making Stovetop Cookies
To make stovetop cookies, you'll need some essential equipment to get started.
Understanding the cooking techniques is key to achieving that perfect texture, and don't forget to experiment with different flavor variations to keep things exciting.
Let's break down each step so you can whip up delicious cookies right on your stovetop!
Essential Equipment Needed
When you're ready to whip up some delicious stovetop cookies, having the right equipment makes all the difference. Here's what you'll need to get started:
- Large non-stick skillet (12-inch): This guarantees even heat distribution and prevents sticking.
- Cookie scoop or rounded tablespoon: Perfect for portioning out the dough into uniform cookies.
- Lid or aluminum foil: Use this to cover the skillet, which helps retain heat and guarantees even cooking.
If you don't have a non-stick skillet, lightly grease the pan with oil or butter.
Remember to preheat your skillet on the second-lowest heat setting and place no more than four cookies at a time to avoid overcrowding.
Enjoy your stovetop baking!
Cooking Techniques Explained
While the idea of baking cookies on the stovetop might seem unconventional, mastering this technique opens up a world of delicious possibilities.
Start by preheating a large non-stick skillet on the second-lowest heat setting. Once it's ready, drop about 2 tablespoons of chocolate chip cookie dough onto the skillet, spacing them out to prevent overcrowding. Press them down slightly with the back of a spoon.
Cover the skillet with a lid or aluminum foil to trap heat and guarantee even cooking. Flip the cookies halfway through when the edges turn golden, cooking for 15 to 17 minutes. Keep an eye on them until they're crisp on the bottom and just set on top.
Let them cool in the skillet before transferring to a rack.
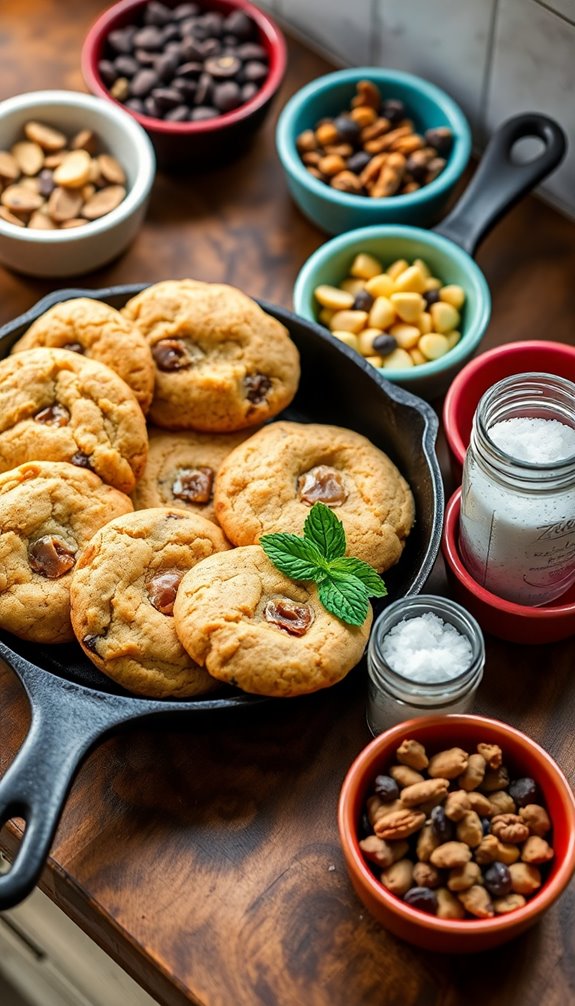
Flavor Variations to Try
Exploring flavor variations can take your stovetop cookies from ordinary to extraordinary. Start with a base of brown sugar and vanilla extract, then get creative!
Here are some ideas to elevate your cookie game:
- Mix in chopped nuts or dried fruits for added texture.
- Add a pinch of cinnamon or nutmeg for warmth, or sprinkle sea salt on top to enhance sweetness.
- Incorporate citrus zest for a revitalizing twist.
For a decadent peanut butter variation, substitute some butter with peanut butter or mix in chocolate and peanut butter chips.
You can even swap vanilla extract for almond or coconut extract to create unique flavors.
With these variations, your cookies will impress every time!
Creative Variations for Stovetop Cookies
If you want to elevate your stovetop cookie game, experimenting with creative variations can lead to delightful surprises.
Swap out traditional chocolate chips for nuts or dried fruits to craft unique flavor profiles. For a comforting twist on oatmeal cookies, use raisins instead of chocolate chips and sprinkle in some cinnamon for warmth.
You can also use peanut butter or almond butter as a base, giving your cookies a rich, nutty flavor while keeping them chewy. Don't shy away from spices—cardamom or ginger can introduce an exotic flair.
If you're feeling adventurous, try a savory cookie by adding herbs like rosemary or thyme, paired with cheese, for an intriguing appetizer-style treat.
Enjoy the creativity!
How to Store and Preserve Stovetop Cookies
After you've enjoyed experimenting with creative variations for your stovetop cookies, knowing how to store and preserve them becomes important for maintaining their deliciousness.
To keep your cookies fresh, store them in an airtight container at room temperature for up to 3-4 days. Make sure the cookies are completely cooled before sealing them to prevent moisture buildup.
For an added tip:
- Place a piece of bread in the container to retain moisture without making the cookies soggy.
- If you want to store them longer, freeze your cookies in a sealed bag for up to three months.
- Aging the dough before baking can enhance the flavor and texture, making your cookies even more enjoyable.
Shelf Life of Stovetop Cookies
Stovetop cookies typically have a shelf life of 3-4 days when stored properly in an airtight container at room temperature. Proper storage is essential to maintain their flavor and texture.
The oats in the cookies help keep them toasted, while the peanut butter retains moisture, contributing to a delightful chewiness. However, after a few days, you might notice the cookies becoming slightly drier. If that happens, a quick reheat in the microwave for a few seconds can help restore some moisture.
For an even better taste and texture, consider aging the dough for up to a week before cooking. This step enhances the overall flavor, making your cookies even more enjoyable during their shelf life.
Troubleshooting Common Skillet Baking Issues
When you're baking cookies in a skillet, troubleshooting common issues can make all the difference between a delightful treat and a frustrating experience.
To tackle problems like uneven cooking or burning, keep these tips in mind:
- If cookies spread too much, guarantee the skillet is cool before adding the dough.
- For undercooked centers, use low heat and cover with a lid or foil to promote even cooking.
- If the bottoms are burning, reduce the cooking time or switch to a lighter-colored skillet.
Other Delicious Stovetop Recipes to Try
If you're looking to expand your skillet baking repertoire, there are plenty of delicious stovetop recipes that can satisfy your cravings without the need for an oven.
Try making a moist stovetop chocolate cake in a non-stick skillet, cooking on low heat for about 30-35 minutes. For fudgy brownies, mix cocoa powder, sugar, eggs, and flour in a skillet, cover, and cook for about 20-25 minutes.
You can whip up fluffy pancakes quickly by simply mixing the batter and cooking each side for 2-3 minutes.
Don't forget about savory options like frittatas; just whisk eggs with veggies and cheese and cook covered for 15-20 minutes.
Enjoy your freshly baked creations right off the stove!
Tips for Perfecting Your Stovetop Baking Skills
To achieve perfect results while baking on the stovetop, it's essential to focus on temperature control and portioning. Here are some tips to help you master your skillet baking skills:
- Preheat your skillet on the second-lowest heat setting to avoid burning.
- Cook no more than four cookies at a time to keep the pan temperature consistent.
- Flip cookies halfway through cooking, ensuring they turn golden brown for the best texture.
After baking, let your cookies cool on a rack for a few minutes to achieve a delightful balance of crispy and gooey.
For the best results, make sure to store your cookies properly, maintaining their freshness and flavor for days to come.
Happy baking!
Conclusion
Now that you know the ins and outs of skillet baking, it's time to release your creativity and whip up some delicious cookies right on your stovetop. Remember, every cookie is a little piece of joy waiting to be shared, so don't hesitate to experiment with flavors and techniques. With practice, you'll be turning out perfect treats that'll make your kitchen the sweetest spot in the house. Happy baking, and may your cookies be as warm as your heart!