To achieve velvety smooth vanilla bean buttercream, start with room temperature butter and use a paddle attachment to mix at low speed, minimizing air bubbles. Once combined, switch to high speed for lightness, then check consistency using the spatula test. For a refined finish, hand mix at the end to eliminate any remaining bubbles. Store your buttercream properly, and you’ll have a perfect texture for all your decorating needs. There’s more to uncover about creating that professional look!
Why Smooth Buttercream Matters
Smooth buttercream is vital for achieving that professional look we all desire in our baked goods. When you create a smooth frosting, you eliminate those pesky air bubbles that can detract from the overall aesthetic appeal of your cake.
A flawless finish makes it easier to apply frosting, ensuring clean edges and surfaces. Plus, a smooth buttercream enhances the visual appeal of your creations, enchanting both customers and guests. It transforms your cakes into enticing masterpieces.
Additionally, a smooth texture is essential for intricate piping techniques, allowing you to craft detailed designs that are stable and striking. With vanilla bean buttercream, you can elevate your decorating game and impress everyone with your beautiful, flawlessly finished cakes. This attention to detail is reminiscent of the precision in soaking almond sponge layers used in classic French desserts like opera cake.
Essential Tips for Achieving Smooth Buttercream
To achieve that perfect smooth buttercream, start by using a paddle attachment and mixing on the lowest speed. This minimizes air incorporation, giving you a denser texture that’s easier to work with. Don’t forget to test the consistency to guarantee your frosting forms soft peaks with a slight curl at the tip! Additionally, using high-quality ingredients can significantly enhance the flavor and texture of your buttercream.
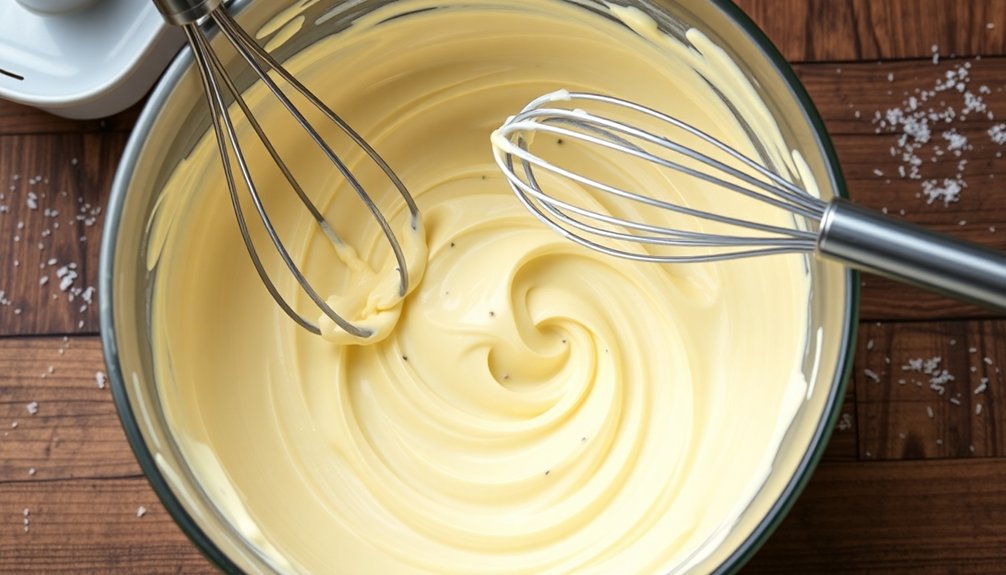
Paddle Attachment Benefits
A paddle attachment is a game-changer for creating velvety buttercream that’s perfect for frosting. It helps reduce air bubbles, resulting in a denser and smoother texture that elevates your final blend.
Unlike a whisk attachment, the paddle attachment guarantees thorough mixing without overworking the butter, allowing you to achieve that silky consistency without compromising flavor.
When you’re in the final mixing stages, making the switch guarantees a consistent and smooth buttercream, enhancing your decorating experience.
If you’re using a hand mixer, beaters can effectively serve as a substitute, also minimizing air incorporation.
Low-Speed Mixing Importance
While you might be tempted to crank up the mixer for a quick blend, mixing buttercream on low speed is vital for achieving that perfect silky texture.
This technique minimizes air incorporation, reducing bubbles that can mar your frosting’s smooth texture. By mixing at low speed during the final phase, you allow excess air to escape, resulting in a denser and creamier buttercream that’s easier to spread and pipe.
Even hand mixers can achieve a smooth consistency when operated at low speed. Plus, this method helps prevent powdered sugar from creating a mess, keeping your workspace clean.
Ultimately, low-speed mixing is essential for crafting professional-looking buttercream that holds its shape and showcases your decorating skills beautifully.
Consistency Testing Techniques
Three key techniques can help you test your buttercream’s consistency, ensuring it’s perfectly smooth and ready for decorating.
Start with the spatula test: dip your spatula into the vanilla bean buttercream and lift it out. If it forms a soft peak with a slight curl, you’re on the right track. If it’s too stiff, add one tablespoon of heavy cream; if too thin, mix in a quarter cup of powdered sugar, retesting after each adjustment.
Keep your mixing speed low to reduce air incorporation, which helps prevent a grainy texture. Finally, hand mix at the end to eliminate any remaining bubbles, ensuring a smooth finish that’ll impress everyone.
The Role of Paddle Attachments in Mixing
When it comes to mixing buttercream, the paddle attachment truly shines. Designed to minimize air incorporation, it creates a denser texture, perfect for achieving that silky smoothness essential for a professional-looking cake.
During the final mixing phase, the paddle attachment guarantees thorough blending of ingredients without the risk of over-aerating, which can lead to pesky air bubbles in your frosting.
If you’re tackling large batches, this attachment is your best friend, easily handling the volume while keeping everything evenly mixed. Its flat design efficiently scrapes the bowl’s sides, making sure no ingredient is left behind, enhancing the overall quality of your buttercream. Additionally, you can elevate the nutritional profile of your buttercream by incorporating healthy fat swaps like avocado or avocado oil for a guilt-free twist.
With the paddle attachment, you’re well on your way to frosting perfection.
Mixing Techniques for Optimal Consistency
Achieving the perfect consistency for your vanilla bean buttercream requires careful mixing techniques. Follow these steps for ideal results:
- Start with room temperature butter to create a smooth base before adding any powdered sugar.
- Use a paddle attachment on your mixer to minimize air incorporation, resulting in a velvety texture.
- Mix on low speed initially to avoid powdered sugar clouds, then switch to high speed for a lighter finish.
- Finish by hand with a spatula to eliminate any remaining air bubbles, enhancing the smoothness of your buttercream. Additionally, using room temperature butter can significantly improve the consistency of your mix, similar to how it is essential in baking gluten-free cookies.
Checking Consistency: The Spatula Test
How can you guarantee your vanilla bean buttercream is just right? The spatula test is your go-to method for checking consistency.
Simply dip your spatula into the buttercream and lift it straight up. If it forms a soft peak with a slight curl at the tip, you’re in good shape!
If the buttercream is too stiff, incorporate a tablespoon of heavy cream to improve spreadability. On the flip side, if it’s too runny, gradually mix in powdered sugar until it thickens.
Regularly checking the consistency after each adjustment assures your buttercream remains smooth and easy to work with. This attention to detail will elevate your frosting game, making it perfect for any cake or cupcake! For a delicious variation, consider using a cream cheese filling to enhance the flavor profile of your desserts.
Final Touch: Hand Mixing for Smoothness
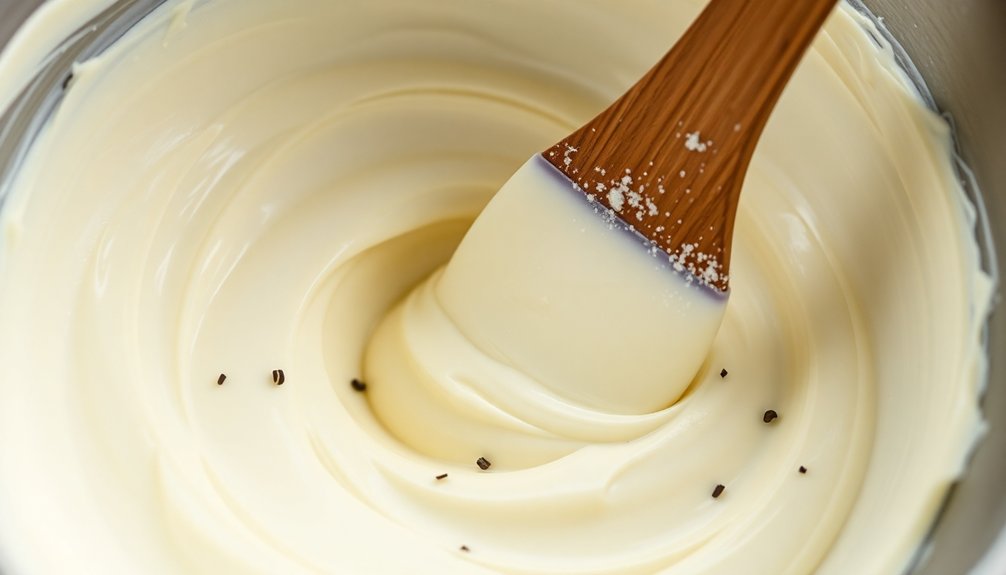
Now that you’ve checked the consistency of your buttercream, it’s time to focus on hand mixing for that perfect smoothness.
This final touch helps eliminate any pesky air bubbles that might’ve formed, ensuring a silky texture you can’t achieve with machines alone. Additionally, using boiled milk frosting can enhance the creaminess of your overall cake experience.
Grab a spatula and get ready to enhance both the look and feel of your frosting!
Benefits of Hand Mixing
While a mixer can do most of the heavy lifting in buttercream preparation, hand mixing at the end is essential for achieving that ultra-smooth finish.
Here are some benefits of hand mixing:
- Eliminates air bubbles: This technique guarantees your buttercream is free from unwanted pockets of air.
- Achieves silky texture: Gentle stirring creates a refined consistency that’s perfect for spreading.
- Promotes uniform consistency: Using a rubber spatula helps incorporate all ingredients thoroughly.
- Allows for fine-tuning: You can adjust the frosting without risking overmixing, avoiding a grainy texture.
Incorporating hand mixing assures a professional finish, making your buttercream not just delicious but visually appealing for cake decorating too!
Techniques for Eliminating Bubbles
To achieve a flawless buttercream, mastering techniques for eliminating bubbles is essential.
After mixing your vanilla bean buttercream, grab a rubber spatula and hand mix for a couple of minutes. This gentle technique helps you focus on incorporating any trapped air pockets, resulting in a silky smooth texture.
Hand mixing allows for better control over the frosting’s consistency, ensuring it’s just right for decorating. It’s especially effective for buttercream made in advance, as it can restore that ideal texture after refrigeration.
Regularly check the frosting’s stiffness while mixing to achieve perfect spreadability. By eliminating air bubbles, you’ll create a stunning buttercream that enhances your cake’s appearance.
Storing and Using Vanilla Bean Buttercream
Storing and using vanilla bean buttercream is straightforward, and with a few tips, you can keep it fresh and ready for your baking projects. Here’s how to guarantee your buttercream stays delicious:
- Store it in an airtight container in the refrigerator for up to a week or freeze it for two months.
- Before using, let the buttercream come to room temperature and whip it to restore that fluffy texture.
- To adjust the consistency if it thickens, add a tablespoon of heavy cream or milk while mixing.
- For optimal flavor, always use room temperature butter when preparing your buttercream. Additionally, consider pairing it with gluten-free options to make delightful treats suitable for everyone.
Conclusion
Achieving velvety smooth vanilla bean buttercream isn’t just about taste; it’s a visual delight that can elevate any dessert. Did you know that 70% of people eat with their eyes first? By mastering these techniques, you not only enhance flavor but also create an irresistible presentation. So, the next time you whip up a batch, remember that smoothness matters. With a little practice, you’ll impress everyone with your stunning and delicious creations!