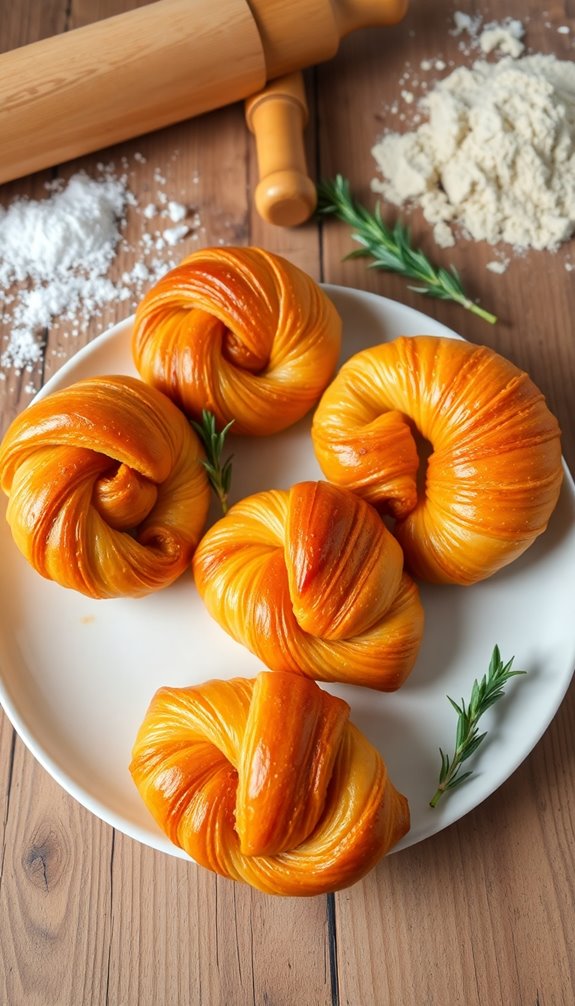
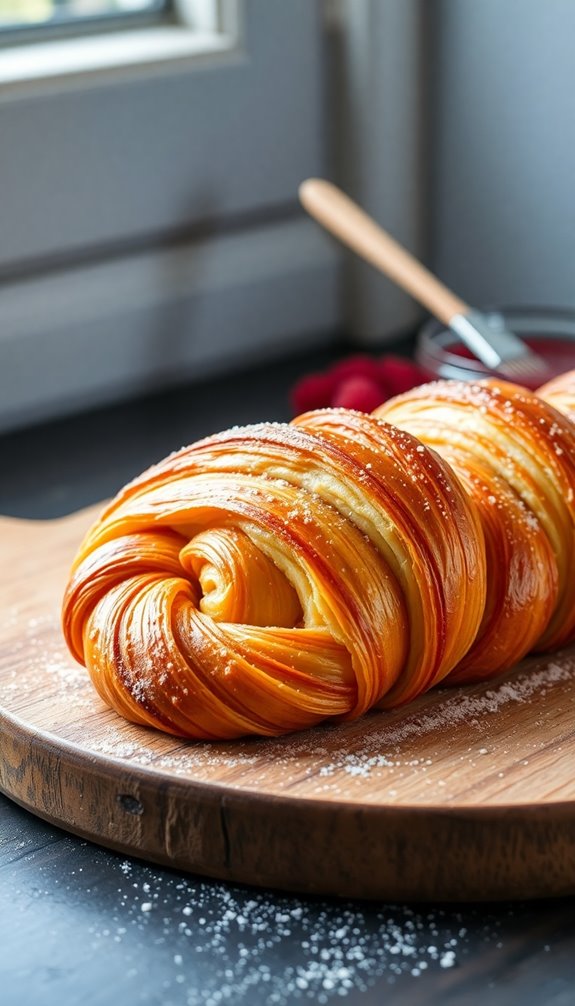
Twisted croissants are a fun and creative pastry you can easily master at home. Start by preparing a buttery laminated dough that creates those delicious flaky layers. Chill your butter and roll it with the dough to maintain its firmness. Once you've rolled and folded it, cut the dough into strips and twist them to form your unique shape. Allow them to rise until they're puffy, then bake until golden brown. Feel free to experiment with various fillings and flavors to personalize your croissants. Keep going to uncover tips and tricks for achieving the best results with this delightful treat!
Understanding Croissant Dough
When it comes to making croissants, understanding the dough is essential. Croissant dough is a type of laminated pastry, which means it features alternating layers of soft dough and butter. You start with basic ingredients like flour, water, yeast, sugar, and salt, mixing them until you form a soft, slightly sticky dough. This dough needs to rise until it doubles in size, providing the ideal texture for your croissants. The dough's successful rise is crucial, much like the process used in making traditional Julekage, which also relies on proper fermentation for flavor development.
The magic happens during the lamination process. You'll be folding and rolling the dough multiple times to create those distinct layers important for achieving that signature flaky texture. Proper mixing techniques are crucial to ensure the dough maintains its integrity throughout this process.
Remember, keeping the dough cool is critical; if the butter melts, you risk losing the layering effect, which is what gives croissants their light, airy bite.
Once you've completed the lamination, you can portion the dough onto sheet pans, ready for cutting and shaping. This careful preparation sets the stage for delicious, perfectly risen croissants that will impress anyone who takes a bite.
Preparing the Butter Packet
With your croissant dough ready, the next step is to prepare the butter packet. Start by cutting two sticks of cool room temperature butter into large pieces. Use a rolling pin to flatten the butter into a thin sheet, making sure it remains firm and manageable throughout the process. Maintaining cold butter is crucial for achieving a flaky texture in your pastries.
Next, create a parchment packet measuring 16 1/4 x 12 inches. You can do this by folding the edges to form a rectangle, placing the flattened butter in the center, and sealing the packet with the folded edges underneath to prevent any leakage. Proper management of the butter is essential here; it should stay cool and pliable to guarantee even layering within the dough for ideal flakiness in the finished croissant. This technique is similar to the process of laminating dough used in making pastries, which helps create layers for a flaky texture. Additionally, maintaining the right baking temperatures is crucial for achieving the perfect croissant rise and texture.
If you'd like to add a twist to your butter packet, consider mixing in some granulated sugar and cinnamon for a delightful cinnamon sugar version.
Once your butter packet is prepared, chill it in the refrigerator while you get your dough ready. This will help maintain its structure and prevent melting during the lamination process, making sure your croissants turn out perfectly flaky and delicious.
Folding Techniques Explained

Mastering the art of folding is essential for achieving perfectly flaky twisted croissants. Using proper folding techniques is key to encasing that chilled butter packet within the dough, ensuring the butter doesn't melt and creating those irresistible flaky layers.
Here's a simple breakdown of the folding process:
- Prepare the Dough: Roll the dough into a rectangle, then place your butter packet in the center.
- Seal It Up: Fold the dough over the butter packet and seal the edges tight to avoid leakage during baking.
- Perform Folds: Execute a series of folds, or turns, after rolling the dough to enhance lamination. If the dough resists, let the gluten relax. The process of creating layers is crucial for achieving the desired texture in pastries. Incorporating nutritious flour alternatives can also elevate the overall health benefits of your croissants.
- Rest If Needed: If your dough becomes warm or sticky, take a brief resting period in the refrigerator to maintain the integrity of the butter layers. Similar to the coffee syrup soaking technique(#) used in preparing an Opera Cake, ensuring proper resting and handling of your croissant dough is crucial for achieving the best results.
Once you've mastered these folding techniques, you'll be well on your way to forming those twisted shapes, allowing the dough to rise beautifully before baking. Enjoy the process, and watch your croissants transform into flaky delights!
Rolling and Shaping the Dough
Rolling and shaping the dough is an important step in creating those delightful twisted croissants. Start by rolling your chilled dough into a long rectangle, about 22 inches by 8 inches. This guarantees even distribution of layers when you fold in the butter packet.
Place the butter packet in the center, then fold the sides over and seal the edges to encase the butter completely.
Next, roll the folded dough into a larger rectangle, aiming for a 12-13 inch square. Cut it into strips, maintaining even thickness for consistent baking. It's essential to keep the layers intact as you work. The layers in dough are crucial for achieving that perfect flaky texture in the finished pastry.
Now, twist each strip 3-4 times to create that signature shape of twisted croissants. This twisting not only gives them their unique look but also helps achieve those flaky layers during baking.
Once you've shaped your strips, allow them to rise until puffy. This step is crucial to guarantee they maintain their structure and texture, leading to ideal results when you finally bake them. The process of creating layers in dough is similar to the invention of chocolate chip cookies, which also emphasizes the significance of technique in baking.
Enjoy the anticipation as you prepare for that delicious moment when your twisted croissants emerge golden and flaky from the oven!
Rising and Final Touches

After shaping your twisted croissants, it's time to let them rise until they're puffy. This final rise should last about 45 minutes to 1 hour, ensuring your dough expands adequately.
To maintain the integrity of the layers and prevent melted butter, consider placing them in a cooler environment during this process.
Before you bake, remember to preheat the oven to 375°F (or 400°F for a darker crust).
Here's a quick checklist to guide you:
- Let the twisted croissants rise until doubled in size.
- Preheat the oven to the desired temperature.
- Bake for 20-22 minutes or until they're golden brown.
- Brush melted butter on top immediately after baking for added flavor.
Once baked, it's essential to cool the twisted croissants on a wire rack. This step prevents sogginess and helps maintain that delightful flaky texture you're aiming for.
Enjoy the anticipation as they rise and bake, and soon you'll have a batch of scrumptious pastries ready to impress!
Baking to Perfection
When it comes to baking twisted croissants to perfection, the right temperature and timing are vital. Start by confirming your dough is slightly sticky yet smooth; avoid over-flouring to maintain that perfect texture.
Before incorporating the chilled butter packet, make certain it's cold enough to prevent melting during the rolling and folding process. This step is essential for achieving those flaky layers.
Next, utilize a series of folds and turns to create those signature layers. Roll the dough into a long rectangle, then fold it to develop the flaky texture you crave.
Allow the twisted dough to rise in a cool environment, as this prevents the butter from melting and keeps your croissants light and airy.
Once baked, brush your croissants with melted butter immediately after removing them from the oven. This not only enhances the flavor but also gives them a beautiful golden finish.
Keep an eye on the baking time to confirm you achieve that perfect balance of crispiness and fluffiness. With these tips in mind, you're on your way to mastering the art of baking twisted croissants!
Flavor Variations to Try

While experimenting with flavor variations, you can elevate your twisted croissant game to new heights. There are countless ways to create unique fillings that excite your taste buds. Here are some delicious ideas to get you started:
- Savory Delight: Mix fresh herbs with cheddar cheese for a rich filling that's perfect for brunch.
- Sweet Surprise: Combine dark brown sugar, ground walnuts, and orange zest for a delightful contrast of flavors that will impress everyone.
- Espresso Kick: For a deeper flavor, sprinkle in some espresso sugar to your sweet variations, enhancing the overall taste of your croissants.
- Cinnamon Bliss: Fold a butter mixture with granulated sugar and cinnamon into the dough to create a warm, aromatic finish that's hard to resist.
Don't hesitate to experiment with additional zest or spices in your sweet fillings.
By playing around with these flavor combinations, you'll discover unique and delicious twists that make your croissant creations truly special.
Serving and Enjoying Twists
Twisted croissants bring a delightful crunch to your breakfast table, and serving them warm is key to revealing their full potential.
Once they're out of the oven, brush your twisted croissants with melted butter for an added layer of flavor and richness. For a sweet finish, toss them in granulated sugar or drizzle a glaze made of melted butter, vanilla, and confectioners' sugar. This not only enhances their crispy texture but also makes them visually appealing.
Pair your warm twists with a steaming cup of coffee or tea to elevate the overall experience. The combination complements the flaky texture of the croissants beautifully.
Don't hesitate to experiment with flavor variations; adding spices to the sugar coating or incorporating different fillings can truly elevate your twisted croissants.
Conclusion
Now that you've mastered the art of the twisted croissant, you're ready to impress friends and family with your delicious creations. Each flaky layer is like a warm hug for your taste buds, inviting everyone to indulge. Don't hesitate to experiment with flavors and fillings; the possibilities are endless! So roll up your sleeves, embrace your inner baker, and let these delightful pastries take center stage at your next gathering. Happy baking!


