Discover the magic of traditional baking with wood cookie molds. Pick molds that match your baking style and from top manufacturers for precise details. Dust with flour, press dough firmly, trim edges, and bake to golden perfection. Decorate with flair using icing techniques and edible decorations. Maintain molds with care, seasoning, and avoiding extreme temperatures for longevity. Enhance your baking skills through the art of using wood cookie molds for beautifully crafted cookies.
Choosing the Right Wood Cookie Mold
When selecting a wood cookie mold, prioritize considering the design and intricacy that align with your baking preferences and needs. For traditional baking enthusiasts, investing in high-quality wooden molds is key to achieving detailed designs on your cookies.
Look for renowned manufacturers like House On The Hill and Tuckamore Homestead who are known for their durable and intricately crafted wooden molds. Choose a mold that suits the theme or occasion you have in mind, whether it's Christmas, weddings, or baby showers.
Ensuring that the wood cookie mold complements your baking skills and preferences is essential, whether you lean towards traditional speculaas or more modern cookie designs. By selecting a mold that resonates with your style and baking aspirations, you can elevate your cookie-making experience and create beautiful, delicious treats that reflect your passion for baking.
Preparing the Mold for Baking
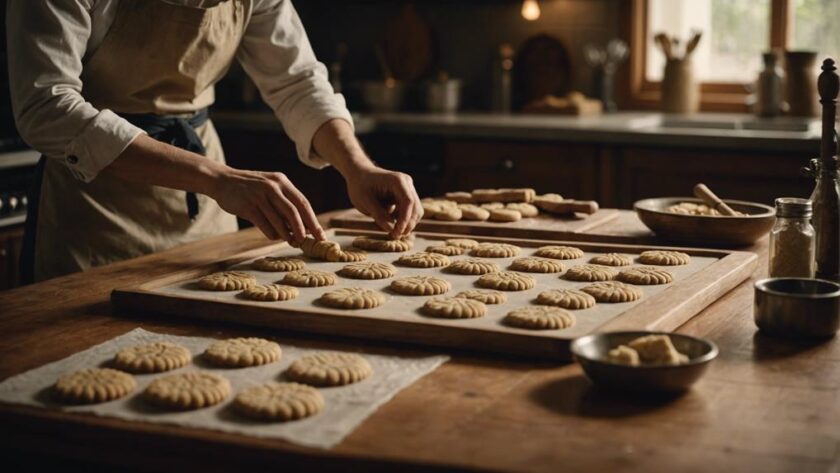
To guarantee successful results when baking with wood cookie molds, start by dusting the mold lightly with flour to prevent dough sticking. This simple step will help make sure that your cookie dough releases easily from the wooden mold after baking.
Once the mold is dusted, firmly press the cookie dough into the mold, ensuring to capture all the intricate designs and details. Use a spatula or knife to trim off any excess dough around the edges of the mold, creating clean edges for your cookies.
Next, roll over the top of the mold with a rolling pin to achieve an even thickness of the dough throughout the mold. Finally, bake the cookies in accordance with the recommended temperature until they turn a delightful golden brown and are fully baked.
Following these steps will help you create perfectly molded cookies every time.
Pressing and Trimming the Dough
Now, it's time to focus on perfecting your dough preparation techniques.
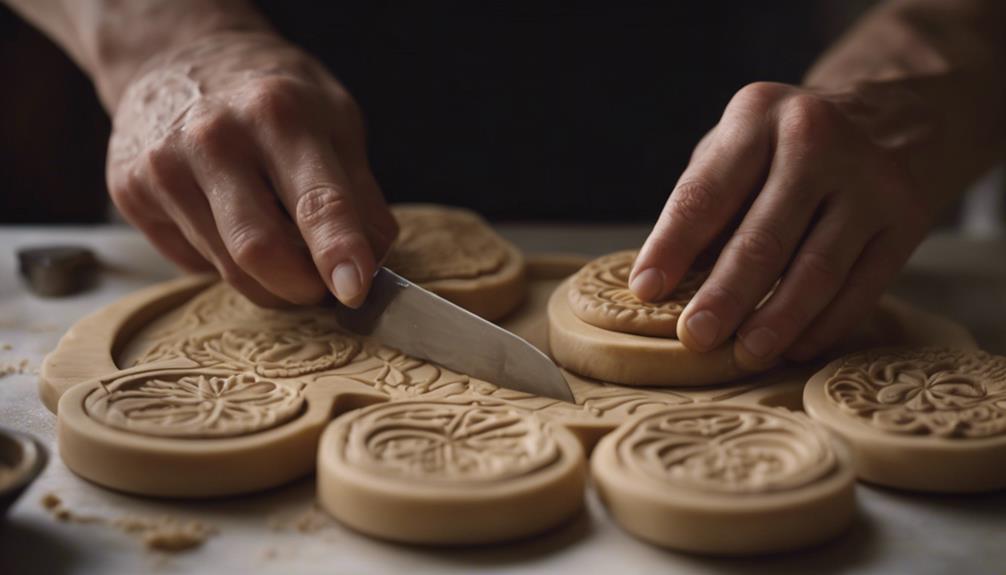
Press the dough firmly into the wooden mold to capture intricate designs, then trim off any excess with a spatula or knife.
Dough Preparation Techniques
Press the sugar cookie dough firmly into the wooden mold to capture intricate designs and details, guaranteeing a thorough impression.
Before pressing, remember to dust the mold with flour using a brush to prevent sticking.
Once the dough is in the mold, trim any excess around the edges using a spatula or knife for clean lines.
To even out the dough and maintain a consistent thickness, roll over the top of the mold with a rolling pin. This step not only aids with consistency but also assists in a uniform bake.
When baking the molded cookies, maintain the oven temperature at 350°F and bake for 15-20 minutes until they achieve a golden brown hue.
Mold Pressing Tips
Make sure the wooden cookie mold is dusted with flour using a brush to prevent the dough from sticking as you press and trim it to capture intricate details.
When pressing the sugar cookie dough into the molds, follow these tips to guarantee perfect results:
- Press Firmly: Apply even pressure to firmly press the dough into all the nooks and crannies of the mold for a well-defined design.
- Trim Carefully: Use a spatula or knife to trim the excess dough around the edges of the mold, creating clean and precise edges.
- Roll Evenly: Roll over the top of the mold with a rolling pin to even out the dough and make sure the design is thoroughly imprinted.
- Bake Thoughtfully: Bake the pressed cookies at 350°F for 15-20 minutes until they turn a beautiful golden brown color and are fully set.
Following these baking tips will help you create intricately molded cookies that not only look stunning but also taste delicious.
Trim Excess Dough
After pressing the sugar cookie dough into the mold, carefully trim the excess dough using a spatula or knife to guarantee clean edges and maintain the shape of the molded cookie.
The trimming process is essential in ensuring that your cookies come out looking neat and well-defined. By removing any excess dough around the edges, you help the cookie maintain the intricate design of the mold without any overhanging bits. Precision during the trimming process is key to achieving visually appealing cookies that will bake evenly.
When trimming the excess dough, be gentle to avoid disrupting the pattern created by the cookie mold. Taking care in this step will result in beautifully shaped cookies that are ready for decorating.
Baking the Cookies to Perfection
To achieve the perfect golden-brown hue and maintain the intricate designs of your speculaas and springerle cookies, bake them at a precise temperature of around 350°F for 15-20 minutes.
Here are some tips to help you bake your cookies to perfection:
- Chilled Dough: Using properly chilled dough will help your cookies keep their intricate designs when pressed into the cookie molds.
- High-Quality Ingredients: Opt for high-quality ingredients like bakers ammonia or baking powder, milk, eggs, powdered sugar, and butter to guarantee successful cookie baking.
- Careful Baking Techniques: Springerle cookies are renowned for their light texture and lemon flavor, which can be accomplished through meticulous baking techniques.
- Glazing: When glazing your cookies, make sure the glaze dries to the touch within 4-6 hours, leaving a shiny finish that enhances their visual appeal.
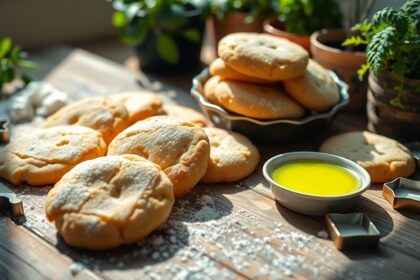
Decorating the Cooled Cookies
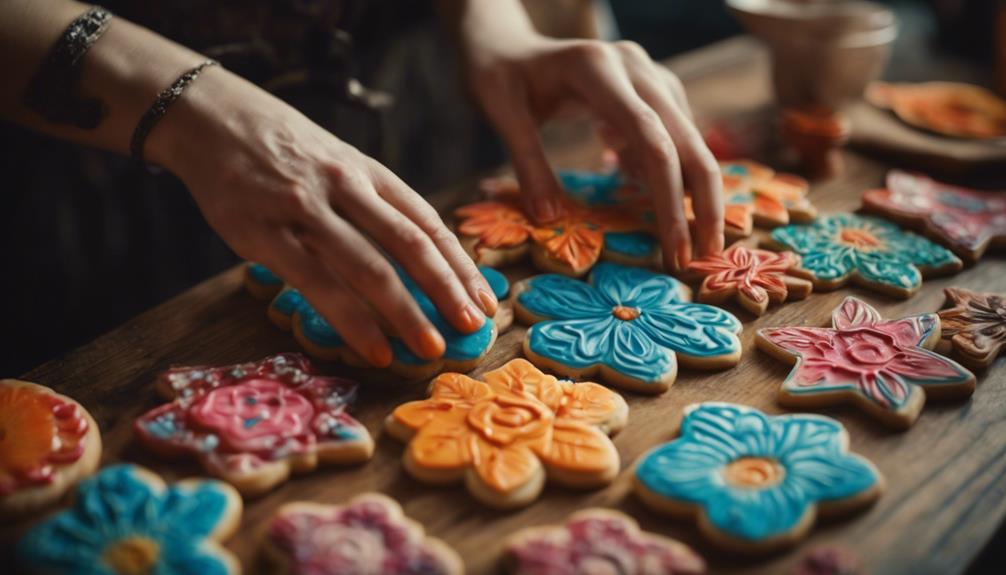
Once your cookies have cooled, it's time to unleash your creativity! Experiment with various icing techniques to add flair to your designs.
Edible embellishments like glitter glaze can elevate the overall look and feel of your cookies, making them stand out on any dessert table.
Icing Techniques for Cookies
Consider using a piping bag or squeeze bottle to intricately apply icing designs on your cooled cookies for a professional and polished finish. Once your cookies have cooled completely, follow these tips to enhance your icing techniques:
- Experiment with different colors and consistencies of icing to explore your creativity.
- Add sprinkles, edible pearls, or colored sugar for a delightful texture and visual appeal.
- Allow the decorated cookies to rest undisturbed until the icing sets and hardens, ensuring your designs remain intact.
- Use a variety of piping tips to create diverse patterns, from delicate lines to intricate lace-like designs.
Edible Embellishments and Designs
Enhance the visual appeal of your cooled cookies by adding edible embellishments and designs for a delightful finishing touch. Once your molded cookies have been glazed and dried, it's time to get creative with decorating.
Consider using edible glitter or luster dust to add a sparkling finish to your cookies. Intricate designs and details can be easily achieved using edible pens or food coloring on the cooled cookies.
For a more decorative touch, royal icing can be piped onto the cookies to create raised patterns or borders. To add texture and visual appeal, gently press sprinkles, colored sugars, or edible pearls onto the glazed cookies.
Additionally, stencils can be utilized with powdered sugar or cocoa to create elegant designs on the surface of the cookies. Experiment with these edible embellishments and designs to elevate the look of your traditional wood cookie mold creations.
Tips for Caring for Wood Cookie Molds
To maintain the quality and longevity of your wood cookie molds, refrain from using soap during cleaning to prevent residue buildup affecting the dough. Instead, opt for gentle cleaning methods to make sure the molds stay in excellent condition.
Here are some tips for caring for your wood cookie molds:
- Store Properly: Keep wooden molds in a cool, dry place to prevent warping or cracking over time.
- Season Regularly: Occasionally season the molds with food-grade mineral oil to preserve their quality and prevent sticking.
- Avoid Extremes: Steer clear of exposing wood molds to extreme temperatures or moisture to prolong their lifespan and preserve intricate designs.
- Ensure Consistency: Proper care of wood cookie molds guarantees consistent results and longevity for making beautiful molded cookies.
Conclusion
So next time you're in the kitchen, reach for your trusty wood cookie mold and let your creativity shine. Just like a sculptor shaping clay or a painter with a canvas, you have the power to turn simple dough into edible works of art.
With a little practice and patience, you'll soon be baking up batches of beautifully designed cookies that will delight your friends and family.
Happy baking!