Making homemade mallow candy is a fun and rewarding process. You'll need unflavored gelatin, granulated sugar, light corn syrup, and water. Start by blooming the gelatin, then boil the sugar, corn syrup, and water to the right temperature. Whip the gelatin and slowly add the hot syrup, increasing speed for a light, fluffy texture. Pour it into a prepared dish and let it set. You can customize your mallow candy with different flavors and coatings for a unique touch. The satisfaction of creating your own treats is unmatched. There's so much more to explore in making these delicious confections!
History of Marshmallows
The sweet treat that's recognized as marshmallows has a fascinating history rooted in the medicinal uses of the marsh mallow plant. In ancient times, the mucilaginous juice from this plant was prized for its soothing properties, much like how Norwegian Kransekake is cherished for its celebratory significance.
European physicians in the 19th century utilized marshmallow syrup as a remedy for coughs and sore throats, crafting palatable cough syrups that incorporated the plant's mucilage. This innovative use laid the groundwork for marshmallows' shift from medicine to confectionery.
As the demand for sweeter alternatives grew, French confectioners began experimenting with the traditional recipe. They replaced mallow sap with gelatin, which allowed for a fluffier texture and a more enjoyable taste. This adaptation marked the birth of the modern marshmallow that we're familiar with today.
By combining sugar syrup and gelatin, they created a treat that would soon become a beloved staple in desserts and snacks.
Today, contemporary marshmallows contain no actual mallow sap, but their origins reflect a rich history of medicinal use. So, next time you enjoy a marshmallow, you'll appreciate its fascinating journey from a healing remedy to a delightful confectionery!
Key Ingredients
When making homemade marshmallows, understanding the key ingredients is essential for achieving that perfect texture and flavor.
You'll need basic components like unflavored gelatin and sugar, but consider swapping traditional sugar for healthier sweeteners to enhance the nutritional value of your mallow candy.
Don't forget about optional add-ins that let you customize your mallow candy.
Let's break down these essentials and explore how they contribute to your delicious creation.
Essential Ingredient Breakdown
To create delicious homemade marshmallows, you'll need six key ingredients that come together to provide the perfect texture and flavor.
First, unflavored gelatin is essential; it gives your marshmallows their structural integrity and fluffy texture. You'll need three packages (21 g) for the best results.
Next, granulated sugar and light corn syrup form the sugar syrup, which must be boiled to 240 degrees Fahrenheit (116 degrees Celsius). This temperature is critical for achieving the right consistency in your marshmallow mixture.
Don't forget a pinch of salt, just 1/8 teaspoon, to enhance the overall flavor and balance the sweetness.
Flavoring and Customization Options
Once you've gathered your key ingredients for homemade marshmallows, it's time to get creative with flavoring and customization options. Start with flavoring options like vanilla extract as a base, then experiment with almond, peppermint, lemon, or orange extracts for a unique twist.
If you want to elevate the visual appeal, adding food coloring can create vibrant colors or festive themes perfect for any occasion.
For fun shapes, use cookie cutters to mold your marshmallows into exciting designs. You can also enhance their flavor and texture by coating them with toasted coconut, cocoa powder, or ground nuts.
Want to make your marshmallows even more festive? Consider incorporating rainbow sprinkles or indulging in chocolate dipping for that extra touch.
If you're after a more intense flavor, try substituting the blooming water with fruit juices or teas. This way, you can impart natural flavors that won't compromise the texture.
With these flavoring and customization options, you'll create marshmallows that not only taste incredible but also look delightful. Enjoy the process, and let your creativity shine!
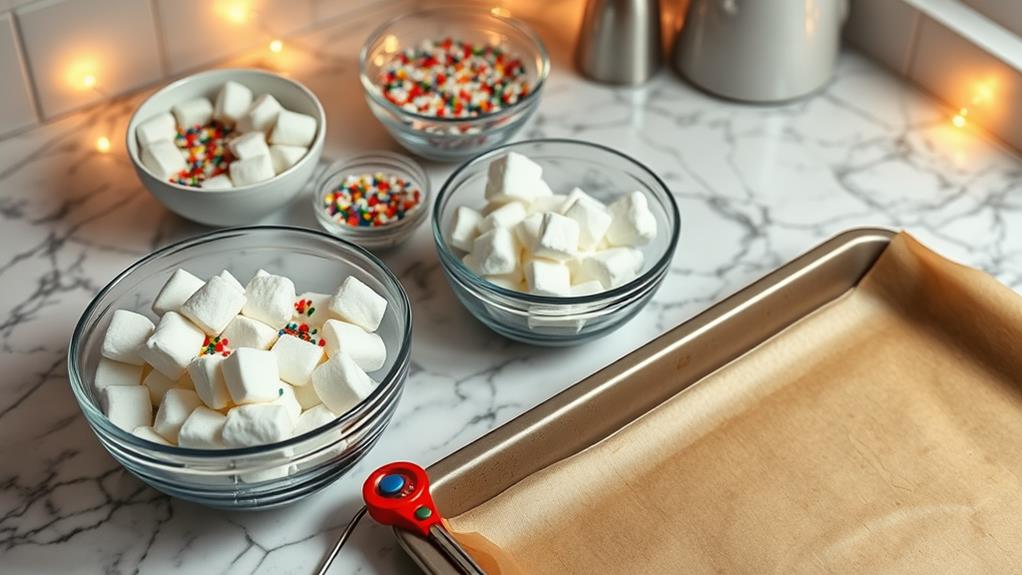
Equipment and Tools Needed
Creating homemade marshmallows requires specific equipment and key ingredients to achieve that perfect spongy texture and delightful flavor.
Start with a stand mixer, which is essential for whipping the marshmallow mixture to fluffy perfection. A candy thermometer is also vital; you'll need it to monitor the temperature of your syrup as you cook it.
For the marshmallow base, gather three packets of unflavored gelatin, which must be bloomed in water prior to use. You'll need about 1.5 cups of granulated sugar and 1 cup of light corn syrup to provide sweetness and prevent crystallization.
Prepare an 8×8 or 9×13-inch baking dish lined with parchment paper for setting the marshmallows. A rubber spatula is helpful for spreading the mixture evenly into the pan, and you'll also want to dust the top with powdered sugar to prevent sticking.
For added flavor, incorporate 1 tablespoon of pure vanilla extract during the whipping process. Make sure you have a mixing bowl to combine your ingredients before transferring them to the baking dish.
With these tools and ingredients, you'll be on your way to crafting delicious homemade marshmallows!
Step-by-Step Instructions
Get ready to make delicious homemade mallow candy with these easy step-by-step instructions.
Start by combining 3 packages (21 g) of unflavored gelatin with 1/2 cup of cold water. Let it soak for about 5 minutes to bloom the gelatin.
While that's happening, prepare your sugar syrup using a healthier alternative by considering options like replacing granulated sugar with natural sweeteners for a guilt-free treat.
In a saucepan, boil 1.5 cups of granulated sugar, 1 cup of light corn syrup, and the remaining 1/2 cup of water until it reaches 240°F (116°C).
Once the syrup is ready, slowly drizzle the hot mixture into the bloomed gelatin while whipping on low speed with your stand mixer. Gradually increase to high speed and beat for about 12 minutes, until the mixture becomes thick and fluffy.
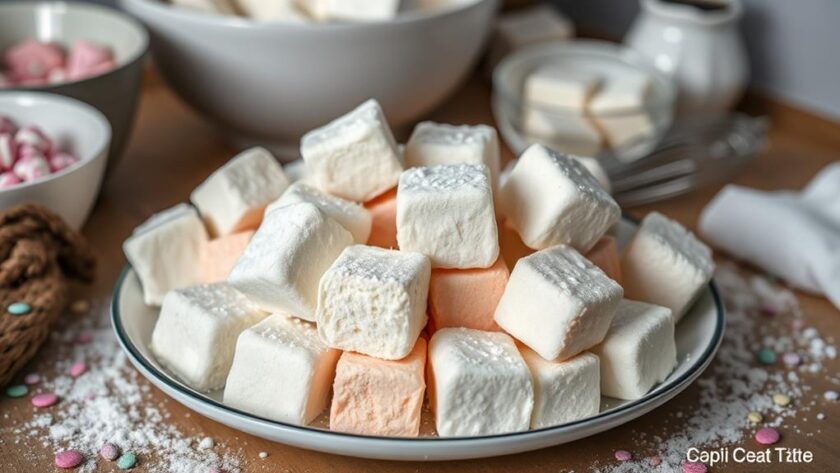
Now it's time to pour the whipped marshmallow mixture into a greased 9×13-inch dish, spreading it evenly with a lightly oiled spatula. Dust the top with a mix of powdered sugar and cornstarch to prevent sticking.
Allow the marshmallows to set at room temperature for at least 4 hours or overnight.
When they're ready, cut them into squares and dust the sticky sides with more powdered sugar. Enjoy your homemade mallow candy!
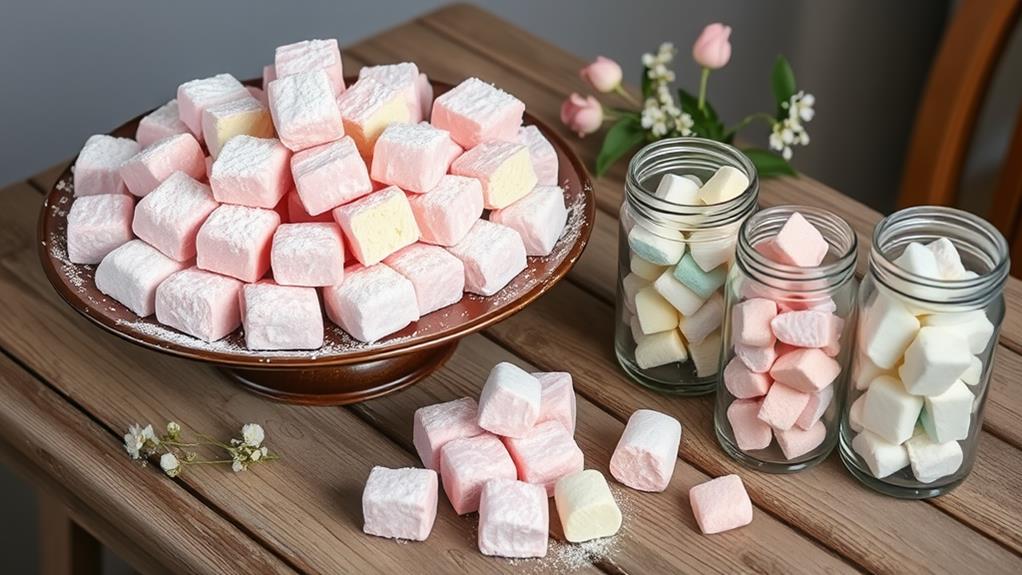
Flavor and Customization Variations
Flavoring your homemade mallow candy can elevate it to a whole new level, making it not just a treat but a delightful experience. You've got a variety of flavoring options at your fingertips! Consider using extracts like peppermint, almond, or lemon—just 1 to 2 teaspoons will add a burst of flavor.
For a festive twist, you might also explore unique combinations like vegan chocolate peppermint cookies to inspire your candy-making. To make your homemade marshmallows visually appealing, add food coloring for festive themes or sprinkle on rainbow decorations.
For an extra fun twist, use cookie cutters to shape your marshmallows into playful forms beyond traditional squares. If you're feeling indulgent, dip your marshmallows in melted chocolate or roll them in toasted coconut or cocoa powder for unique flavor combinations.
Don't shy away from experimenting! Try substituting blooming water with brewed tea or fruit puree to create exciting flavor variations. Each tweak brings a new dimension to your mallow candy, allowing you to personalize your treats to match any occasion or taste preference.
Tips for Storage and Serving
Storing your homemade mallow candy properly is essential to keep it soft and delicious. To do this, make certain you store homemade marshmallows in an airtight container at room temperature.
Consider pairing your marshmallows with a cozy drink like hot chocolate for an enhanced experience, as warm and cozy hot chocolate recipes can perfectly complement your treats. Avoid refrigeration, as it can negatively affect their texture and lead to hardening.
To maintain freshness and prevent sticking, dust the marshmallows with a mixture of confectioners' sugar and cornstarch before storing.
When cutting marshmallows into squares, use a lightly oiled knife or kitchen scissors to achieve clean edges and minimize sticking. This will help you create perfectly shaped marshmallow treats for serving.
For an enhanced treat, serve your homemade marshmallows in a variety of ways. They're fantastic additions to hot cocoa, creating a cozy drink experience, or as toppings for desserts like cakes and s'mores.
When stored properly, your marshmallows can last up to one month, making them a great option for preparing ahead of time for gatherings or as thoughtful gifts.
With these tips, you can guarantee that your homemade mallow candy stays fresh, soft, and ready to delight friends and family!
Benefits of Homemade Marshmallows
When you make marshmallows at home, you'll experience a superior flavor that's hard to beat.
You can customize them to fit your taste, adding different flavors and colors for a truly unique treat.
Plus, they pair perfectly with desserts like hot cocoa and s'mores, enhancing your sweet creations.
Superior Flavor Experience
Homemade marshmallows offer a superior flavor experience that elevates your treats to a whole new level. Unlike store-bought options, these treats provide a rich texture and freshness that truly enhance your culinary experience.
When you whip up a batch using your favorite marshmallow recipe, you'll notice how the flavor bursts with every bite, thanks to the pure ingredients, including high-quality vanilla extract.
The satisfaction of creating these delightful confections is immense. You'll appreciate the velvety texture that makes them ideal companions for hot cocoa or desserts, transforming an ordinary treat into an indulgent experience.
Plus, when stored in an air-tight container, your homemade marshmallows can last for weeks, maintaining their delightful taste and texture.
The best part? You can customize your marshmallows to suit your palate. Whether you want to add nuts, cocoa powder, or other flavors, the possibilities are endless.
This personal touch not only enhances the superior flavor but also makes the process even more enjoyable. So, roll up your sleeves and immerse yourself in the world of homemade marshmallows; your taste buds will thank you!
Customization and Versatility
Creating homemade marshmallows opens up a world of customization and versatility that store-bought options simply can't match. You can personalize your marshmallows to fit any occasion or taste preference, making them a fun kitchen project.
Here are three ways to elevate your marshmallow game:
- Flavorings: Experiment with different extracts like peppermint or almond to create unique flavor profiles.
- Visual Appeal: Add food coloring and sprinkles for a festive touch, perfect for themed parties or holiday gatherings.
- Shape and Texture: Use cookie cutters to shape your marshmallows into fun designs, and consider incorporating nuts or cocoa powder to enhance their texture and flavor.
The possibilities are endless! You can enjoy your marshmallows in various desserts, from classic s'mores to delicious Rice Krispie Treats.
With each batch, you can create a one-of-a-kind treat that reflects your personal style and taste. So, roll up your sleeves and let your creativity shine through in every fluffy, sweet morsel you make!
Ideal for Dessert Pairing
Pairing homemade marshmallows with your favorite desserts can transform an ordinary treat into something extraordinary. Their superior flavor and freshness outshine store-bought options, ensuring that each bite is a delight. The richer texture of homemade marshmallows enhances desserts like hot cocoa and s'mores, creating a velvety experience that you won't forget.
Homemade marshmallows are ideal for dessert pairing because they're customizable in size and flavor. Whether you want classic vanilla, chocolate-infused, or festive variations with seasonal extracts and vibrant colorings, you can tailor them to match your taste.
Their versatility as ingredients allows you to use them as toppings, fillings, or even standalone treats, elevating everyday desserts into gourmet experiences.
The satisfaction and enjoyment of making these marshmallows is just as rewarding as indulging in them. You'll find that adding homemade marshmallows not only enhances desserts but also creates memorable moments with family and friends.
Conclusion
Making homemade marshmallows is like weaving clouds of sweetness into your kitchen. With each fluffy bite, you're not just savoring a treat; you're crafting memories that stick like the gooey goodness on your fingers. Embrace the joy of creating something truly unique, one soft, pillowy morsel at a time. So, gather your ingredients and let the magic unfold—after all, life's too short for store-bought when you can whip up your own delicious dreams!