When choosing between rough puff and classic puff pastry, consider your baking needs. If you want a quick, simple option, go for rough puff, which gives rustic layers in less time. Classic puff, with its meticulous lamination, yields a lofty rise and is perfect for elaborate pastries. Think about the texture and results you want, and you’ll find the right fit. Stick around to discover more about their preparation and best uses!
Understanding Puff Pastry
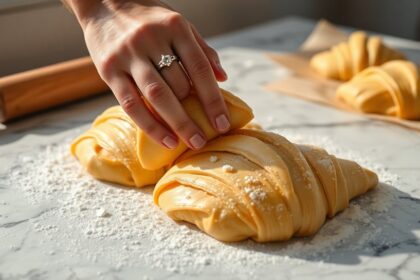
Puff pastry is a culinary marvel, known for its delicate layers and flaky texture. When you work with puff pastry dough, you’ll find that the magic lies in the layering of butter and dough, creating hundreds of light layers.
Classic puff pastry demands precision, requiring multiple turns—usually 6 to 7—to achieve up to 729 layers. This method, while rewarding, can be intricate. On the other hand, rough puff pastry simplifies this process, allowing you to mix the butter directly into the dough for quicker preparation.
Both types use similar ingredients: unsalted butter, all-purpose flour, sugar, salt, and cold water. Keeping your dough cool is vital, as it guarantees the butter stays solid, contributing to that desired rise in the oven. Mastering choux pastry techniques can also enhance your overall pastry skills and understanding of dough preparation.
Key Differences Between Rough Puff and Classic Puff
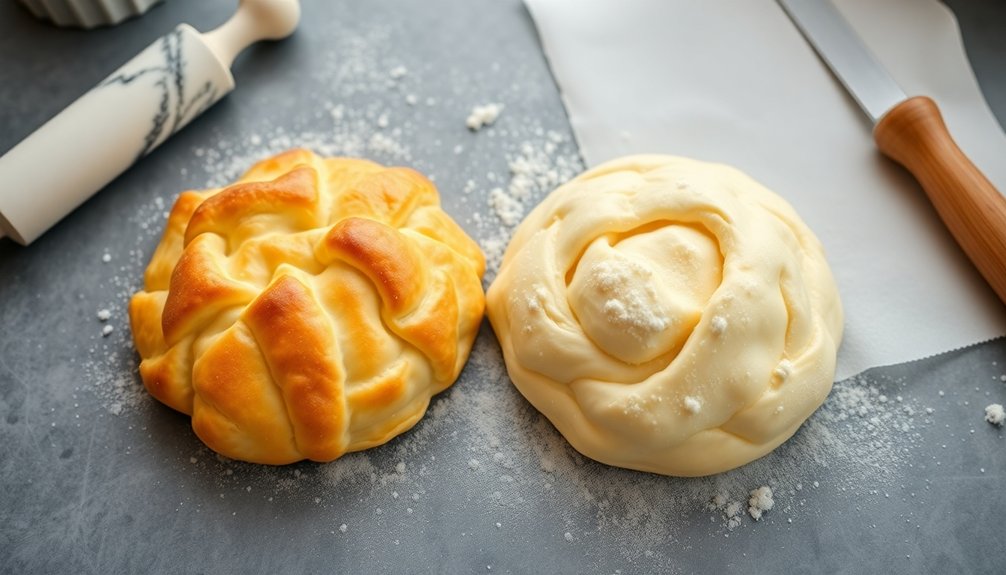
When you compare rough puff and classic puff pastry, you’ll notice key differences in preparation techniques and results. Rough puff simplifies the process, making it quicker and easier, while classic puff demands precision for that perfect rise. Understanding these distinctions can help you choose the right pastry for your baking needs. Additionally, mastering the art of puff pastry can elevate your dessert creations to new heights.
Preparation Techniques Compared
While both rough puff and classic puff pastry aim to achieve a flaky texture, their preparation techniques differ markedly.
Classic puff pastry involves a meticulous lamination process, where you’ll roll and fold the dough 6-7 times to create hundreds of thin layers. This requires precise temperature control and time.
In contrast, rough puff pastry simplifies the process by mixing cold butter in as chunks, folding it more casually. This approach allows you to prepare the dough in a fraction of the time, making it more accessible for home bakers.
While classic puff is ideal for recipes that need a high rise, rough puff pastry works well for tarts and pot pies, offering a delightful flakiness with less effort.
Layering and Texture
Although both rough puff and classic puff pastry aim for a flaky texture, their layering and overall results differ greatly.
Classic puff pastry involves a meticulous lamination process that creates an impressive 729 layers, resulting in a uniform and lofty rise.
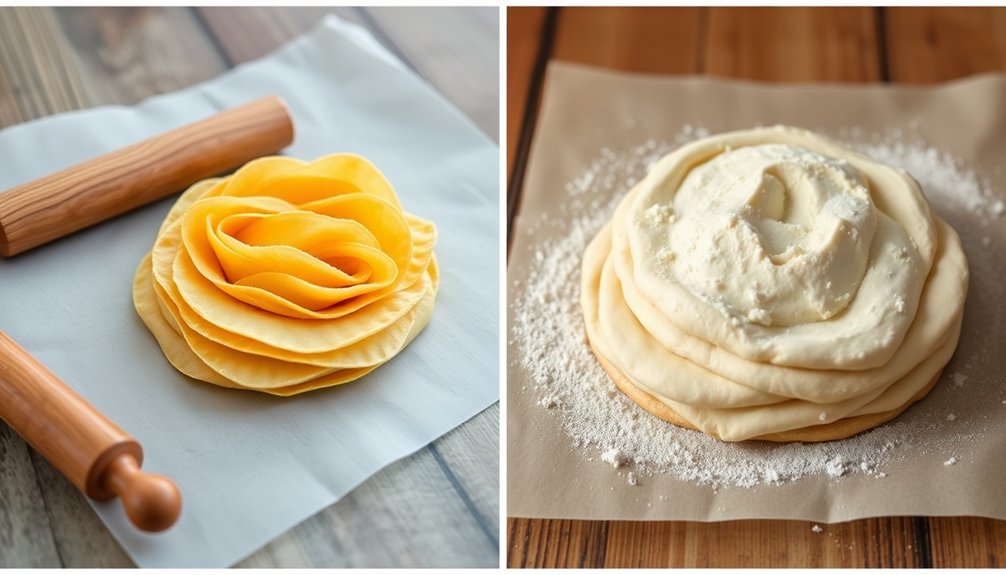
In contrast, rough puff pastry uses a simpler technique with fewer folds, leading to a slightly denser texture but still offering a good number of layers.
While classic pastry features butter carefully enclosed in the dough for an ultra-light finish, rough puff incorporates cold butter mixed into the dough, yielding a more rustic layering effect.
Ultimately, you’ll notice that classic puff pastry tends to puff more consistently, while rough puff delivers a delightful, yet less even, flaky texture.
Baking Results and Uses
The differences in layering and texture between rough puff and classic puff pastry lead to distinct baking results and uses.
Classic puff pastry boasts up to 729 layers, creating a higher rise and a delicate texture that’s perfect for elaborate pastries like vol-au-vents.
In contrast, rough puff pastry, with its simplified folding process, offers a flaky and tender result in a fraction of the time.
Ideal for savory pies and quick desserts, rough puff pastry is more forgiving, making it great for novice bakers.
While both pastries share a buttery flavor, classic puff’s refined taste comes from its meticulous preparation.
If you need convenience, rough puff is your best bet for last-minute baking.
Ingredients for Both Pastries
When you’re making rough puff or classic puff pastry, you’ll find that both recipes rely on all-purpose flour, unsalted butter, and salt as their main ingredients.
However, the way you incorporate the butter greatly affects the final texture and flavor.
Let’s break down the essential ingredients and fat ratios that set these two pastries apart. Additionally, understanding gluten-free ingredients can provide alternatives for those with dietary restrictions.
Essential Ingredients Compared
While both rough puff pastry and classic puff pastry share essential ingredients, their preparation methods set them apart.
You’ll find that both types require all-purpose flour, unsalted butter (preferably high-quality European), granulated sugar, and kosher salt.
The key difference lies in how you incorporate the butter into the dough. Classic puff pastry demands a meticulous lamination technique, where you encase a butter block within a lean dough.
On the other hand, rough puff pastry simplifies this by mixing cold butter directly into the dough. This streamlined method allows for quicker preparation without sacrificing the flaky texture that defines puff pastry.
Ultimately, your choice will depend on your time and precision preferences in the kitchen.
Fat Ratios Explained
Understanding fat ratios is essential for mastering both rough and classic puff pastry.
Classic puff pastry typically uses a fat-to-flour ratio of 1:2, requiring more butter for ideal rise and flakiness. In contrast, rough puff pastry has a more forgiving ratio of about 1:1, making it easier to handle for quick preparations.
For both pastries, unsalted butter is recommended, with high-quality European butter preferred for its flavor and texture.
In classic puff pastry, the fat is meticulously laminated in layers, while rough puff incorporates cold butter without fully breaking it down.
You’ll generally use around 200g of fat for every 300g of flour in rough puff, while classic puff may require more to achieve those signature layers.
Tools You’ll Need
To create perfect rough puff or classic puff pastry, having the right tools on hand makes all the difference. A stand mixer is invaluable for efficiently incorporating cold butter into the dough while keeping its integrity intact. You’ll need a rolling pin to evenly roll out the dough and achieve the desired thickness for both types of pastry. A bench scraper is essential for shaping the dough and transferring it from the work surface to the refrigerator without damaging those vital layers. Don’t forget plastic wrap to cover the dough during resting periods, preventing it from drying out. Finally, a tape measure or ruler can help you guarantee consistent dimensions, which is key for proper lamination and even baking. Additionally, using cold butter is crucial for achieving a flaky texture in your pastry, as it creates steam pockets during baking.
Step-by-Step Preparation for Classic Puff Pastry
Classic puff pastry requires careful preparation, starting with the creation of your lean dough. You’ll mix all-purpose flour, sugar, salt, and cold water, then chill it for ideal texture.
Classic puff pastry begins with a meticulous lean dough made from flour, sugar, salt, and cold water, chilled for perfect texture.
Once ready, you’ll incorporate the butter block, beginning the lamination process.
Here’s how to achieve that perfect flaky pastry:
- Roll the dough into a rectangle, then fold it into thirds like a business letter.
- Chill it again to maintain the butter’s firmness.
- Repeat this for six to seven turns, ensuring each layer remains distinct.
After the final resting period, roll it out to your desired thickness and bake at 400°F (204°C) for 25-28 minutes, letting that beautiful puff pastry rise and turn golden brown! Additionally, consider incorporating nutrient-rich flours to enhance the nutritional value of your baked goods.
Making Rough Puff Pastry: A Simplified Approach
While making rough puff pastry is simpler than its classic counterpart, it still yields a delightful flaky texture that elevates your baked goods.
Start by combining cold butter with flour, sugar, and salt. Mix just enough to keep the butter intact; this is key for that flaky finish.
Shape the dough into a rectangle and fold it into thirds like a business letter. Repeat this folding process five times, creating layers that will puff beautifully.
After shaping, roll the final dough to about ¼ inch thick. Bake at 400°F (204°C) for 25-28 minutes until golden brown and puffy.
You can prepare it in a few hours or store it in the fridge for up to two days for convenience. Additionally, the layering technique used in rough puff pastry is similar to that of the cheesecake swirl in red velvet cake, which enhances texture and flavor.
Importance of Temperature and Resting
When making puff pastry, keeping your dough chilled is key to achieving those flaky layers you want. You’ll need to monitor the temperature closely and incorporate resting periods to allow the gluten to relax. Mastering these techniques will make a noticeable difference in the final texture of your pastry. Additionally, using high-quality butter contributes significantly to the rich flavor and flaky texture of your pastry.
Chilling Dough Effectiveness
Chilling the dough is essential for both rough puff and classic puff pastry because it keeps the butter solid, which is key for achieving those desired flaky layers. Proper chilling helps maintain temperature control, ensuring the butter doesn’t melt into the dough.
Here’s why you shouldn’t skip this step:
- Flaky Perfection: Solid butter creates distinct layers that lead to that irresistible flakiness you crave.
- Relaxed Gluten: Resting time between folds allows gluten to relax, making the dough easier to work with.
- Maximum Rise: A final refrigeration of at least 4 hours for classic puff pastry is critical for achieving that stunning height and texture.
Pay attention to chilling dough; it’s essential for your pastry success!
Temperature Control Techniques
To achieve the perfect flaky texture in both rough puff and classic puff pastries, you need to master temperature control and resting techniques.
Keeping your dough temperature between 40°F and 50°F is essential to prevent the butter from melting into the dough. Incorporate resting periods during the lamination process to allow gluten to relax, making the dough easier to roll out while maintaining solidified butter for better layering.
For rough puff pastry, aim for five resting periods, while classic puff typically needs more. Chilling the dough for at least two hours after initial prep and each fold helps preserve butter layers important for a successful rise.
If your dough gets too soft, a quick chill can restore its firmness and structure.
Storage Tips for Your Pastry
Properly storing your pastry is essential for maintaining its texture and flavor, so keep these tips in mind.
- Refrigerate or Freeze: Store rough puff pastry in the refrigerator for up to two days. For longer storage, tightly wrap it in plastic wrap and freeze it to prevent freezer burn.
- Prepare for Storage: Slice the dough in half for easier handling and roll it to a ¼-inch thickness if you prefer flat storage.
- Layer Wisely: If stacking in the freezer, use parchment paper between layers to make separation simple when you’re ready to use it. Properly measured dry ingredients are vital for achieving the right texture in your baked goods.
Always check the dough’s texture; if it feels wet or sticky, sprinkle a bit of flour when rolling out for your recipes.
Enjoy your baking!
Recipe Ideas for Using Puff Pastry
Whether you’re in the mood for something sweet or savory, puff pastry offers endless possibilities in the kitchen. You can whip up a delightful puff pastry recipe for tarts, turnovers, or even a comforting pot pie top.
If you’re feeling adventurous, try a homemade puff pastry to create cheese straws or cinnamon twists that impress your guests. For an elegant presentation, craft delicate pastries like vol-au-vent or cream horns, filled with your favorite sweet or savory fillings.
Don’t forget to utilize puff pastry as a base for appetizers—spinach puffs and caramelized onion tarts are sure to wow everyone. Plus, using puff pastry instead of traditional pie crusts adds a light, flaky texture to classic dessert recipes like fruit pies. Consider pairing your pastries with gluten-free options to ensure everyone can enjoy them this holiday season.
Community Experiences and Feedback
As many bakers have discovered, the community’s feedback on rough puff pastry highlights its appeal for both beginners and experienced cooks alike.
Many appreciate how it simplifies the baking process while still delivering results. Here are three key takeaways from the community:
- Simplicity: Rough puff recipes are quicker and easier, making it ideal for novice bakers.
- Flakiness: Users consistently report excellent flakiness and buttery flavor, even when compared to classic puff pastry.
- Versatility: The adaptability of rough puff pastry shines through in both savory and sweet dishes, showcasing its wide-ranging potential. Additionally, many bakers enjoy experimenting with creative festive cookie recipes, enhancing their holiday baking experiences.
While challenges like dough temperature exist, overall, bakers find rough puff pastry more forgiving, allowing for delicious results with less effort.
Conclusion
Whether you choose rough puff or classic puff pastry, both can elevate your culinary creations. You might think classic puff is too time-consuming, but with practice, it can become a rewarding and enjoyable process. Plus, rough puff offers a quicker alternative without sacrificing flavor or texture. Whichever you pick, both styles deliver delicious results. So roll up your sleeves, experiment, and find the perfect pastry that suits your taste and schedule. Happy baking!