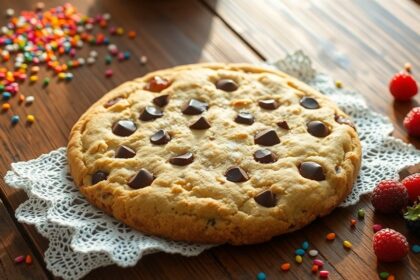
If you’re looking for beginner-friendly desserts that don’t require a mixer, you’re in luck! You can whip up tasty treats like Chocolate Chip Cookie Bars, No-Bake Cheesecake, and Chocolate Mousse with ease. Other options include Easy Fruit Crisp, S’mores Dip, and No-Bake Oatmeal Cookies. Even classic Rice Crispy Treats and Healthy Fruit and Yogurt Parfaits are simple to prepare. These no-mixer delights are sure to satisfy your sweet tooth, and there’s even more to discover!
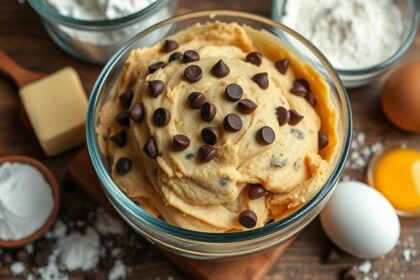
Chocolate Chip Cookie Bars: A Simple Treat
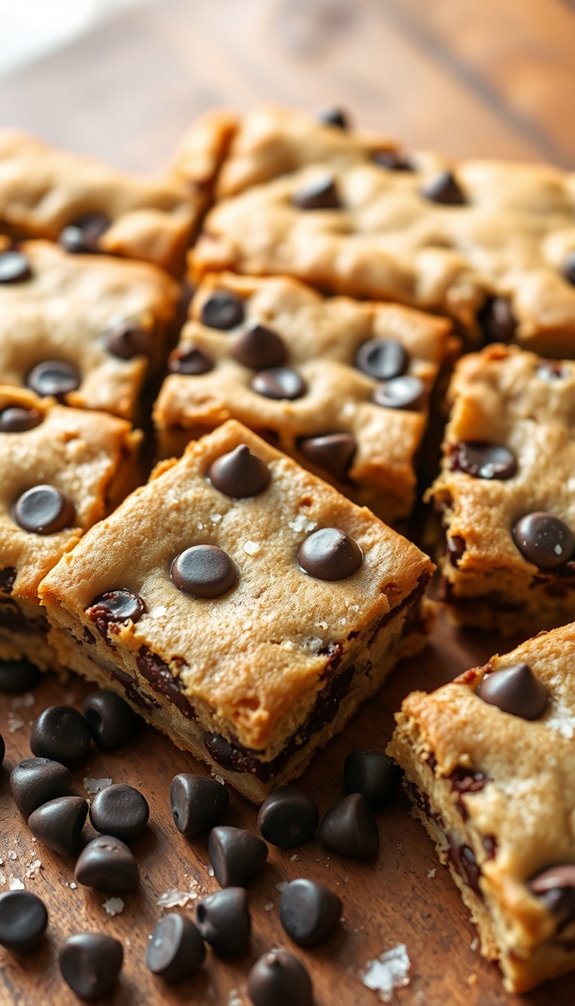
If you’re craving a sweet treat that doesn’t require fancy equipment, chocolate chip cookie bars are the perfect solution.
These bars are easy to whip up, and you can customize them with chocolate variations like dark chocolate chips or white chocolate chunks for a unique twist.
Customize your chocolate chip cookie bars with dark chocolate chips or white chocolate chunks for a delightful twist!
Start by mixing your dry ingredients in one bowl and your wet ingredients in another, then combine them without a mixer. Granulated sugar can replace brown sugar in your recipe for added sweetness without compromising texture.
For best results, use a spatula to fold in the chocolate chips gently. Using browned butter enhances the nutty flavor of your cookie bars, making them even more delicious.
A key baking tip is to underbake them slightly, which keeps the bars chewy and delicious. This method mirrors the importance of chilling the dough before baking to control spreading and achieve that perfect texture.
Let them cool before cutting, and you’ll have a simple yet satisfying dessert that everyone will love!
Enjoy your baking adventure!
No-Bake Cheesecake: Creamy and Delicious
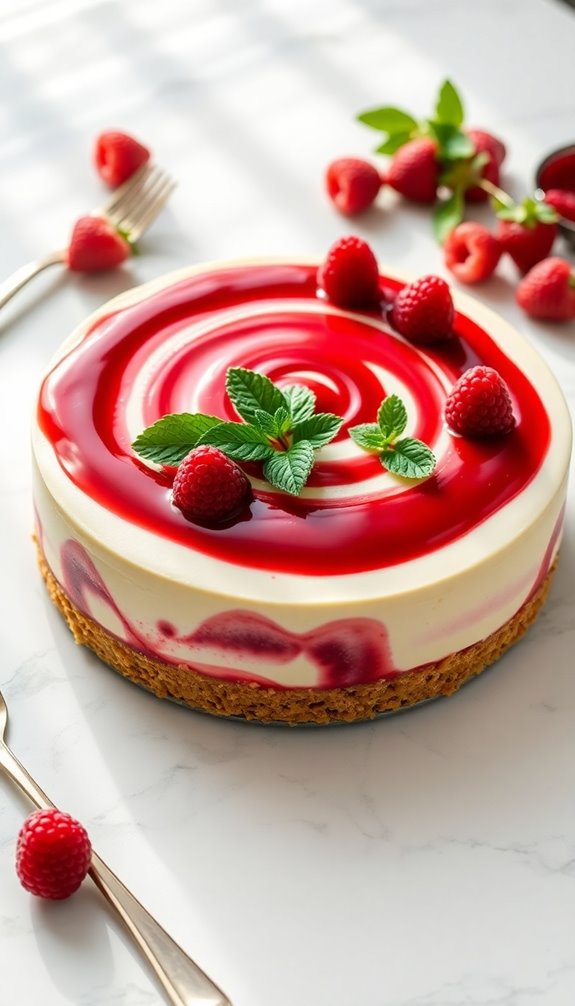
If you want to whip up a no-bake cheesecake, you’ll need a few essential ingredients to get started. A buttery graham cracker crust forms a flavorful base for the bars. We’ll walk you through step-by-step instructions to create a creamy dessert that’s sure to impress. Plus, you can explore different flavor variations to make it your own! Remember, using quality ingredients will enhance the flavor and texture of your cheesecake. A no-bake dessert like this can be prepared quickly, taking only approximately 30 minutes to put together before it chills.
Essential Ingredients Needed
To create a creamy and delicious no-bake cheesecake, you’ll need a few essential ingredients that come together effortlessly.
Start with cream cheese, the star of your cheesecake, which gives it that rich texture. Next, grab some granulated sugar to sweeten things up. You’ll also need heavy cream for that perfect fluffy consistency. Don’t forget vanilla extract to enhance the flavor! A key ingredient for a no-bake dessert is sweetened condensed milk, which adds both sweetness and creaminess to your filling. The addition of high-quality ingredients can significantly elevate the overall taste of your cheesecake.
For the crust, crushed graham crackers and melted butter are must-have pantry staples that add a delightful crunch. Additionally, using brown sugar in your cheesecake crust can elevate the flavor profile and add a hint of caramel sweetness.
Make sure you have essential baking tools like a mixing bowl and a spatula to combine your ingredients smoothly. With these basics on hand, you’re ready to whip up a cheesecake that everyone will love!
Step-by-Step Instructions
Now that you’ve gathered all the ingredients for your no-bake cheesecake, it’s time to put everything together.
Start with the crust: mix crushed graham crackers, melted butter, and sugar in a bowl. Press the mixture into the bottom of a springform pan.
For the filling, combine cream cheese, sugar, and vanilla in another bowl. Use a spatula to mix until smooth—no mixer needed! Gradually fold in whipped cream for a light texture. Remember to use quality ingredients for the best results.
Pour the filling over the crust, spreading it evenly. Cover the pan and refrigerate for at least four hours, or until it’s set.
This step-by-step baking method uses beginner-friendly techniques, ensuring you create a creamy and delicious cheesecake with ease. Enjoy your creation!
Flavor Variations Ideas
No-bake cheesecake is a versatile dessert that welcomes a variety of flavor twists to suit your taste.
Try adding spice variations like cinnamon or nutmeg for a warm touch. Nutty additions, such as crushed almonds or pecans, create a delightful crunch. For a fruity flair, incorporate fruit extracts or fresh purees.
You can also experiment with herb infusions like basil or mint for a unique twist. Don’t forget flavor swirls with caramel or fruit preserves, and candy mix-ins like crushed cookies or chocolate chunks.
Top your cheesecake with chocolate drizzles or zest enhancements from lemon or orange. Seasonal spices and dessert toppings like whipped cream or berries can elevate your creation, ensuring each bite is a new experience.
Enjoy!
Classic Rice Crispy Treats: A Childhood Favorite

Classic Rice Crispy Treats evoke a sense of nostalgia, reminding many of carefree childhood days. You can whip up this simple treat in no time, bringing back those cherished memories.
Classic Rice Crispy Treats bring back joyful memories of childhood, easy to make and always delightful.
All you need is butter, marshmallows, and, of course, Rice Crispy cereal. Melt the butter and marshmallows together, mix in the cereal, and press it into a pan. It’s that easy!
If you want to get creative, there are endless recipe variations. Try adding chocolate chips, peanut butter, or even sprinkles for a fun twist.
You could also experiment with different cereals or mix in dried fruit for added texture. No matter how you customize it, these classic treats will always bring joy and a taste of your youth.
Easy Fruit Crisp: Warm and Fruity Delight
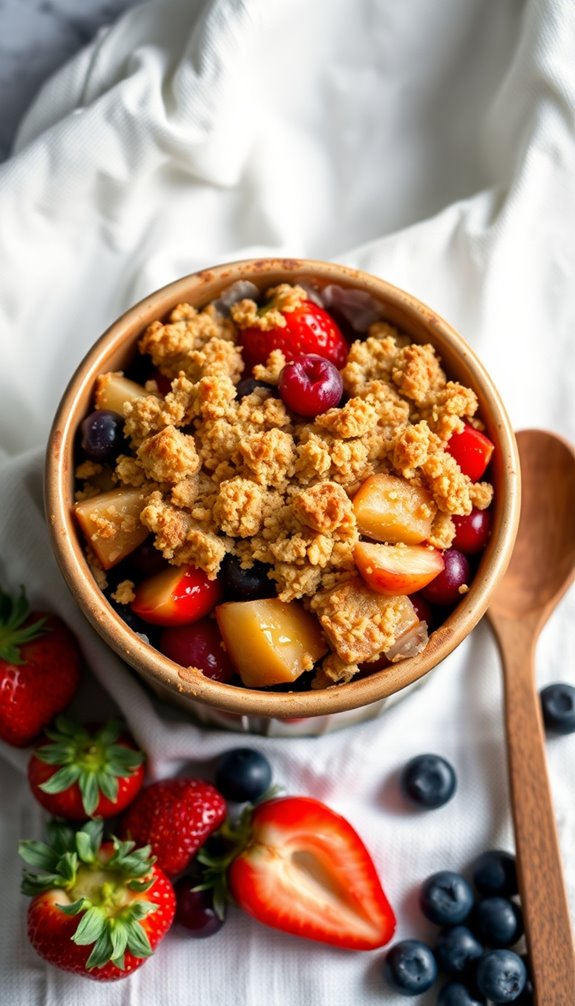
Creating an easy fruit crisp starts with picking the right fruit, so think about your favorites.
You can also experiment with simple topping variations to make it uniquely yours.
Once it’s baked, consider how to serve it for maximum enjoyment—it’s all about the perfect pairings!
Choosing The Right Fruit
Choosing the right fruit is essential for crafting a delicious fruit crisp that truly shines. Start by considering seasonal fruits, as they bring the freshest flavors to your dish.
In spring and summer, juicy berries, peaches, and cherries are fantastic choices. In the fall, opt for apples and pears, which add a comforting warmth.
Don’t overlook tropical options like pineapple or mango for a unique twist; they can elevate your crisp with vibrant sweetness. Mixing fruits can also enhance the flavor profile, so don’t be afraid to combine a few favorites.
Whatever you choose, make sure the fruits are ripe and flavorful, ensuring your fruit crisp is a warm and fruity delight that everyone will love!
Simple Topping Variations
While you’ve picked the perfect fruits for your crisp, the right topping can elevate it to a whole new level.
Consider adding a dollop of whipped cream or a yogurt layer for creaminess. For a touch of indulgence, drizzle some chocolate or caramel sauce over the top. You can also sprinkle a variety of cookie crumbles for a delightful crunch.
If you’re looking for freshness, toss on some fresh fruit or a sprinkle of citrus zest to brighten the flavors. Nut toppings add a nice texture, while granola crunch can give it that extra layer of satisfaction.
And don’t forget to finish it off with a colorful sprinkles variety for a fun, festive touch!
Serving Suggestions And Pairings
To truly enjoy your Easy Fruit Crisp, consider serving it warm straight from the oven, as the heat enhances the flavors and aromas.
Top it with a generous scoop of vanilla ice cream or a dollop of whipped cream for that perfect creamy contrast. For a delightful twist, drizzle some caramel sauce over the crisp; the sweetness pairs beautifully with the tartness of the fruit.
You might also enjoy it alongside a cup of hot tea or coffee, making for a cozy dessert experience. If you’re feeling adventurous, try serving it with a scoop of yogurt for added tanginess.
These serving suggestions and dessert pairings will elevate your Easy Fruit Crisp, making it a memorable treat for any occasion.
Chocolate Mousse: Rich and Silky
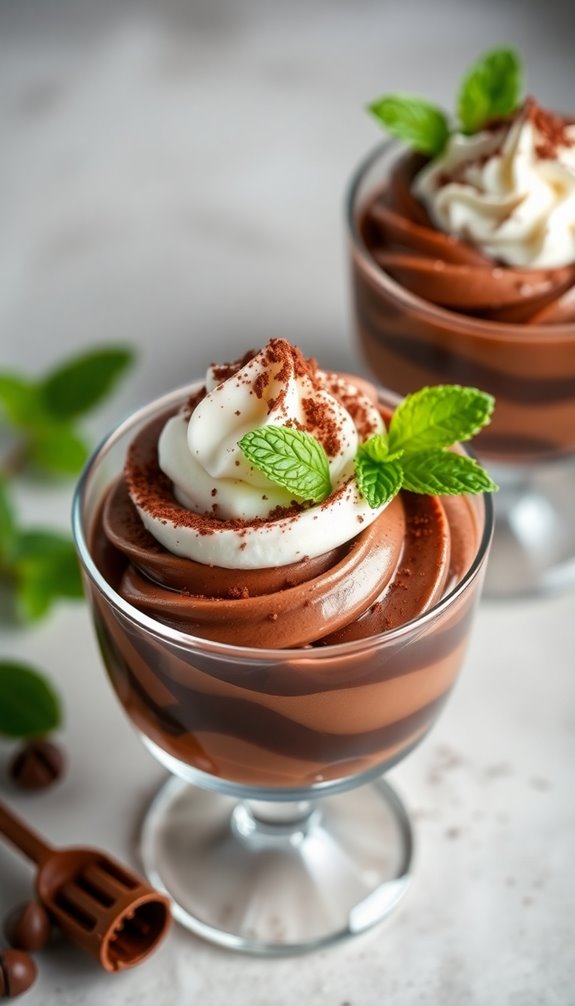
When you crave a dessert that feels indulgent yet is surprisingly simple to make, chocolate mousse hits the spot. This rich treat boasts a silky texture and intense chocolate flavor, making it a perfect choice for beginners.
Here’s how you can elevate your mousse:
Elevate your chocolate mousse with quality chocolate, fluffy egg whites, and proper chilling for an unforgettable treat.
- Choose Quality Chocolate: Use high-quality chocolate to enhance the flavor and richness.
- Incorporate Egg Whites: Whisk egg whites until they form soft peaks; this adds airiness to the mousse, creating that signature silky texture.
- Chill Properly: Allow your mousse to chill in the fridge for at least two hours. This step is essential for setting the mousse and deepening the chocolate flavor.
With these simple steps, you’ll impress everyone with your delectable chocolate mousse!
Lemon Bars: Bright and Tart
Lemon bars are a delightful way to satisfy your sweet tooth, especially when you want something bright and tangy. These treats combine a buttery crust with a smooth, zesty filling that’s sure to impress.
One of the lemon zest benefits is its ability to enhance the flavor while providing a burst of vitality. You can easily customize your lemon bars with variations like adding fresh berries or a hint of coconut for an extra twist.
For a gluten-free option, try using almond flour for the crust. Baking lemon bars is a simple process that doesn’t require a mixer, making it perfect for beginners.
Give this recipe a try, and enjoy the invigorating taste of homemade lemon bars!
Peanut Butter Cookies: Quick and Satisfying
Peanut butter cookies are a breeze to whip up, requiring just a few simple ingredients you probably have on hand.
In no time, you’ll enjoy the warm, comforting aroma wafting through your kitchen as they bake. Plus, the rich flavor of peanut butter pairs perfectly with sweet treats, making these cookies a satisfying choice.
Simple Ingredients Required
If you’re looking for a quick and satisfying dessert, peanut butter cookies are a fantastic choice, especially since they require just a handful of simple ingredients.
You probably already have these simple pantry staples on hand, making it easy to whip them up anytime. Here are three essential ingredients you’ll need:
- Peanut Butter: The star of the show, bringing that rich, nutty flavor.
- Sugar: Granulated sugar adds sweetness while helping the cookies hold together.
- Egg: This binds everything together, ensuring your cookies come out just right.
Feel free to experiment with easy flavor additions like chocolate chips or a sprinkle of sea salt on top.
With these basics, you’ll create delicious treats in no time!
Quick Baking Process
Now that you’ve gathered those simple ingredients, you can start baking your peanut butter cookies in no time.
First, preheat your oven to 350°F (175°C). In a bowl, mix together your peanut butter, sugar, and egg using beginner baking techniques. You don’t need fancy tools; just a fork will do!
For quick baking tips, scoop equal-sized portions onto your baking sheet, leaving space in between. Bake for about 10 minutes, or until they’re golden.
Let them cool for a few minutes on the sheet before transferring them to a wire rack. With this straightforward process, you’ll whip up delicious cookies that satisfy your cravings and build your confidence in the kitchen.
Enjoy your tasty reward!
Perfect Flavor Combinations
While baking your cookies, consider how various flavor combinations can elevate your peanut butter treats. Achieving perfect pairings can lead to delightful flavor harmony that will impress any palate.
Here are three combinations to try:
- Chocolate Chips: The rich sweetness of chocolate complements the nutty flavor of peanut butter, creating a classic, indulgent treat.
- Sea Salt: A sprinkle of sea salt enhances the sweetness and nutty flavors, providing a sophisticated touch to your cookies.
- Honey or Maple Syrup: Adding a drizzle of honey or maple syrup introduces a natural sweetness that balances the richness of peanut butter.
Experiment with these combinations, and watch your peanut butter cookies transform into a deliciously satisfying experience!
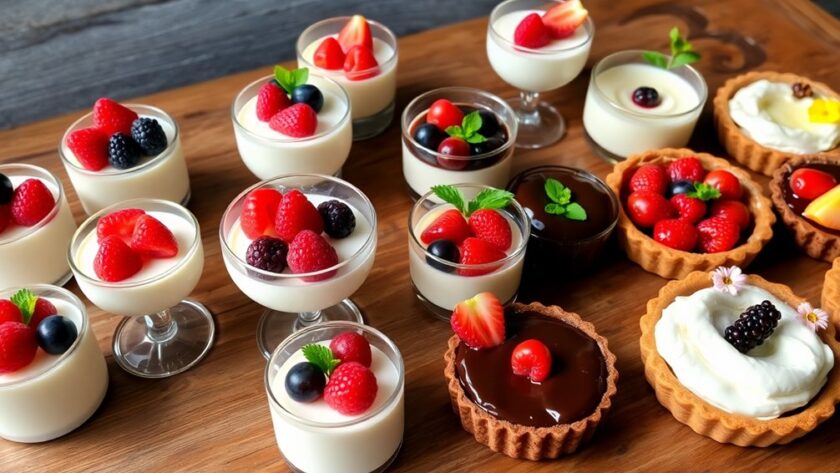
Berry Tart: Fresh and Flavorful
Although creating a stunning berry tart may seem intimidating, it’s surprisingly simple and requires no mixer.
Start with choosing your tart crust options—store-bought or homemade. A buttery shortcrust works beautifully, but you can also experiment with graham cracker or almond flour crusts for a twist.
Next, select your favorite berries for a burst of fresh flavor. You can mix strawberries, blueberries, and raspberries for a classic look, or try more unique berry tart variations like blackberries or even tropical fruits.
Once your crust is ready, fill it with a creamy layer, such as mascarpone or whipped cream, then artfully arrange your berries on top.
This delightful dessert not only impresses but also satisfies your sweet tooth!
Vanilla Pudding: Creamy Comfort in a Cup
Vanilla pudding is a classic treat that’s easy to whip up at home. You’ll only need a few simple ingredients, and the cooking process is straightforward. Plus, there are plenty of flavor variations you can experiment with to keep things interesting!
Ingredients You’ll Need
When you’re ready to whip up a delicious cup of vanilla pudding, gather a few simple ingredients that will bring creamy comfort to your dessert table.
You’ll be amazed at how easy it’s to create this delightful treat using basic kitchen essentials. Here’s what you’ll need:
- Milk – Whole milk works best for that rich creaminess.
- Sugar – Granulated sugar adds the perfect touch of sweetness.
- Cornstarch – This simple pantry staple helps thicken your pudding, giving it that desirable texture.
With these ingredients in hand and your essential baking tools like a whisk and a saucepan, you’re well on your way to serving up a comforting vanilla pudding that everyone will love!
Simple Cooking Process
To create your creamy vanilla pudding, start by combining the milk, sugar, and cornstarch in a saucepan over medium heat.
Stir the mixture constantly until it thickens, using simple techniques that make this recipe beginner friendly. Once it reaches a smooth and creamy consistency, remove it from heat and add in your vanilla extract.
Pour the pudding into serving cups and let it cool to room temperature. For an extra touch, you can chill it in the fridge to enhance the flavor.
This straightforward process allows you to whip up a delightful dessert without any fancy tools or complicated steps. Enjoy your homemade vanilla pudding, a comforting treat that’s perfect for any occasion!
Flavor Variations To Try
While vanilla pudding is a classic favorite, experimenting with different flavors can elevate your dessert game.
With just a few tweaks, you can create unique flavor combinations that surprise and delight your taste buds. Here are some ideas to inspire your next pudding creation:
- Chocolate Delight: Mix in cocoa powder or melted chocolate for a rich, indulgent treat.
- Fruit Fusion: Incorporate seasonal ingredient swaps like fresh berries or citrus zest for a rejuvenating twist.
- Spiced Chai: Add chai spice blend or cinnamon for a warm, aromatic flavor.
These variations not only enhance the vanilla base but also allow you to enjoy the pudding in new and exciting ways.
Banana Bread: Use Those Overripe Bananas
If you’ve got overripe bananas sitting on your counter, don’t toss them out just yet! They’re perfect for making delicious banana bread.
Start by mashing those bananas in a bowl; the riper, the better! Mix in some sugar, melted butter, and eggs until combined.
For baking tips, remember to add flour, baking soda, and a pinch of salt to create a smooth batter. You can also throw in nuts or chocolate chips for extra flavor.
Pour the mixture into a loaf pan and bake at 350°F (175°C) for about an hour. Once it’s golden brown and a toothpick comes out clean, let it cool before slicing.
You’ll have a moist, tasty treat that’s perfect for any time!
Chocolate Lava Cake: A Decadent Surprise
Get ready to impress with a chocolate lava cake that’s rich in flavor and surprisingly easy to make.
You’ll find a few straightforward steps to guide you, along with essential baking tips to guarantee a gooey center every time.
Let’s reveal the secrets to this decadent dessert that’s sure to delight!
Rich Chocolate Flavor Profile
Indulging in a rich chocolate lava cake is like experiencing a symphony of flavors that dance on your palate. The magic lies in the contrast between the outer cake and molten center, creating delightful chocolate textures. Each bite bursts with flavor intensity, leaving you craving more.
To fully appreciate this dessert, consider these elements:
- Dark Chocolate: The deep, slightly bitter notes enhance richness.
- Butter: Adds creaminess, creating a luxurious mouthfeel.
- Sugar: Balances the bitterness, amplifying sweetness to round out the flavor.
Together, these components create a decadent experience that satisfies your chocolate cravings like no other.
You’ll find that the interplay of textures and flavors makes every forkful an indulgent delight.
Easy Preparation Steps
While preparing a chocolate lava cake may seem challenging, you’ll find that it requires just a few simple steps to create this indulgent dessert.
Start by melting butter and chocolate together, which is a fantastic quick prep tip. Once melted, whisk in sugar, eggs, and a pinch of salt until smooth.
Next, gently fold in flour to keep the batter light and airy.
Now, pour the batter into greased ramekins and bake them for about 12 minutes. This is where the magic happens! The outside firms up while the inside stays gooey.
For a delicious finish, let them cool slightly before serving. Remember, timing is key for that perfect lava effect, so keep an eye on your cakes!
Enjoy your creation!
Baking Tips for Success
To achieve that perfect chocolate lava cake, a few baking tips can make all the difference. Mastering essential baking techniques and knowing when to make ingredient substitutions can elevate your dessert game.
Here are three tips to guarantee success:
- Use high-quality chocolate: The flavor of your lava cake hinges on the chocolate. Opt for a rich dark chocolate for the best results.
- Don’t overbake: Keep a close eye on your cakes; they should be slightly jiggly in the center when you take them out. Overbaking can ruin the gooey surprise!
- Experiment with substitutions: If you’re out of eggs, try using applesauce or yogurt as a binding agent. They can work surprisingly well without compromising taste.
Follow these tips for a decadent dessert every time!
Oatmeal Cookies: Whole Grain Goodness
When you’re looking for a wholesome treat that’s easy to make, oatmeal cookies stand out as a delicious option. These cookies offer a perfect blend of whole grain goodness and versatility.
You can experiment with various oatmeal variations, like using old-fashioned or quick oats, to achieve your desired texture. Plus, oatmeal cookies are a fantastic canvas for healthy add-ins. Toss in some chopped nuts, dried fruits, or dark chocolate chips to elevate the flavor and boost nutrition.
The best part? You don’t need a mixer; just combine your ingredients in a bowl and mix with a spoon. In no time, you’ll have a batch of chewy, hearty cookies that satisfy your sweet tooth while keeping things wholesome!
Coconut Macaroons: Chewy and Sweet
Coconut macaroons are a delightful treat that brings a tropical twist to any dessert table.
Coconut macaroons offer a delicious tropical flair, perfect for elevating any dessert spread.
These chewy, sweet bites are easy to make and can be customized with various coconut variety options.
To achieve the perfect macaroon, keep these chewy texture tips in mind:
- Use Sweetened Coconut: It enhances sweetness and moisture, ensuring a delightful chew.
- Chill the Mixture: Letting it rest in the fridge for 30 minutes helps the ingredients meld together, making it easier to shape.
- Don’t Overbake: Aim for a light golden color; overbaking can lead to a dry texture.
With these simple steps, you’ll create coconut macaroons that impress guests and satisfy your sweet tooth!
Pumpkin Spice Bars: Fall Flavors Without the Fuss
If you’re craving the cozy flavors of fall without the hassle of complicated baking, pumpkin spice bars are the perfect solution.
These delicious bars capture the essence of autumn with their warm, spiced aroma and rich pumpkin flavor. You won’t need any fancy equipment—just a bowl and a whisk will do!
Combine pumpkin puree, brown sugar, and pumpkin spice with simple pantry staples like flour and eggs. Spread the batter into a pan, bake, and voilà! You’ve got a delightful treat that’s sure to impress.
Cut them into squares, dust with powdered sugar, and enjoy. Whether you’re sharing with friends or savoring them solo, these pumpkin spice bars make fall baking a breeze!
S’mores Dip: A Campfire Classic at Home
As the weather cools and you crave a sweet, nostalgic treat, S’mores Dip brings the classic campfire flavors right to your kitchen.
This gooey delight combines all the essential s’mores ingredients without the need for a campfire. It’s perfect for sharing and super easy to whip up!
Here’s what you’ll need:
- Chocolate Chips: Use semi-sweet or milk chocolate for that rich flavor.
- Marshmallows: Mini or regular, they’ll melt beautifully on top.
- Graham Crackers: For dipping and that signature crunch.
Just layer the chocolate and marshmallows in a baking dish, pop it in the oven until it’s bubbly, and serve with graham crackers.
Enjoy the campfire nostalgia without leaving your home!
No-Bake Chocolate Oatmeal Cookies: Quick and Easy
Craving a quick and delicious treat? No-bake chocolate oatmeal cookies are the perfect solution! With just a few simple ingredients—rolled oats, cocoa powder, peanut butter, and sweeteners—you can whip these up in no time.
Start by heating your sugar, milk, and butter until boiling, then stir in the cocoa and peanut butter. Mix in the oats, drop spoonfuls onto parchment paper, and let them cool to set.
For fun chocolate variations, consider adding chocolate chips, nuts, or shredded coconut into the mix. Here are some quick tips: work quickly to form the cookies before the mixture cools too much, and store leftovers in an airtight container for a week.
Enjoy your easy, no-bake indulgence!
Cinnamon Sugar Puff Pastry Twists: Flaky and Fun
Whether you’re looking for a quick snack or a delightful dessert to impress guests, cinnamon sugar puff pastry twists are a fantastic choice.
With just a few simple baking techniques, you can create a flaky treat that’s both fun and delicious. Here’s how to make them:
- Prepare the Puff Pastry: Roll out store-bought puff pastry and cut it into strips.
- Add the Flavor: Brush the strips with melted butter, then sprinkle a generous mixture of cinnamon and sugar.
- Twist and Bake: Twist each strip and place them on a baking sheet. Bake until golden brown and flaky.
These twists are perfect for any occasion, and you’ll love how easy they’re to whip up!
Fruit and Yogurt Parfait: A Healthy Indulgence
After enjoying the delightful crunch of cinnamon sugar puff pastry twists, you might want to balance out your sweet treats with something that feels just as indulgent but is a bit healthier.
After savoring the crispy sweetness of puff pastry twists, consider a healthier yet indulgent treat to balance your cravings.
A fruit and yogurt parfait is perfect for this! Layer your favorite yogurt, packed with yogurt nutrition, with fresh fruits like berries, bananas, or peaches. You can customize parfait variations by adding granola for crunch, honey for sweetness, or nuts for extra protein.
This dessert not only satisfies your sweet tooth but also provides essential vitamins and minerals. Plus, it’s incredibly simple to prepare; just layer and enjoy.
Immerse yourself in this delicious, guilt-free treat that’s great for breakfast, a snack, or dessert!
Conclusion
With these 18 no-mixer desserts at your fingertips, you’re all set to whip up sweet memories in your kitchen. Whether you’re craving the gooey warmth of chocolate chip cookie bars or the creamy delight of no-bake cheesecake, each recipe is a ticket to a delicious adventure. So grab your ingredients, roll up your sleeves, and let the magic unfold. Before you know it, your home will be filled with the sweet aroma of homemade treats, like a cozy hug for your taste buds.