You can create a stunning gingerbread house this holiday season with a simple recipe and some creativity. Start with 4 cups of all-purpose flour, 1 cup each of brown sugar and unsalted butter, and 1 cup of molasses. After chilling your dough, roll it out and cut out shapes using a template. Bake at 350°F for 10-12 minutes. For assembly, use thick royal icing to secure the pieces, letting it set for at least an hour. Don't forget to get creative with your decorations; vibrant icing and candies bring your house to life. There's plenty more to explore!
Ingredients for Gingerbread House
When making a gingerbread house, you'll typically need a few essential ingredients. The foundation of your gingerbread house recipe consists of 4 cups of all-purpose flour, 1 cup of brown sugar, 1 cup of unsalted butter, 1 cup of molasses, and 1 tablespoon of ground ginger.
Molasses is vital for achieving that deep color and distinctive flavor that makes gingerbread so special. If you're in a pinch, you can substitute molasses with dark corn syrup, honey, or maple syrup in equal weight.
For the best structural integrity, consider using vegetable shortening in your recipe, though it won't add to the flavor profile. The dough you'll make, known as gingerbread cookie dough, typically yields enough for about 1.5 to 2 houses, perfect for your holiday season gatherings.
While the base recipe is solid, you can enhance the aroma and visual appeal by adding optional spices like cinnamon and nutmeg. These ingredients not only provide flavor but also make your gingerbread house a festive centerpiece.
With these ingredients for gingerbread house in hand, you're set to create a delicious masterpiece!
Preparation and Dough Tips
When making your gingerbread dough, proper storage and chilling are key to achieving the best results. To enhance the flavor, consider incorporating festive spices like cinnamon or nutmeg, reminiscent of popular holiday treats such as Peppermint Meringues.
You'll want to wrap the dough tightly in plastic and refrigerate it for at least 2 hours, or up to 3 days, to develop flavor and texture.
Freezing the rolled-out dough for 20 minutes before cutting shapes also helps prevent stickiness, making it easier to work with.
Dough Storage Recommendations
To achieve the best results with your gingerbread house, proper dough storage is key. Refrigerating your gingerbread dough not only enhances its workability but also allows it to rest before you roll it out.
Here are some recommendations for ideal dough storage:
- Wrap the dough tightly in plastic wrap to prevent it from drying out or absorbing unwanted odors.
- You can refrigerate the dough for up to 3 days, making it easy to prepare in advance.
- If you need more time, freeze the dough for up to 3 months for convenience.
- To make rolling easier, chill the dough for about 20 minutes to guarantee it's more manageable.
- Consider portioning the dough into equal balls before refrigerating; this allows for easier rolling and shaping when you're ready to bake.
Chilling Techniques Explained
Chilling your gingerbread dough properly is vital for achieving the best results. Start by chilling the gingerbread dough for at least 20 minutes. This short chilling period helps reduce stickiness, making it easier to roll out to the desired thickness of 1/4 inch.
For ideal results, you can refrigerate the dough wrapped in plastic for 2 hours to 3 days. This not only allows flavors to develop but also improves workability.
To make the process smoother, consider portioning the dough into equal balls before chilling. This technique facilitates easier rolling and guarantees consistency in your final shapes.
If the dough becomes too warm while you're handling it, don't hesitate to return it to the refrigerator briefly to maintain its structural integrity.
Proper chilling is essential since it prevents the dough from spreading during baking, making sure that the cut shapes retain their design for assembly.
Baking and Assembly Steps

Get ready to bake your gingerbread house by preheating the oven to 350°F (177°C). Roll out your chilled dough to a thickness of 1/4 inch, then use a gingerbread house template to cut out the shapes that include iconic features like the front door and windows.
It's time to bake the pieces! Place them in the oven for 10-12 minutes until firm, and once done, cool completely on a wire rack to guarantee structural integrity.
Now, let's assemble your gingerbread house. Use thick royal icing as an adhesive; apply it along the edges of each piece to create strong bonds. Allow the structure to set for at least an hour before moving on to the roof assembly.
For the roof, pipe icing along the top edges of the house, carefully positioning the roof pieces while holding them in place until they're partially set for stability. You can also enhance your design by adding intricate details that reflect Hobbit architecture.
Here's a quick checklist to follow:
- Roll out dough and cut using the gingerbread house template.
- Bake the pieces and cool completely.
- Apply thick royal icing to assemble the house.
- Assemble the chimney if desired.
- Allow the entire structure to dry for 3-6 hours before decorating a gingerbread masterpiece.
Icing and Decoration Techniques
Now that your gingerbread house is assembled, it's time to focus on icing and decorations.
You'll want to prepare royal icing for a sturdy hold, which is essential for ensuring your decorations stay in place.
Experiment with vibrant icing colors and playful patterns to make your gingerbread house truly stand out, enhancing it with elements from festive sugar cookie recipes and techniques.
Explore creative ways to embellish your masterpiece with candies.
Let's get started on making your house not just structurally sound, but also a festive delight!
Royal Icing Preparation Tips
When it comes to creating stunning gingerbread houses, mastering royal icing is essential for both assembly and decoration. To achieve that perfect thick consistency, combine powdered sugar, egg whites or meringue powder, and a bit of water.
Here are some tips to guarantee your royal icing works like a charm:
- Achieve the right consistency: Make sure your icing is stiff enough for structural support when assembling your house but can be thinned slightly with water for intricate designs.
- Use piping bags: Control your application with piping bags or homemade freezer bags with a small cut in the corner for detailed decorating.
- Set time: Allow royal icing to set for at least 1 hour after assembly to guarantee stability and prevent pieces from shifting during decoration.
- Prevent drying out: Keep a damp towel over the bowl or cover it with plastic wrap when your icing isn't in use to avoid it drying out.
- Practice patience: Take your time when creating intricate designs; rushed work can lead to messy results.
With these tips, you'll be well on your way to crafting a beautifully decorated gingerbread house!
Creative Decoration Ideas
After mastering royal icing, you're ready to explore creative decoration ideas that will make your gingerbread house truly unique.
Start by using a piping bag to apply royal icing with precision, adding intricate designs to your gingerbread house pieces. This icing not only secures your candy decorations but also mimics the look of snow on rooftops.
Next, reveal a candy variety to embellish your creation. Incorporate colorful gumdrops, M&Ms, and candy canes to create visual interest and festive charm.
Don't hesitate to sprinkle on some edible glitter for an extra magical touch.
To add depth, focus on textural contrast in your decorations. Use crushed cookies for pathways and waffle-patterned cookies for the roof tiles.
These different textures will elevate the overall design and make your gingerbread house stand out.
User Experiences and Feedback

User experiences with the gingerbread house recipe reveal a strong sense of satisfaction and creativity. Many users appreciate how easy it's to follow the recipe, resulting in delicious outcomes that everyone loves.
The simplicity of the process makes it accessible for all skill levels, similar to how healthy gluten-free cookie recipes cater to different dietary needs. Successful construction of gingerbread houses emphasizes the recipe's structural integrity, which is essential for assembly.
While feedback is overwhelmingly positive, some users have offered constructive criticism regarding dough consistency, suggesting minor adjustments for ideal results.
Here are some highlights from user experiences:
- High satisfaction with the recipe's ease of use.
- Many report strong structural integrity during construction.
- Users share unique decorating ideas, showcasing creativity.
- Personal modifications foster community engagement and sharing of tips.
- Trust in the recipe builds pride in users' gingerbread house creations.
Storage and Advance Preparation
To keep your gingerbread house creations fresh and ready for decorating, proper storage and advance preparation are key. After baking, you can store your gingerbread pieces at room temperature for up to a week or freeze them for three months to maintain freshness.
If you plan to use royal icing, prepare it one day in advance and let it sit at room temperature until you're ready to assemble. For a healthier twist on your gingerbread house, consider using healthier ingredient swaps like almond flour or natural sweeteners in your dough.
For the best results, chill the gingerbread dough wrapped in plastic for at least two hours, or store it in the refrigerator for up to three days. This helps achieve ideal dough consistency for gingerbread house making.
When you're ready to assemble, make sure to allow your house to set for at least three to six hours. This waiting period is vital for ensuring structural stability before you start decorating.
If you want to spread the decorating process over multiple days, consider assembling your gingerbread house a day ahead. This advance preparation will streamline your decorating session and help you create a beautiful holiday masterpiece without the last-minute rush.
Planning Your Gingerbread House
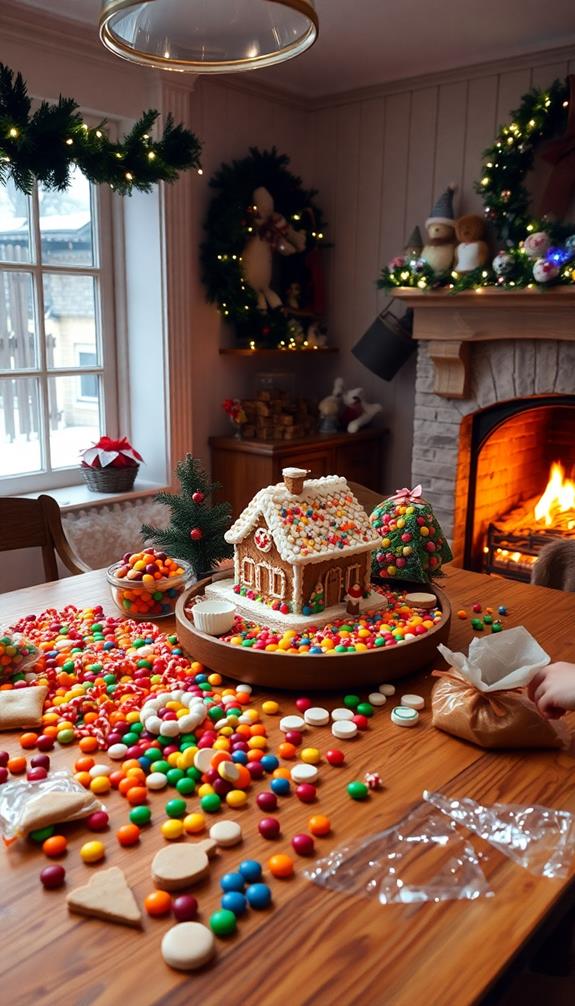
Planning your gingerbread house involves careful organization and timing to guarantee a smooth building process. Start by gathering all necessary ingredients and tools at least four days before your construction day. This helps you stay on track and reduces stress.
Consider incorporating elements like traditional Scandinavian desserts to inspire your decorations! Here's a quick plan to follow:
- Day 1: Gather ingredients like flour and molasses, and tools like a rolling pin and cookie cutters.
- Day 2: Prepare the dough and chill it, using a gingerbread house pattern to cut out template pieces.
- Day 3: Preheat your oven to 350°F (177°C), prepare baking sheets with parchment paper, and bake the pieces.
- Day 4: Allow the baked pieces to cool completely to guarantee stability before you assemble the house.
- Decorating Day: Use royal icing to make your decorations and attach the cooled house pieces.
Following this timeline will help you efficiently make gingerbread houses.
Conclusion
So, go ahead and embrace the chaos of gingerbread house-making! After all, who wouldn't want to spend hours crafting a sugar-laden masterpiece, only to watch it crumble under the weight of your holiday dreams? But hey, nothing screams festive spirit quite like a little glue-gunning and a dash of frustration. In the end, you'll either create a whimsical wonder or a dessert disaster—either way, it's a sweet memory worth savoring (and possibly sharing on social media)!

