You're about to enjoy a fun and easy garbage cookies recipe that turns your pantry leftovers into delicious treats! Start with a buttery base made from flour, sugar, butter, and eggs. Mix in chocolate chips, pretzels, nuts, or any snack you have on hand. Chill the dough for at least 30 minutes before baking at 350°F for 9-15 minutes. This guarantees a chewy center with crispy edges. Feel free to experiment with various mix-ins for a unique flavor experience. Want to know storage tips and other creative ideas? There's more to discover to make these cookies even better!
Overview of Garbage Cookies
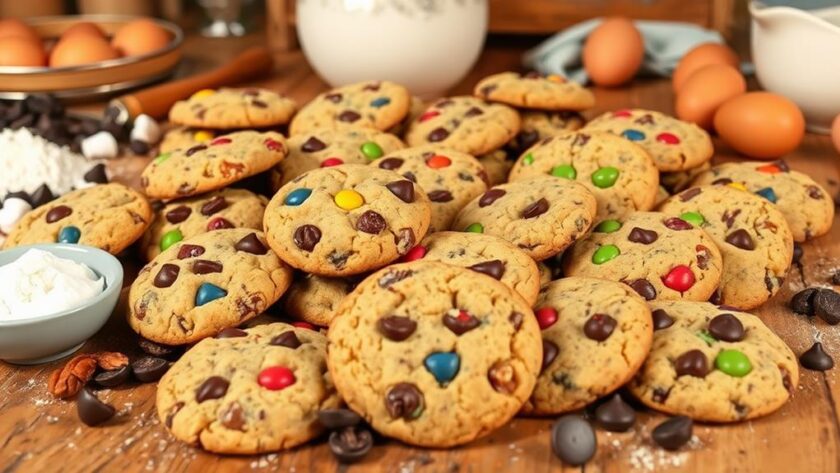
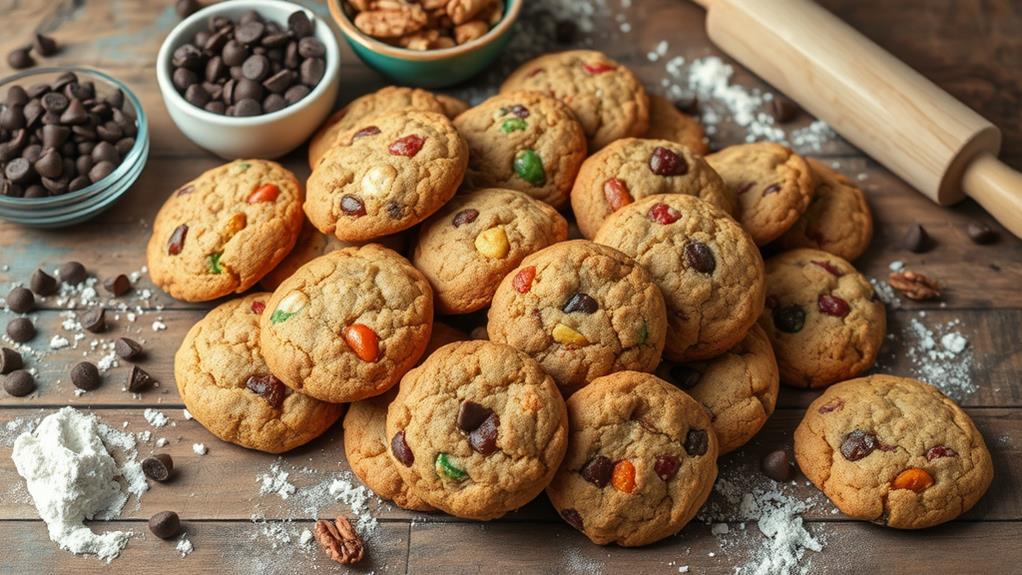
Garbage Cookies, often referred to as Compost Cookies, are a delightful way to turn leftover snacks into a tasty treat. This creative cookie recipe, made famous by Christina Tosi from Momofuku Milk Bar, lets you mix and match a variety of ingredients, ensuring you get a unique flavor with every batch.
Featuring a buttery base and a chewy center, these cookies have crisp edges that perfectly complement the sweet and salty mix-ins. You can also incorporate gluten-free options like almond flour or coconut flour for a healthier twist, making these cookies suitable for health-conscious individuals 7 Healthy Gluten-Free Cookie Recipes.
What sets garbage cookies apart is their versatility. You can toss in chocolate chips, peanut butter chips, pretzels, nuts, or any snacks you have lying around. Whether it's granola or candy, the possibilities are endless, making it easy to experiment with flavors that suit your taste.
The result? A deliciously diverse cookie that highlights the beauty of using up leftovers.
Fresh out of the oven, these cookies are unbeatable, but you can store them in an airtight container for up to five days or freeze them for longer enjoyment.
Key Ingredients
To create delicious garbage cookies, you'll need a few key ingredients that form the foundation of this treat. Start with all-purpose flour and granulated sugar, which give your cookies structure and sweetness. Don't forget the butter; it adds richness and a delightful chewiness to every bite.
Notably, the concept of cookies has a rich history, with chocolate chip cookies being invented by Ruth Graves Wakefield in 1938 at the Toll House Inn, where the first chocolate chip cookie was created. You'll also want some brown sugar for an extra layer of flavor.
For the perfect texture, you'll need eggs, which help bind everything together. Essential leavening agents like baking soda and baking powder are vital too—they'll give your cookies that soft rise you crave.
Now, let's talk about the fun part: mix-ins! Chocolate chips are a must, but you can also throw in pretzels, nuts, or your favorite candy pieces for added crunch and flavor.
If you're feeling adventurous, consider adding oats or crushed graham crackers to enhance the texture. A touch of corn syrup can help achieve a chewy consistency, though you can skip it if you don't have any on hand.
With these key ingredients, you're well on your way to baking mouthwatering garbage cookies!
Step-by-Step Instructions
Now that you have your ingredients ready, let's get into the nitty-gritty of making your garbage cookies.
You'll want to focus on ingredient preparation techniques and how to properly mix and chill the dough for the best results.
Consider swapping traditional ingredients with healthier alternatives, such as using nutrient-rich flours like almond or coconut flour to boost the nutritional value of your cookies.
Ingredient Preparation Techniques
Gathering all your essential ingredients is the crucial first step in making delicious Garbage Cookies. You'll need softened butter, granulated sugar, brown sugar, eggs, flour, baking soda, salt, and your choice of mix-ins like chocolate chips, pretzels, or nuts.
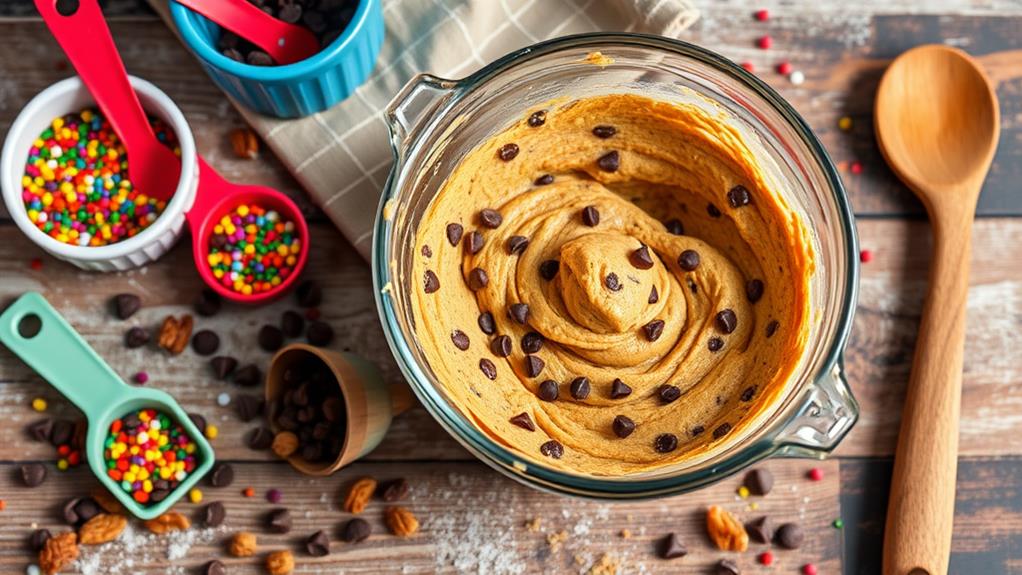
Start by creaming together the softened butter, granulated sugar, and brown sugar in a large bowl. Mix this until the mixture is pale and fluffy, which should take about 2-3 minutes.
Next, incorporate the eggs one at a time, mixing well after each addition. Don't forget to add a splash of vanilla extract for that extra flavor boost!
In a separate bowl, whisk together the dry ingredients, including flour, baking soda, and salt. Gradually fold these dry ingredients into your wet mixture to avoid overmixing, which could affect the texture of your cookies.
Mixing and Chilling Dough
Mixing the cookie dough is where the magic begins, turning simple ingredients into a delightful treat. Start by creaming together softened butter, granulated sugar, and brown sugar for about 2 to 3 minutes until the mixture is light and fluffy. This guarantees the sugars dissolve properly, setting the base for your cookies.
Next, you'll want to incorporate eggs and vanilla extract one at a time, mixing until fully combined to add moisture and flavor.
Then, follow these steps to mix your dough:
- In a separate bowl, whisk together dry ingredients like all-purpose flour, baking soda, and salt.
- Gradually stir together the dry mixture into the wet ingredients, being careful not to overmix.
- Fold in your favorite mix-ins—chocolate chips, pretzels, and nuts—until just combined, and reserve some for topping if you like.
- Finally, chill the prepared dough in the refrigerator for at least 30 minutes. This helps control the cookie shape and enhances the flavors.
Once the dough is chilled, you're all set for baking! Enjoy the process as you create these scrumptious cookies.
Baking and Cooling Tips
Preheat your oven to 350°F (or 375°F if you prefer a slightly crispier cookie) and line your baking sheets with parchment paper or silicone mats to make cleanup a breeze.
Once your dough is ready and has chilled for at least 30 minutes, scoop out portions and place them on the prepared baking sheets, ensuring enough space between each cookie for spreading.
Now, it's time to bake cookies! Pop them in the oven and set a timer for 9-15 minutes, depending on how chewy you want them. Keep an eye on them; they're done when the edges are golden but the centers remain soft.
After they're baked, let your cookies cool on the baking sheet for about 5-7 minutes. This step helps them set up properly, making it easier to transfer them without breaking.
Once they're slightly cool, move them to wire racks to cool completely. Enjoy the delightful aroma filling your kitchen while you wait for your delicious garbage cookies to be ready!
Customization Ideas
Often, you'll find that customizing your Garbage Cookies can elevate them to a whole new level of deliciousness.
With just a few tweaks, you can make these treats uniquely yours, similar to how classic Italian desserts like Cassata Cake are enhanced through unique flavor combinations.
Here are some fun customization ideas to get you started:
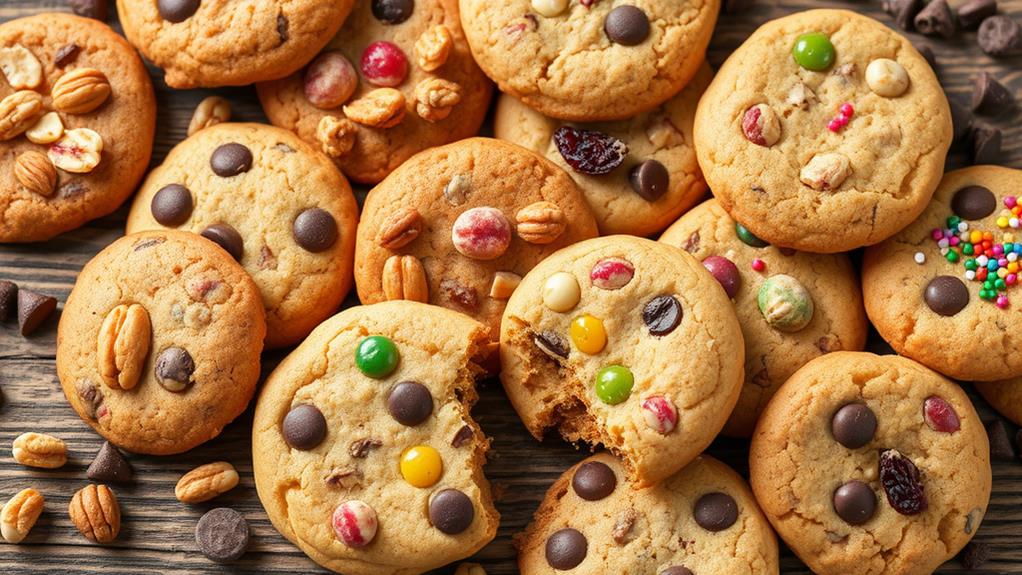
- Chocolate Chips: Experiment with different types of chocolate chips like dark, milk, or white chocolate. Each variety will bring its own flavor profile to the mix.
- Salty Snacks: Incorporate crushed salty snacks such as pretzels, potato chips, or Fritos. This adds a delightful crunch and enhances the salty-sweet balance.
- Dried Fruits: Toss in some dried fruits like cranberries or raisins. They provide a chewy texture and a hint of natural sweetness that complements the other ingredients.
- Graham Crackers: For an unexpected twist, mix in crushed graham crackers or even cereal. This adds texture and a slight hint of nostalgia to your cookies.
Feel free to get creative with your combinations, and don't hesitate to try using flavored nut butters like almond or cashew for an extra nutty kick.
Your Garbage Cookies will never be the same!
Baking Tips
To get the best results with your garbage cookies, chilling the dough for at least 30 minutes is key; it helps maintain their shape and boosts flavor.
Consider using healthier ingredient swaps like almond flour or oats for added fiber and protein.
Don't forget to mix in a variety of sweet and salty snacks like chocolate chips and pretzels for a deliciously balanced treat.
These simple tips can make a big difference in your baking success!
Dough Chilling Importance
Chilling your cookie dough is essential for achieving the perfect cookie. When you take the time to refrigerate your dough, you control the shape during baking and prevent unwanted spreading.
Here are some key benefits of dough chilling:
- Flavor Concentration: Chilling allows the flavors to develop and intensify, resulting in a more delicious cookie.
- Desired Texture: Refrigerating the dough firms up the butter, giving you that ideal crisp edge while keeping the center soft and chewy.
- Cookie Structure: Skipping this step can lead to thinner cookies that lack the texture and structure you want.
- Optimal Results: For the best flavor and texture, try refrigerating your dough overnight. It makes a noticeable difference in your final baked cookies.
Mix-In Combinations Suggestions
After you've chilled your cookie dough, it's time to get creative with mix-ins that can elevate your garbage cookies to a whole new level.
Start by combining classic chocolate chips with crushed potato chips or pretzels for a delightful sweet and salty balance. Aim for 1.5 cups of assorted mix-ins, mixing chewy ingredients like oats with crunchy options like broken graham crackers or nuts.
For an extra layer of richness, add 1/2 cup of peanut butter or almond butter to the dough. This addition complements the sweetness of chocolate while introducing a delicious creaminess.
Don't shy away from using leftover snacks; Fritos or tortilla chips can provide a unique twist that enhances that salty-sweet combination you're after.
You can also incorporate dried fruits or seeds to introduce additional flavors and textures, which will enhance your cookie creation.
Storage Recommendations
Storing your Garbage Cookies properly guarantees they stay fresh and delicious for as long as possible. Here are some storage recommendations to keep in mind:
- Airtight Container: Keep your cookies in an airtight container at room temperature for up to 3-4 days. This helps maintain their freshness and texture.
- Freeze Cookies: For longer storage, you can freeze cookies in double-bagged freezer bags. Make sure to remove as much air as possible to prevent freezer burn. They'll last for up to 2 months!
- Thaw at Room Temperature: When you're ready to enjoy those frozen cookies, just let them thaw at room temperature for about 30 minutes. This will improve their texture and flavor.
- Storing Cookie Dough: If you want to save cookie dough for later, wrap it tightly in plastic wrap and store it in the freezer for up to 3 months. This way, you can bake fresh cookies whenever you want!
For a delightful treat, reheat your cookies in a preheated oven at 350°F for 5-7 minutes, restoring their soft and chewy texture before serving. Happy snacking!
Reader Feedback and Variations
Bakers love sharing their experiences with Garbage Cookies, and the feedback often showcases creative variations that elevate this treat. Many of you have reported success by incorporating leftover candies or sweet and salty snacks, enhancing the uniqueness of each batch.
Experimenting with different types of nuts and chocolate chips can also lead to your signature version of these crowd-pleasing cookies.
Adjusting the quantities of mix-ins is a common theme in reader comments. You might want to try using 1 to 1.5 cups of various ingredients to strike the perfect balance of flavors. Some bakers have even added savory elements like pretzels, proving that there's no wrong way to make these cookies.
Positive reviews often highlight the cookies' ability to please a crowd, especially when you include colorful M&Ms or seasonal sprinkles for festive occasions.
Plus, the joy of using pantry leftovers makes Garbage Cookies a practical and creative baking choice. So, whether you stick to classic ingredients or get adventurous with your mix-ins, you're bound to create a batch that delights everyone!
Conclusion
Garbage cookies are like a delightful surprise in every bite, blending flavors and textures to create a treat that's sure to please everyone. With their endless customization options, you can easily make them your own. So, gather your favorite mix-ins, follow the simple steps, and enjoy the delicious chaos that comes from baking these fun cookies. Whether for a snack or a party, they're bound to be a hit. Happy baking!