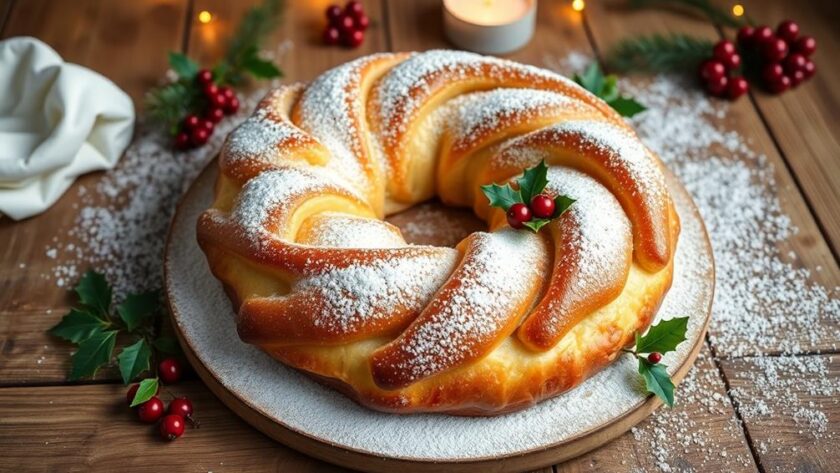
You're about to embrace the joy of making a Danish Christmas Kringle, a festive pastry filled with rich flavors and tradition. Start with all-purpose flour, warm milk, and butter to create a smooth dough. Don't forget the almond filling—it's essential for that authentic taste. After letting your dough rise and chill, shape it into a delightful wreath or braid. Bake until golden and finish with a sweet glaze. This Kringle isn't just a treat; it embodies togetherness during the holidays. Keep exploring to uncover variations and tips that'll elevate your baking experience!
Cultural Significance of Kringle
Kringle isn't just a delicious pastry; it carries deep cultural significance, especially during the holiday season. As a traditional Danish holiday treat, it embodies the spirit of hygge, promoting comfort and coziness during Christmas celebrations.
You might find Kringle at family gatherings, where its flaky layers and sweet fillings, like almond paste, create a festive atmosphere that brings everyone together. The preparation of Kringle often includes unique elements like evaporated milk for richness, enhancing its flavor and texture.
Originating from Danish immigrants in the late 1800s, Kringle has woven itself into the cultural heritage of the Midwestern United States, marking its place as Wisconsin's state pastry. This beloved pastry often marks special occasions, from birthdays to holidays, showcasing regional variations that reflect the diverse traditions within Denmark.
When you indulge in a warm slice of Kringle alongside your coffee, you're not just enjoying a treat; you're participating in a rich tapestry of family customs and festive spirit. Each bite carries stories of gatherings past, making it a cherished component of your holiday celebrations.
Whether it's filled with fruit preserves or cream cheese, Kringle remains a symbol of togetherness and joy, ensuring that each special occasion is memorable.
Essential Ingredients
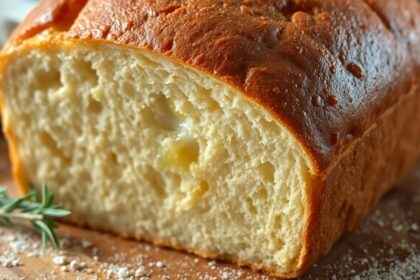
To whip up a delightful Danish Christmas Kringle, you'll need a handful of essential ingredients that come together to create its signature flaky texture and rich flavor. Start with all-purpose flour, which forms the base of your dough, along with active dry yeast, warm milk, and butter.
These elements combine to give your Kringle its delicious, buttery foundation. This pastry is reminiscent of other festive treats, such as the Norwegian Kransekake, known for its stunning presentation and chewy texture.
For the filling, almond filling is a must. You'll mix almond paste with sugar, egg, and spices like cinnamon and cardamom to enhance the flavor profile.
This fragrant mixture is what makes each bite truly irresistible. If you want to get creative, consider adding optional ingredients like cream cheese, chopped nuts, or fruit preserves to personalize your filling.
Once your Kringle is baked to golden perfection, don't forget the glaze! A simple mixture of confectioners' sugar and water or vanilla provides a sweet finish that complements the pastry beautifully.
With these easily accessible ingredients, you can craft a traditional Danish treat that's sure to impress your family and friends during the festive season. Enjoy the process, and savor every delicious bite!
Dough Preparation Steps
Now that you've gathered your essential ingredients, let's focus on the dough preparation steps.
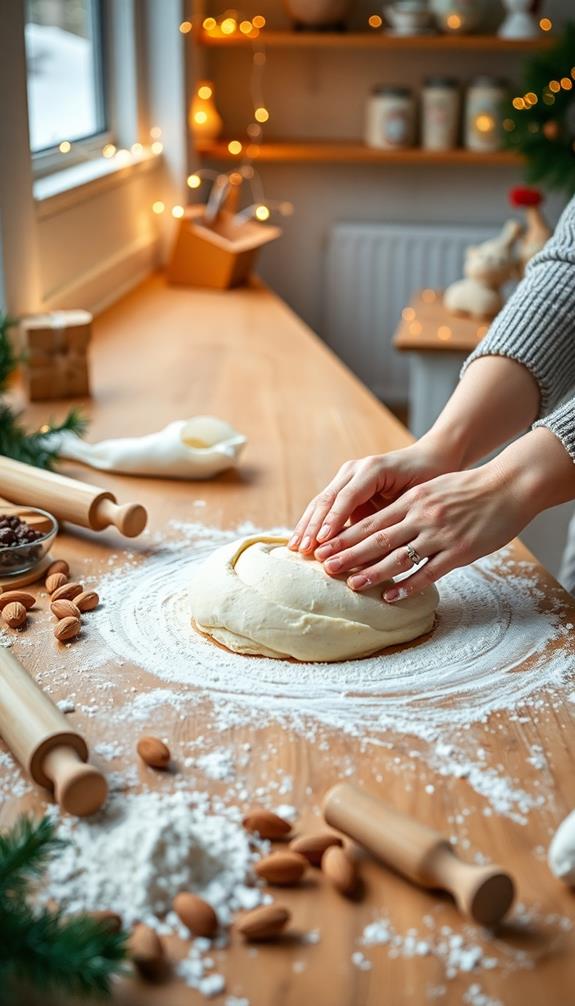
You'll mix and knead the ingredients carefully to create a smooth texture, guaranteeing that you keep your butter cold for a flaky texture.
Following this, an important chilling and rising process will make certain your kringle turns out light and flaky, ready for shaping.
Essential Ingredients Overview
When you begin making Danish Christmas Kringle, the foundation lies in the dough preparation, which is important for achieving that perfect flaky texture.
Start by activating your yeast in warm water, allowing it to stand until it becomes foamy—this usually takes about 5-10 minutes.
Meanwhile, combine scalded milk with egg yolk, granulated sugar, cardamom, and salt to create a rich base for your Danish pastry dough.
Next, gradually add flour, starting with 1 cup, followed by another 1/2 cup, ensuring the mixture remains smooth.
Incorporate cold butter into the dough, folding it in repeatedly until it fully blends, which is essential for that flaky pastry quality. The dough's texture will improve with each fold.
Once mixed, let the dough rise in a warm place until it doubles in size, which typically takes 1-2 hours.
This step is crucial, as it allows the yeast to work its magic, contributing to the overall flavor and texture of your Kringle.
With the dough prepared, you're ready to shape and bake your festive treat!
Mixing and Kneading Techniques
With the dough ready, you'll want to focus on the mixing and kneading techniques that will bring your Danish Christmas Kringle to life.
Start by activating your active dry yeast; combine it with warm water (110-115°F) and let it sit for 5-10 minutes until foamy. This guarantees a better rise in your dough.
Next, scald some milk and mix in the egg yolk, sugar, cardamom, and salt for flavor. Gradually incorporate flour until you form a smooth dough.
Now, it's time to fold in the cold butter. Do this by incorporating it into the dough repeatedly, but be careful not to overwork the mixture—this will help maintain that flaky pastry texture you desire.
After that, divide the dough in half and roll each portion to about 6 x 18 inches, which is perfect for filling and shaping.
Chilling and Rising Process
Chilling the dough is a significant step that enhances the flakiness of your Danish Christmas Kringle. Begin the chilling process after preparing the dough and let it rest in the refrigerator for at least 4 hours, or up to 2 days. This extended chilling helps develop a flaky texture that's critical for the perfect Kringle.
First, activate the yeast mixture by combining it with warm water, allowing it to stand for 5-10 minutes until it's foamy. This activation is essential for proper leavening.
Once your wet and dry ingredients are mixed, gradually incorporate flour until you have a smooth dough. Then, fold in cold butter repeatedly to create layers.
After the chilling, divide the dough in half and roll each portion to your desired size before shaping. This guarantees even rising and baking.
Allow the shaped dough to rise in a warm environment until it doubles in size, which usually takes about 1-2 hours. This step is crucial for achieving that signature fluffy texture.
The combination of the chilling process and adequate rising will elevate your Kringle to the next level!
Filling Options
When it comes to filling your Danish Christmas Kringle, you've got some delicious options to ponder.
Classic almond filling variations provide a rich, nutty flavor, making them a perfect complement to the flaky pastry.
For those seeking a healthier twist, contemplate using nutty flavor and soft texture from almond flour cookies as inspiration for your filling.
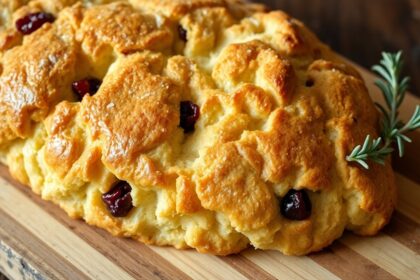
Creative fruit fillings like raspberry or apricot can add a revitalizing sweetness.
Whichever you choose, these fillings will elevate your kringle to festive perfection!
Classic Almond Filling Variations
Elevate your Danish Christmas Kringle by experimenting with classic almond filling variations that can truly transform this festive treat. The traditional almond filling typically features almond paste, powdered sugar, egg white, vanilla, and a pinch of salt. However, you can tweak it to suit your taste.
Here are some delightful variations to contemplate:
- Creamy Bliss: Blend cream cheese with almond paste for a rich, creamy filling that complements the flaky dough beautifully.
- Nutty Crunch: Add chopped pecans or walnuts to your almond filling for a satisfying crunch and deeper flavor.
- Sweet & Tangy: Layer in fruit preserves, like raspberry or apricot, with the almond filling for a sweet and tangy contrast that elevates the overall taste.
You can also sprinkle in spices such as ground cinnamon to create a warm, inviting flavor profile that resonates with the traditions brought by Danish immigrants.
With these variations, your Danish Christmas Kringle won't only be a feast for the eyes but also a celebration of flavors that'll wow your family and friends!
Creative Fruit Filling Ideas
For a delicious twist on your Danish Christmas Kringle, consider incorporating creative fruit fillings that add vibrant flavors and textures.
Start with fruit preserves like spiced raspberry or apricot jam, which introduce a sweet and tangy profile that complements the buttery pastry beautifully. If you prefer a livelier approach, sliced apples or pears mixed with cinnamon create a delightful filling in the center that enhances overall taste and texture.
Dried fruits also shine in this festive pastry. Chopped cherries or cranberries mixed with nuts offer a chewy and flavorful filling option that brings a holiday spirit to your kringle.
For an extra zing, don't forget to add citrus zest, such as orange or lemon. This brightens the flavors and provides a revitalizing contrast to the sweetness.
Lastly, think about combining fruit with cream cheese. This mixture results in a rich, creamy texture that elevates your kringle to indulgent heights.
With these creative fruit filling ideas, your Danish Christmas Kringle won't only taste divine but also look enticingly festive!
Shaping Techniques
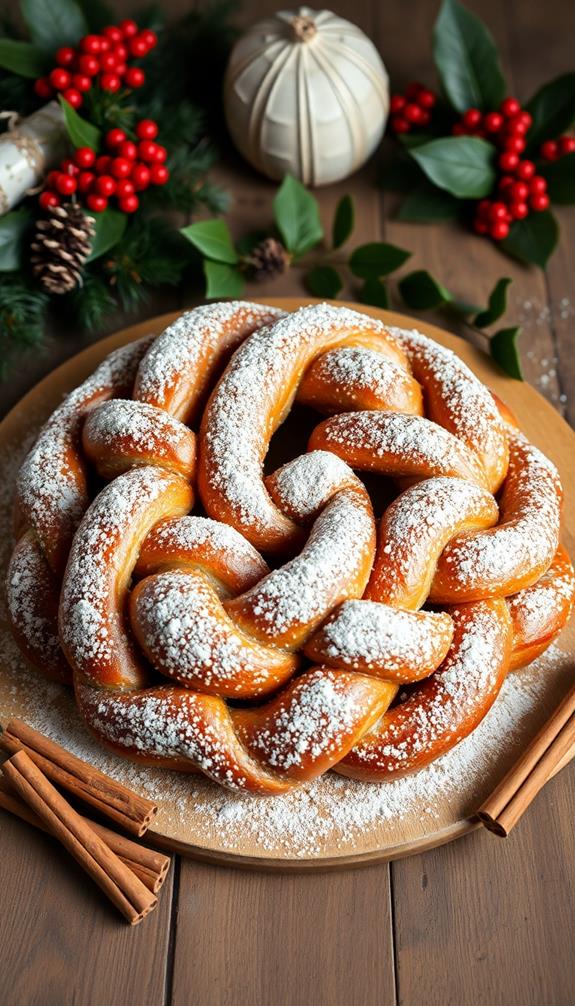
As you prepare to shape your kringle, rolling the dough into a rectangle about 24×24 inches sets the stage for a beautiful pastry. Make certain to sprinkle flour underneath to prevent sticking.
Once you've rolled it out, fold the dough into thirds and then roll it again to a length of 36 inches. This creates a long strip that's perfect for shaping. For consistency in baking, verify you're using the right flour, as seen in baking with gluten-free flour.
Next, cut the rolled dough into strips for braiding or twisting. This not only enhances the visual appeal but also adds texture to your kringle. You can then form the dough into a wreath or oval shape. Pinch the ends together to seal the filling inside, making sure it stays secure during baking.
After shaping, allow the kringle to rise again. This vital step helps achieve that light and fluffy texture you desire.
Here are some tips to keep in mind:
- Use enough flour to prevent sticking.
- Verify your filling is evenly distributed.
- Don't rush the rising process for ideal texture.
With these techniques, your kringle will be both beautiful and delicious!
Baking Instructions
Before you start baking, preheat your oven to 375°F (190°C) and line your baking sheet with parchment paper. If you're looking for a gluten-free alternative, consider using a gluten-free flour blend for a lighter texture and to cater to dietary needs, as gluten-free options can provide delicious treats without compromising flavor.
Once your kringle is shaped, carefully place it on the prepared baking sheet. To achieve that perfect golden, glossy finish, brush the surface with a beaten egg wash.
Now, it's time to bake. Place the baking sheet with parchment in the oven and let the kringle bake until golden brown, which should take about 25-30 minutes. Remember to rotate the baking sheet halfway through to guarantee even browning. Keep an eye on it; you want that beautiful golden color!
After baking, take the kringle out and let it cool completely on a wire rack for a few minutes. This step is essential for ideal texture and flavor.
Once it's cooled, you can assemble the kringle if you haven't already, and drizzle a delicious milk glaze over it. This glaze, made from confectioners' sugar, vanilla, and a pinch of salt, will enhance the sweetness and complete your festive Danish kringle. Enjoy every bite of your holiday creation!
Glazing and Presentation
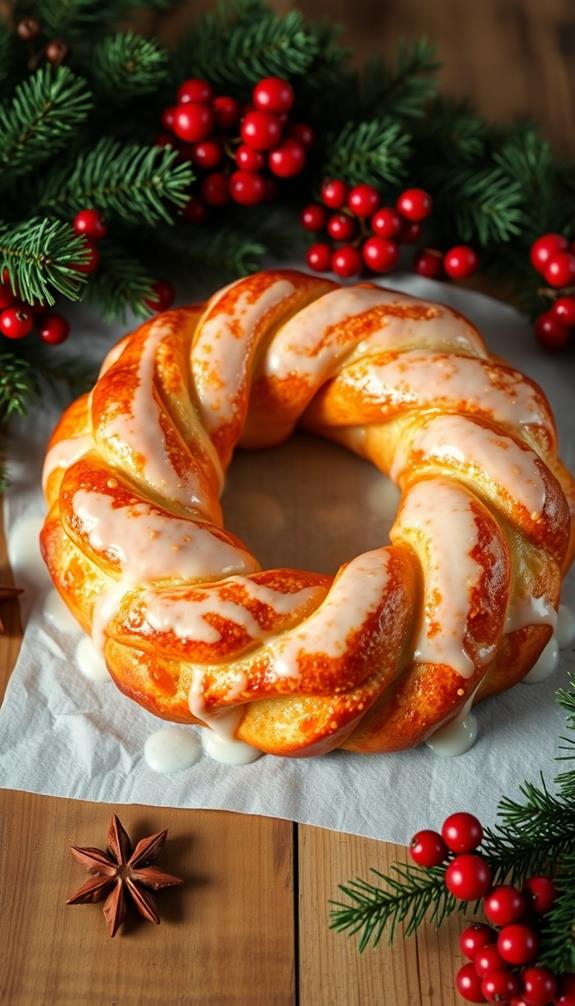
Once your Danish Christmas Kringle has cooled, it's time to dress it up with a delightful glaze that elevates its appearance and flavor. The glaze, made from confectioners sugar, vanilla, and a pinch of salt, creates a sweet finish that perfectly complements the rich pastry.
Like the symbolism of abundance found in traditional treats such as mincemeat pie, this glaze adds a festive touch to your kringle. Make sure to allow the kringle to cool on a baking sheet before applying the glaze to prevent it from becoming too runny.
Here's how you can enhance the presentation:
- Top the glazed kringle with chopped pecans and walnuts for added flavor and a festive touch.
- Use Danish flags as decorative elements to symbolize the cultural heritage of this cherished treat.
- Allow the glaze to set for about 30 minutes, making it simple to prepare for your holiday gatherings or brunches.
With these finishing touches, your Danish Christmas Kringle won't only taste incredible but also look stunning on the table. You'll be proud to serve a pastry that showcases both tradition and festive spirit!
Storage Tips
After enjoying the delightful glaze and presentation of your Danish Christmas Kringle, it's important to know how to store any leftovers properly.
To keep your Kringle fresh, you can store it in an airtight container at room temperature for up to five days. This guarantees that it retains its soft texture and delicious flavor, much like how traditional Julekake is stored to maintain its freshness. Make sure the container is sealed tightly and kept away from moisture to prevent drying out.
If you have more leftovers than you can eat within that time, refrigerate the Kringle for up to three days. When you're ready to enjoy it again, reheat it in the microwave or oven for the best taste.
If you're planning to save your Kringle for a longer period, you can freeze it before adding the icing. Wrap it in two layers of storage wrap and one layer of aluminum foil to protect its flavor and texture. It can stay frozen for up to three months.
When you're ready to indulge in your frozen Kringle, remember to thaw it in the refrigerator overnight and only add the icing once it's completely thawed.
Following these storage tips will help guarantee your Kringle maintains its deliciousness and freshness!
Community Feedback and Variations
Sharing their experiences, bakers in the community have created exciting variations of the traditional Danish Christmas Kringle. One popular twist is substituting cherry pie filling for the classic almond paste, which adds a delightful and unique flavor. Many first-time bakers have praised the recipe's simplicity, often achieving great results with just a few steps.
Here are some popular community suggestions:
- Glaze Enhancements: Incorporate vanilla extract into your glaze for an extra flavor boost.
- Filling Alternatives: Experiment with different fillings like cream cheese or fruit preserves for a homemade Danish twist.
- Egg Wash Techniques: Lightly brush the dough with an egg wash for a beautiful golden finish.
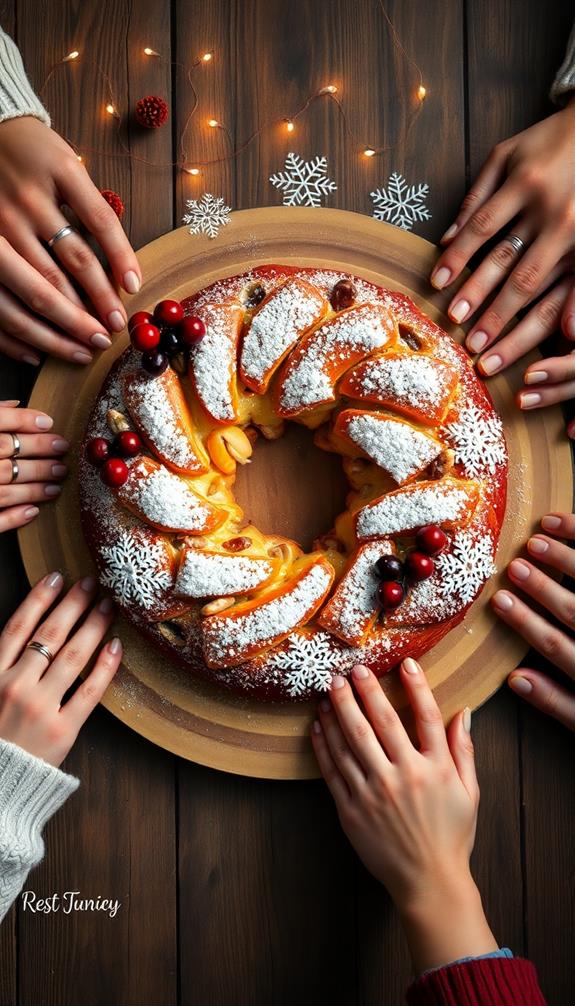
The community feedback highlights how the Kringle has become a cherished holiday treat, often passed down through generations. As families gather to make this pastry, they share their creative modifications, celebrating their baking successes on social media.
Conclusion
In the heart of every festive gathering, the Danish Christmas kringle symbolizes warmth and togetherness. As you share this delightful pastry, its golden layers mirror the joy of the season, while the sweet fillings reflect cherished memories. Each slice is a bridge connecting generations, inviting laughter and love around the table. So, as you bake and savor your kringle, remember: it's not just a treat; it's a celebration of tradition that brings us all closer together.