To master cruffins from scratch, you’ll need to combine the flaky layers of croissants with the softness of muffins. Start with high-quality ingredients, like European-style butter and all-purpose flour, to achieve the perfect texture. Use reliable yeast for a good rise and invest in the right tools, like a muffin tin and rolling pin. Focus on rolling and folding techniques to create those beautiful layers. There’s plenty more to explore about fillings and serving suggestions ahead!
What Are Cruffins and Why You’ll Love Them?
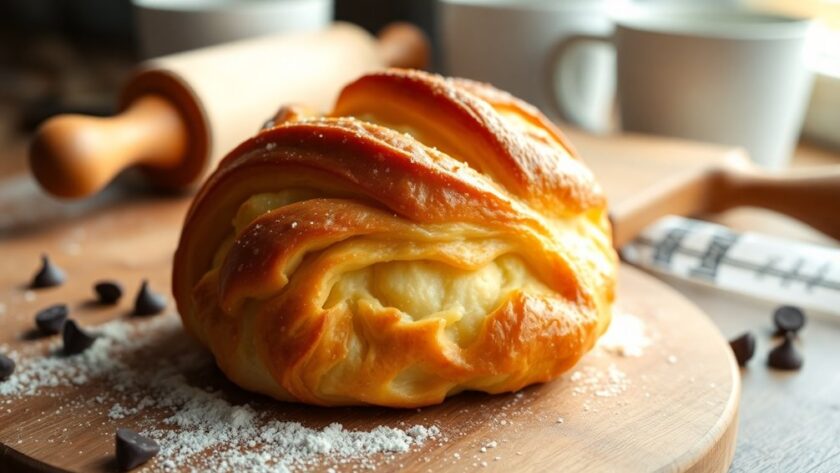
Cruffins are a delightful hybrid pastry that combines the flaky texture of a croissant with the soft, sweet qualities of a muffin.
Originating in the culinary scene of San Francisco, cruffins have quickly gained popularity since their debut in 2013. They are often celebrated for their nutritional benefits that can be enhanced with wholesome fillings and ingredients. You can even experiment with gluten-free options to make these delicious treats suitable for various dietary needs.
You’ll love them for their unique taste and versatility, as they can be filled with various delightful fillings like cream cheese, jam, or chocolate.
The cruffin history reflects a creative evolution in pastry-making, catering to both croissant lovers and muffin enthusiasts alike.
With their impressive appearance and irresistible flavors, cruffins make for perfect breakfast treats or indulgent snacks.
Once you take a bite, you’ll understand why this trendy pastry has captured the hearts of foodies everywhere. Additionally, the process of making cruffins requires a laminated dough process similar to that of croissants, ensuring that they have the signature flaky layers that make them so appealing.
Essential Ingredients for Perfect Cruffins
To make perfect cruffins, you need to pay attention to your ingredients.
The type of flour, the quality of butter, and your choice of yeast all play essential roles in the final product. High-quality European-style butters with at least 82% butterfat are recommended for achieving the best texture and flavor. Additionally, gluten-free flour can be used as an alternative for those with dietary restrictions. Let’s explore how each of these elements can elevate your cruffins to the next level. Proper conditioning of the butter is critical for achieving flakiness in pastries.
Flour Type Matters
When it comes to creating the perfect cruffin, the type of flour you choose can greatly impact the texture and flavor of your pastry.
Opt for all-purpose flour with a moderate flour protein content, about 10-12%. This balance provides the right structure without making your cruffins too dense. Higher protein flours, like bread flour, can create a chewier texture, which isn’t ideal for this delicate treat. Additionally, puff pastry relies on a meticulous lamination process that contributes to its flakiness, which is something you want to emulate in your cruffins. The importance of ingredient balance cannot be overstated, as it directly influences the final outcome of your pastry.
You want a light, flaky cruffin that still holds its shape. The flour texture should be fine and soft, allowing it to blend seamlessly with the other ingredients. Additionally, using high-fat, unsalted butter in your recipe will enhance the flakiness and richness of your cruffins.
Experimenting with different flour types will help you discover the perfect combination for those irresistible, buttery layers that define a great cruffin.
Importance Of Butter
The choice of butter is just as essential as selecting the right flour for your cruffins. High butter quality makes a significant difference in flavor and texture, so opt for unsalted European-style butter if you can. This type of butter has a higher fat content, resulting in flakier and richer cruffins.
Butter temperature also plays a vital role. It should be cold but pliable when you incorporate it into your dough. This allows for the perfect lamination process, creating those delectable layers. If your butter’s too warm, it’ll blend too easily into the dough, resulting in a denser texture. So, remember, the right butter quality and temperature are key to mastering your cruffins! Additionally, incorporating whipped shortbread cookies into your baking repertoire will enhance your overall pastry skills and understanding of texture.
Yeast Selection Tips
While you might think any yeast will do, choosing the right one is essential for achieving the perfect cruffins.
You’ll typically want to use active dry yeast or instant yeast, as both types offer convenience and reliability. Active dry yeast requires proofing, while instant yeast can be mixed directly with the dry ingredients, speeding up your preparation.
The fermentation process is significant; it helps develop the flavors and texture that make cruffins irresistible. Make sure your yeast is fresh, as old yeast can result in poor rise and dense pastries.
Experimenting with different yeast types can also yield unique flavors, so don’t hesitate to try them out and find your favorite for those delicious, flaky cruffins!
The Equipment You Need for Baking Cruffins
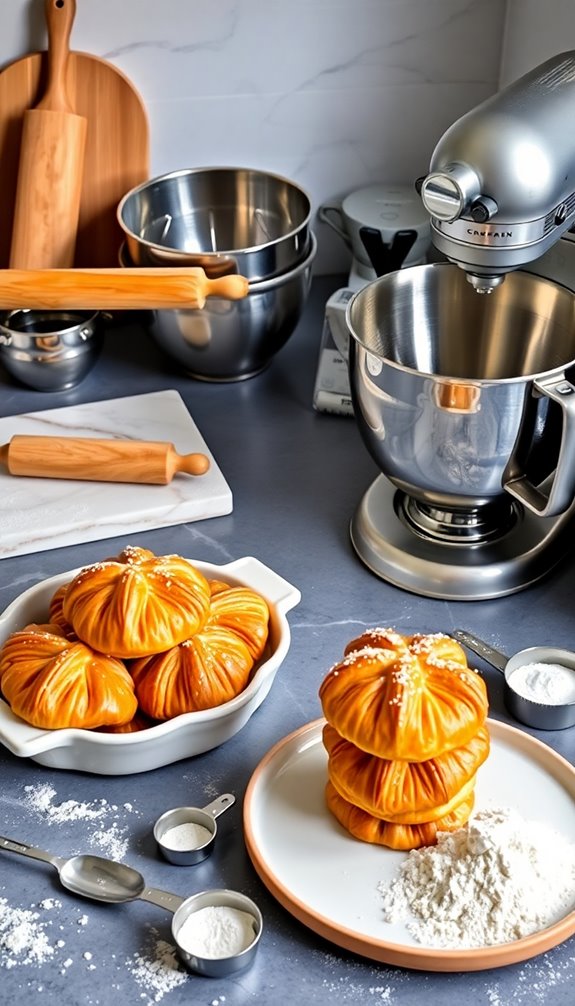
When baking cruffins, having the right equipment is key to your success.
You’ll need essential baking tools, a suitable oven, and accurate measuring equipment to guarantee your creations turn out perfectly.
Let’s explore what you’ll need to get started.
Essential Baking Tools
To bake delicious cruffins from scratch, you’ll need a few essential baking tools that make the process smoother and more enjoyable.
Start with a high-quality rolling pin; it’ll help you achieve that perfect dough thickness. A sturdy bench scraper is also vital for managing your dough and making clean cuts.
Don’t forget a good set of measuring cups and spoons, as accuracy is key in baking. A muffin tin is essential for shaping your cruffins, while a silicone pastry brush will help you apply melted butter evenly.
Finally, a baking mat or parchment paper will guarantee easy removal and cleanup.
With the right kitchen equipment in hand, you’ll be well on your way to mastering this delightful hybrid treat!
Recommended Oven Types
Choosing the right oven can make all the difference in baking perfect cruffins, so it’s essential to contemplate a few key features.
Convection ovens are a fantastic choice because they circulate hot air, ensuring even baking and a beautifully crisp exterior. This helps your cruffins rise perfectly while maintaining a flaky texture.
If you prefer a more traditional method, electric ovens can also yield great results, especially when you monitor the temperature closely. They provide reliable heat and are accessible in most kitchens.
Whichever type you choose, make sure it has good temperature control, as precision is key to achieving that delightful balance of soft, buttery layers and a golden-brown crust.
Happy baking!
Measuring Equipment Importance
Whether you’re a seasoned baker or just starting out, having the right measuring equipment is essential for perfecting your cruffins.
Accurate measurements can make or break your dough, so invest in a reliable digital scale to weigh your ingredients precisely. Unlike volume measurements, weighing gives you consistency, which is vital for flaky layers.
In addition to the scale, don’t overlook measuring spoons. They’re perfect for smaller quantities, like yeast or salt, ensuring you get the balance just right.
With these tools on hand, you’ll create a dough that rises beautifully and bakes evenly. So, gear up with quality measuring equipment, and you’ll be well on your way to mastering the art of cruffins!
How to Make the Perfect Croissant Dough

While making the perfect croissant dough may seem challenging, it’s all about mastering a few key techniques. First, understand the croissant history; it’s rooted in the meticulous process of layering dough and butter.
Start with high-quality ingredients: all-purpose flour, yeast, salt, and unsalted butter. Mix the flour, salt, and yeast, ensuring they’re well combined. Gradually add cold water until you form a cohesive dough. Knead until smooth, then let it rest to develop flavor.
Rolling and Folding Techniques for Flaky Layers
To create those flaky layers in your cruffins, you’ll need to master some key rolling techniques.
Getting the dough to the right thickness and knowing how to fold it properly are essential steps.
Let’s explore how these methods come together to elevate your baking game.
Essential Rolling Techniques
Mastering essential rolling techniques is crucial for achieving those flaky layers that make cruffins irresistible. Start by measuring your dough accurately and chilling it to enhance dough elasticity.
As you roll, keep your surface lightly floured to prevent sticking, but avoid excessive flour, which can hinder the layers. Use even pressure while rolling to maintain a consistent thickness; this guarantees uniform layers during baking.
Remember to rotate the dough frequently, allowing for better control and even distribution of butter. Don’t rush the process; patience is key to developing those desired flaky layers.
Finally, always roll from the center outwards to maintain shape and integrity. With these techniques, you’re well on your way to cruffin perfection!
Mastering the Fold
Rolling techniques set the stage for creating flaky layers, but the folding process is where the magic truly happens.
To master the fold, start by placing your chilled butter block between two layers of dough. Fold the dough over the butter, sealing the edges tightly to prevent leaks.
Then, roll it out into a rectangle, and perform the first fold by bringing one end to the center and the other end over it. This is the first turn in your folding techniques.
Repeat this process, ensuring you chill the dough between turns to maintain its structure.
With each fold, you’re not just layering dough; you’re mastering layers that will transform your cruffins into a flaky masterpiece.
Keep practicing, and you’ll perfect your technique!
Preparing the Muffin Tin for Cruffin Baking
A well-prepared muffin tin is essential for achieving the perfect cruffin texture. Start by greasing each cup generously with butter or non-stick spray; this step prevents sticking and allows for that desirable golden crust. You can also use parchment paper liners for added ease.
Next, consider using a standard muffin tin, which gives your cruffins a nice shape and height. For cruffin baking techniques, make sure you chill the tin in the refrigerator for about 10 minutes before filling it with dough; this helps maintain the layers and enhances flakiness.
Finally, don’t overfill the cups—about two-thirds full is ideal. With proper muffin tin preparation, you’ll set the stage for delightful, flaky cruffins that’ll impress everyone!
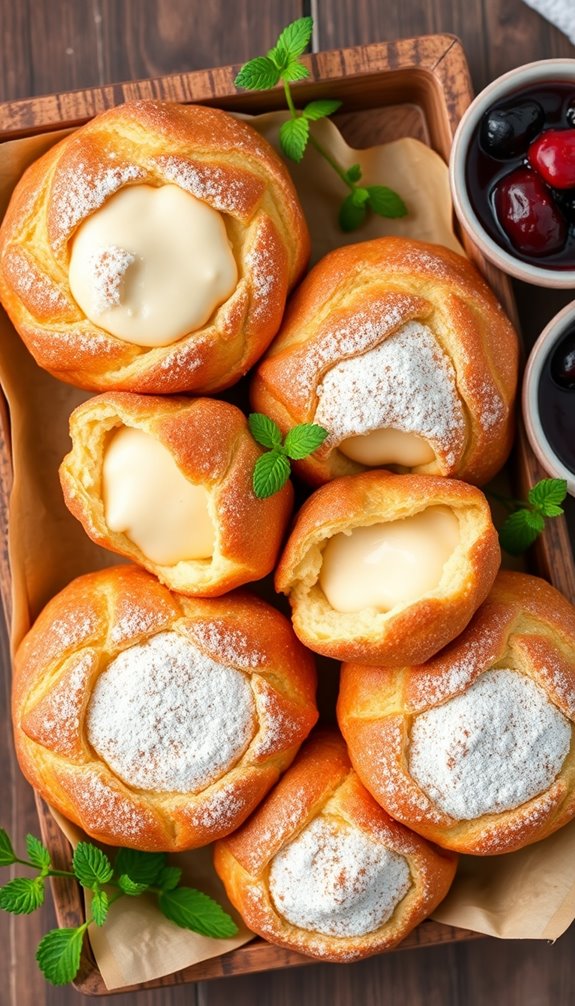
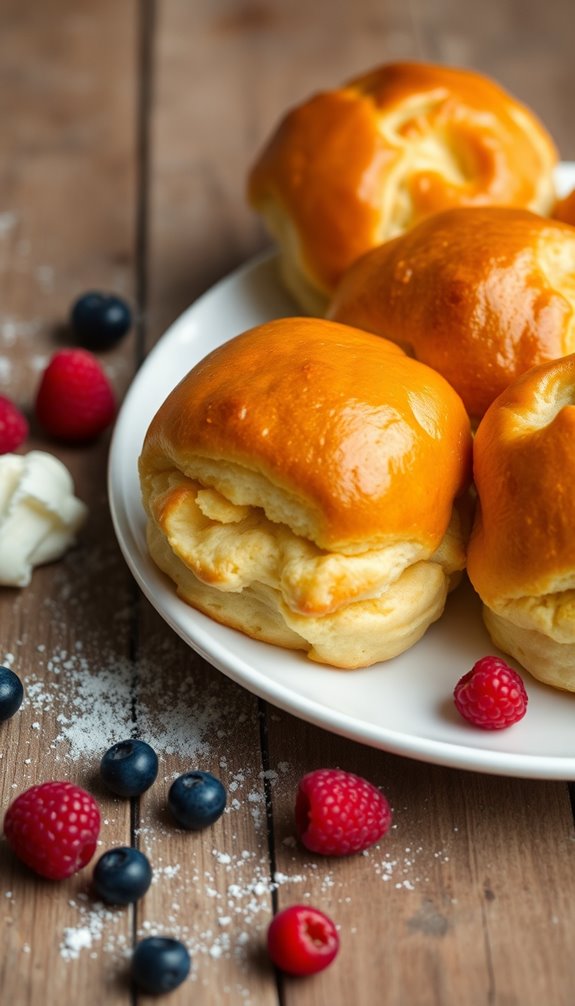
Delicious Fillings to Try in Your Cruffins
Now that you’ve got your cruffin base ready, it’s time to think about fillings that’ll elevate your treats.
Whether you’re craving something sweet or leaning towards savory, there’s a world of flavors waiting for you to explore.
Let’s get creative with some delicious options!
Sweet Fillings To Explore
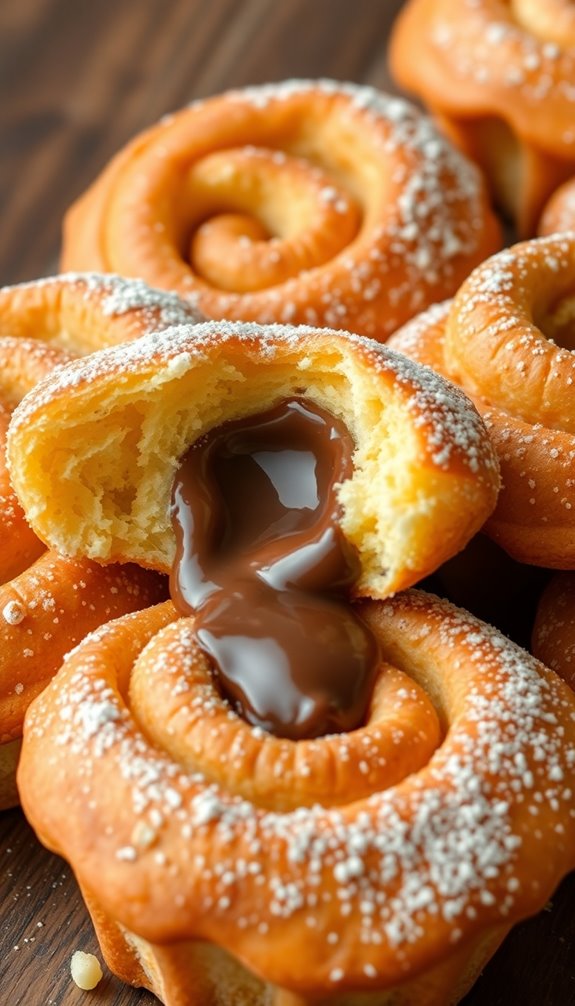
Cruffins are a delightful canvas for creativity, especially when it comes to sweet fillings. You can start with rich chocolate ganache or spread creamy Nutella swirls for a decadent treat.
If you prefer fruity flavors, try a tangy lemon curd or a luscious fruit compote. For a comforting twist, mix peanut butter with maple syrup or spread smooth cream cheese topped with cinnamon sugar.
Almond paste adds a nutty depth, while raspberry jam can bring a unique tartness. Each filling allows you to customize your cruffins to match your cravings, making them a perfect indulgence for any occasion.
Savory Options To Consider
While sweet fillings often steal the spotlight, savory options can elevate your cruffins to a whole new level.
Imagine biting into a warm cheese cruffin, gooey melted cheese oozing with every bite. You can mix different cheeses like sharp cheddar, creamy goat cheese, or even a spicy pepper jack to create your perfect blend.
For a fresh twist, try herb cruffins packed with fragrant herbs like rosemary, thyme, or chives. These flavors add a delightful aroma and depth to your cruffins.
You might even consider adding sautéed veggies or crispy bacon for extra texture.
With these savory fillings, you’ll impress your friends and family, proving that cruffins aren’t just for sweet cravings—they can be a savory delight too!
Step-by-Step Instructions for Shaping Cruffins
As you prepare to shape your cruffins, remember that this step is crucial for achieving that delightful, airy texture.
Start by rolling out your chilled dough into a rectangle. Use a rolling pin to create an even thickness, about 1/4 inch.
Next, apply your desired filling, making sure it spreads evenly.
Now, employ your shaping techniques: fold the dough over itself lengthwise, and then roll it tightly from the short end, similar to a jelly roll. Pinch the seams to seal it well.
For the cruffin aesthetics, place your rolled dough into a greased muffin tin, tucking the ends underneath. This guarantees your cruffins rise beautifully, creating those signature flaky layers that everyone loves!
Baking Tips for Achieving the Ideal Texture
After shaping your cruffins, the baking process plays a pivotal role in achieving that perfect texture.
You want a delightful texture contrast between the flaky layers and the soft, moist interior. Here are some tips to help you nail that moisture balance:
- Preheat your oven adequately to guarantee even baking.
- Use a baking stone or steel to promote consistent heat distribution.
- Bake at a high temperature initially to create a crispy outer layer.
- Rotate your cruffins halfway through baking for uniform browning.
- Let them cool on a wire rack to prevent sogginess.
How to Know When Your Cruffins Are Done?
How can you tell when your cruffins are perfectly baked? Start by checking the cruffin texture. They should be golden brown and slightly crispy on the outside, while remaining soft and flaky on the inside.
Gently press the top; if it springs back, they’re likely ready. Next, take a moment to enjoy the cruffin aroma wafting from your oven. A rich, buttery scent indicates that the layers have developed beautifully. If you can smell that delightful fragrance, it’s a good sign your cruffins are close to done.
Finally, use a toothpick to test the center; it should come out clean. With these tips, you’ll know exactly when to pull those delicious cruffins from the oven!
Creative Glazes and Toppings for Cruffins
Once you’ve perfected the baking process, it’s time to elevate your cruffins with creative glazes and toppings.
Experimenting with glaze inspirations and topping combinations lets you personalize these treats and impress your friends. Here are some ideas to get you started:
- Maple glaze with crushed pecans for a sweet, nutty crunch.
- Lemon icing topped with coconut flakes for a tropical twist.
- Chocolate ganache with sea salt for a rich, indulgent flavor.
- Honey glaze with fresh berries to add a revitalizing touch.
- Caramel drizzle with toasted almonds for a decadent finish.
Each combination adds a unique flair, transforming your cruffins into a delightful experience that’ll have everyone coming back for more!
Storing and Reheating Your Homemade Cruffins
Storing your homemade cruffins properly guarantees they stay fresh and delicious for days. To maximize cruffin longevity, keep them in an airtight container at room temperature for up to two days.
Properly storing your homemade cruffins in an airtight container ensures they remain fresh and delightful for up to two days.
If you want to enjoy them longer, consider freezing cruffins. Wrap each cruffin tightly in plastic wrap, then place them in a freezer-safe bag. They can last up to three months in the freezer.
When you’re ready to indulge, simply thaw them at room temperature or reheat them in the oven at 350°F for about 10 minutes. This method restores their flaky texture and warmth, making your cruffins taste freshly baked.
Enjoy your delightful creations without worrying about them going stale!
Troubleshooting Common Cruffin Mistakes
Even experienced bakers can encounter challenges when making cruffins, but recognizing and addressing common mistakes can lead to delicious results.
Here are some typical issues you might face and their cruffin solutions:
- Dough too dry: Confirm you measure your flour accurately and add a bit more liquid if necessary.
- Flat cruffins: Check that your dough has enough layers; proper lamination is key for height.
- Burnt tops: Try lowering the oven temperature or covering the tops with foil during baking.
- Underbaked inside: Use an oven thermometer to confirm your temperature is accurate.
- Filling leaks: Seal your cruffins tightly to prevent filling from oozing out during baking.
Variations on the Classic Cruffin Recipe
After mastering the common pitfalls of cruffin baking, it’s time to get creative with your flavors. You can experiment with unique flavor combinations that elevate your cruffins from ordinary to extraordinary.
Consider filling them with luscious chocolate ganache paired with a hint of sea salt, or try a spiced apple filling for a cozy autumn treat. Embrace seasonal ingredient variations by incorporating fresh berries in the summer or pumpkin puree in the fall.
Don’t hesitate to add zesty citrus zest or aromatic spices to the dough itself for an extra flavor kick. By playing with these ingredients, you’ll discover endless possibilities, ensuring each batch of cruffins reflects your taste and creativity.
Happy baking!
Serving Suggestions for Your Cruffins
While your freshly baked cruffins might be tempting to enjoy right out of the oven, serving them with thoughtful accompaniments can elevate the experience.
Consider using beautiful serving platters to showcase your creations, and think about pairing beverages that complement their flavors. Here are some suggestions to enhance your cruffin enjoyment:
- Freshly brewed coffee or espresso
- A selection of herbal teas
- Sweetened fruit compote or preserves
- Whipped cream or mascarpone cheese
- A light fruit salad
These pairings not only highlight the cruffins’ unique textures and flavors but also create a delightful atmosphere for sharing with friends and family.
Enjoy experimenting with different combinations to find your perfect match!
Conclusion
Now that you’ve mastered the art of cruffins, it’s time to share your delicious creations with friends and family. Coincidentally, you might find that baking these treats not only fills your kitchen with the heavenly aroma of buttery pastry but also brings everyone together for a delightful taste experience. So, roll up your sleeves, experiment with flavors, and watch as your cruffins become the star of the show, making every gathering a little sweeter and more memorable.