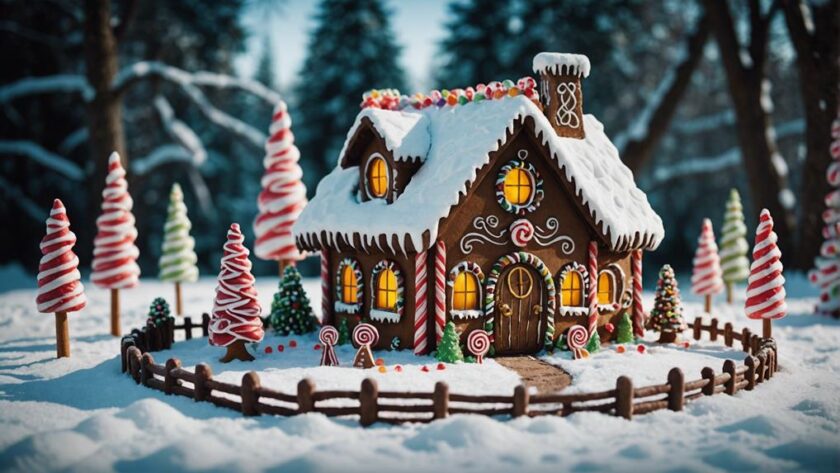
Crafting a magical gingerbread Hobbit house begins with selecting key pattern features and mixing gingerbread dough with classic ingredients. Chill the dough, roll it out evenly, and cut out precise shapes following a gingerbread house pattern. Craft transparent windows using clear peppermints and fill them with crushed candies for a glass-like effect. Finally, secure components with melted chocolate for a sturdy structure and pay attention to precision for a flawless finish. A world of whimsy awaits as you start on this enchanting culinary journey into the lands of hobbits and holiday cheer.
Pattern Selection and Preparation
How can you guarantee your gingerbread Hobbit house pattern captures the essence of iconic Hobbit architecture while leaving room for creative flair?
When selecting a pattern for your gingerbread house inspired by Hobbit holes, such as Bag End from The Hobbit movie, it's important to focus on key features like the front door, windows, and characteristic Hobbit architecture.
Draw the pattern slightly larger than life to allow for easier decorating and detailing. Make sure to include pieces for the front, sides, roof, door, and intricate details in the pattern.
Don't shy away from incorporating green fondant to mimic the lush greenery surrounding Hobbit houses. Remember, while it's vital to stay true to the iconic design elements, there's also ample space for creativity.
Feel free to deviate from strict shapes to infuse your gingerbread Hobbit house with a touch of uniqueness that reflects your personal style and imagination.
Dough Mixing and Rolling
To prepare for crafting your magical gingerbread Hobbit house, begin by mixing the gingerbread dough using classic ingredients like flour, ginger, cinnamon, baking soda, and molasses for that signature spicy flavor.
Once the dough is well combined, chill it for at least 4 hours. This chilling time will make it easier to roll out the gingerbread dough later on.
When you're ready to start shaping the pieces for your gingerbread house, take the chilled dough and roll it out evenly. The key is to make sure that the dough is of a consistent thickness so that all the pieces bake evenly.
Use a gingerbread house pattern to guide you as you cut out precise shapes for the front, sides, roof, door, and any other intricate details.
Carefully transfer these cut-out gingerbread pieces onto baking sheets, maintaining their shapes, ready for the baking process.
Piece Cutting and Baking
Cut out the gingerbread pieces directly on the baking sheets to maintain their shape and prevent warping during the baking process.
Here are some key tips to guarantee your gingerbread hobbit house turns out just right:
- Precision is Key: Take your time cutting the gingerbread pieces, especially when creating the intricate details like the door and window bricks. This attention to detail will make your gingerbread house truly magical.
- Chill for Success: Remember to chill the gingerbread dough before cutting and baking. This step not only helps the dough keep its shape but also enhances the flavor and texture of your gingerbread pieces.
- New Recipe Excitement: Using a new gingerbread recipe specifically designed for freestanding house pieces can elevate your gingerbread hobbit house to the next level. Embrace the opportunity to experiment with different flavors and textures to create a unique and delicious masterpiece.
Window Crafting and Installation
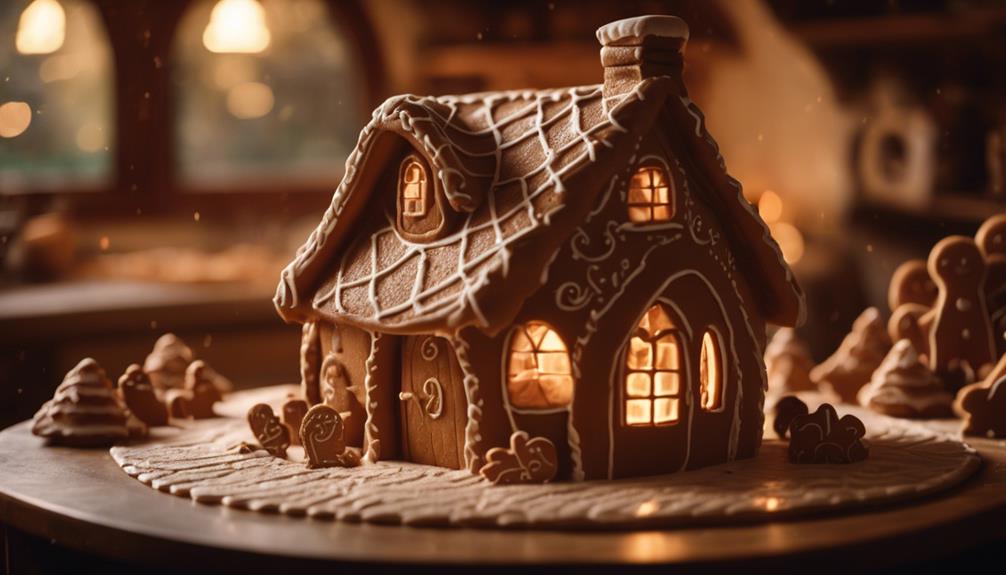
Craft the transparent windows for your gingerbread Hobbit house using clear peppermints to add a touch of enchantment to your creation.
Start by filling the window holes with crushed candies and carefully melting them to achieve a glass-like effect. To guarantee a slow and steady melting process and avoid bubbles, ensure a slow and steady melting process. The melted candies not only provide transparency but also offer structural support to the windows.
Once the candies have solidified, use chocolate as a reliable adhesive to secure the windows in place. The clear peppermints will give your gingerbread house an authentic and magical look, allowing light to filter through the windows beautifully.
Remember to handle the melted candies with care to avoid burns and achieve the desired transparency. With these window crafting techniques, your gingerbread Hobbit house will be one step closer to becoming a whimsical masterpiece.
Final Assembly and Decoration

For the final assembly and decoration of your gingerbread Hobbit house, focus on securing each component with melted chocolate for a sturdy structure and attention to detail. Start by carefully attaching the walls and roof pieces using melted chocolate instead of royal icing for added stability. Remember to take your time and guarantee each piece is aligned perfectly to avoid any mishaps during the assembly process.
To add a touch of whimsy to your gingerbread house, consider incorporating clear peppermints as windows. Crush and melt the peppermints to fill the window holes, creating a magical and transparent effect that will enchant anyone who gazes upon your creation.
Lastly, for those final decorative touches, use melted chocolate as glue to add intricate details such as brick patterns or other embellishments. Pay close attention to precision and patience during this step to guarantee a flawless finish to your gingerbread masterpiece.
Conclusion
As you put the finishing touches on your gingerbread hobbit house, you can't help but feel like a wizard conjuring up a magical creation.
The sweet smell of gingerbread fills the air as you admire your handiwork, knowing that this whimsical creation will bring joy to all who see it.
Let your imagination run wild and enjoy the enchantment of your very own edible masterpiece.