To create beautiful edible designs with Brown Bag Cookie Art, start by using sugar cookies as your base. Utilize cookie molds for uniform shapes and enhance your creativity with royal icing techniques. Consider stenciling and layering colors to add depth to your designs. Make sure to chill your dough for defined edges and easy handling. Once baked, let your cookies cool before decorating. Use creative presentations like cookie bouquets or themed boxes to showcase your artwork. Follow along, and you'll discover more tips and tricks to elevate your cookie decorating skills to the next level.
Overview of Cookie Art
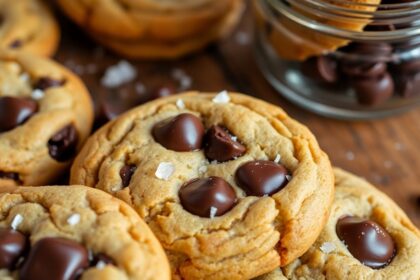
Cookie art transforms ordinary baked goods into stunning works of edible creativity. It involves the decorative process of designing and embellishing cookies, primarily using royal icing and various edible decorations. Creating intricate designs allows you to utilize festive sugar cookie recipes that serve as a great foundation. Whimsical and sweet animal cookies with frosting can also inspire your designs, adding a playful touch to your creations.
If you're keen to plunge into cookie decorating, you'll find that sugar cookies serve as the ideal foundation, providing a sturdy base for intricate designs. You can experiment with popular cookie shapes created using molds, which guarantee uniformity in size and allow for detailed patterns. Techniques like flooding, stenciling, and layering enable you to express your artistic flair and create visually enchanting pieces. Each method opens up a world of possibilities, letting you personalize your cookies for any occasion.
To enhance your cookie decorating skills, take advantage of community resources such as online tutorials and creative classes. They offer invaluable insights into new techniques and approaches, boosting your confidence and creativity. Additionally, mastering royal icing consistency is essential for achieving clean and professional-looking designs, and understanding the importance of frosting ingredients will elevate your decorating game.
As you set off on your cookie art journey, remember that practice is key. With each batch, you'll refine your skills and develop your unique style, making every cookie a delightful masterpiece. So, roll up your sleeves and let your imagination run wild!
History of Brown Bag Molds
The journey of Brown Bag Cookie Molds reflects a blend of tradition and innovation in cookie art. Originating from traditional baking practices in the 1990s, these molds were popularized through family baking traditions that celebrated unique cookie shapes.
You'll find that Brown Bag Cookie Molds are often crafted from durable materials, designed to withstand high baking temperatures while preserving intricate designs, resulting in even baking results that enhance the final product's quality. These molds can also be used to create decorative elements akin to those found in traditional desserts like Norwegian Kransekake, showcasing the versatility of cookie art.
The collection of Brown Bag Cookie Molds began in the 1980s, with Lucy Natkiel leading the charge. She emphasized detail and design, which transformed cookie-making into a true art form.
Antique Brown Bag molds have become cherished heirlooms, passed down through generations and showcasing a rich history of cookie art and craftsmanship.
Moreover, the versatility of these molds extends beyond cookies; they're also used for decorative crafts like marzipan and paper casting. Additionally, using healthier ingredients like nutrient-rich flour alternatives can elevate your cookie creations while maintaining traditional shapes and designs.
As you explore cookie art, understanding the history of Brown Bag Cookie Molds can inspire your creativity and deepen your appreciation for this unique baking tradition. With each mold, you connect to a legacy of artistry that's as delicious as it's beautiful.
Benefits of Cookie Molds

Using cookie molds can elevate your baking experience in several impactful ways. First, they guarantee uniform shapes and sizes, resulting in cookies that not only look great but also bake evenly. This consistency can greatly cut down on your baking time since the design of cookie molds promotes even heat distribution. Additionally, the Pinecone cookie molds provide a rustic touch to your baked goods, enhancing their overall appeal.
Furthermore, using gluten-free flour in conjunction with molds can ensure that your creations cater to a wider audience, including those with dietary restrictions. Moreover, the intricate impressions created by cookie molds simplify the decorating process. You can achieve stunning designs without spending hours on hand-piping, allowing you to focus on the fun part: decorating! The enhanced presentation from using cookie molds makes your baked goods perfect for special occasions and events where visual appeal is vital.
Furthermore, cookie molds encourage your creativity. With a variety of shapes and designs at your fingertips, you can tailor your cookies to suit different themes or seasons, making each batch uniquely yours. For example, using molds in holiday-themed cookie shapes can add a festive touch to your creations.
Whether you're preparing holiday treats or fun party snacks, cookie molds are versatile tools that can transform simple recipes into standout creations. So, immerse yourself in the world of cookie molds and enjoy the benefits they bring to your baking adventures!
Types of Cookie Molds
When it comes to selecting cookie molds, you'll find a diverse array of options that cater to different baking needs and preferences.
Cookie molds come in various materials, including silicone, metal, and plastic. Silicone molds are particularly popular for their easy release properties and ability to create intricate designs with fine details. If you love creativity in your baking, silicone might be your best bet. Many bakers enjoy using silicone molds to create festive cookie decorations that enhance their holiday treats, making them ideal for high-protein vegan cookie recipes that require unique shapes.
On the other hand, metal molds are traditionally favored for their durability and the classic shapes they produce. They're a staple in both home and professional baking, making them perfect for anyone seeking timeless designs.
If you're looking for something more affordable, plastic cookie molds might fit the bill, though they may not offer the same durability as metal or the flexibility of silicone.
Additionally, specialty molds cater to themed occasions, allowing you to create festive shapes for holidays like Christmas or Halloween. Many bakers also enjoy using molds to create cookies that pair perfectly with flavors like coconut and pineapple, adding an exotic twist to their creations.
For a truly personalized touch, consider custom molds designed for unique events and individual preferences. With these options, you can discover the perfect cookie mold that suits your baking style and occasions.
Techniques for Using Molds
To achieve beautifully shaped cookies with molds, you'll want to follow a few essential techniques. First, press your cookie dough firmly and evenly into the mold. This guarantees defined shapes and prevents air pockets that could affect your final design.
Before filling the molds, lightly grease them; this step facilitates easier release of the cookies once baked. Chilling the dough before molding is vital, too. It reduces spreading during baking, helping maintain the cookie's integrity. Additionally, using gluten-free ingredients like almond flour can enhance the flavor and texture of your cookies. In baking, as with the evolution of cheesecake, the use of local ingredients reflects cultural adaptations and can lead to unique flavor profiles.
When you're ready to bake, preheat your oven to the recommended temperature, typically around 350°F (175°C), and follow the baking times specific to your bag cookie mold recipes—usually about 10-12 minutes. Keep an eye on them to avoid overbaking.
After baking, let the cookies cool completely in the molds. This prevents breakage and guarantees that all the intricate details remain intact. Additionally, incorporating different flavors and ingredients can elevate your cookie designs, much like the evolution of chocolate chip cookies that has led to diverse adaptations and innovations in the baking industry.
Baking Tips for Success
To achieve cookie perfection, start by preheating your oven to around 350°F (175°C) for even baking.
Chilling your dough makes it easier to handle and keeps your cookies from spreading, ensuring they hold their shape.
Don't forget to grease your molds lightly to make removal a breeze and keep those intricate designs intact!
Optimal Dough Temperature
Achieving the perfect cookie starts with understanding the importance of dough temperature. The ideal dough temperature for baking cookies typically falls between 60°F to 70°F (15°C to 21°C). This range guarantees that your dough is manageable and easy to mold.
Chilling your cookie dough before baking is key; it helps maintain the shape of your cookies and prevents excessive spreading. This results in cleaner, more defined edges that elevate your edible designs.
When you use chilled dough, you'll find it easier to press into molds, allowing for better detail and impressions in your final baked product. On the other hand, working with warm dough can lead to sticky handling and make mold release difficult. To avoid this, refrigerate your dough for at least 30 minutes before use.
For the best results, keep your cookie dough cool while you work. If you have any leftover dough, return it to the refrigerator as needed to maintain that ideal temperature.
Mold Preparation Techniques
How can you guarantee your cookie designs turn out perfectly every time? Start with proper mold preparation techniques. First, lightly grease your cookie molds before use. This guarantees easy release of your molded cookies and helps maintain the integrity of your designs.
Next, use chilled dough; it's firmer and less likely to spread during baking, resulting in cleaner, more defined shapes. When filling your molds, be sure to fill them evenly and avoid overfilling. If you overfill, your cookies may overflow, distorting those intricate molded designs you worked so hard to create.
Preheating the oven to the recommended temperature for your specific dough is vital, too. This guarantees even heat distribution and ideal baking results.
Finally, once baked, allow your cookies to cool completely in the molds. This step is necessary to prevent breakage and preserve those delicate details that make your molded cookies so special.
Follow these techniques, and you'll be on your way to creating beautiful, edible designs every time!
Care and Maintenance
When it comes to keeping your cookie molds in top shape, proper care and maintenance are essential. After using your molds for cookie dough, make certain to hand wash them with mild soap and water. This helps preserve their flexibility and surface finish.
Avoid abrasive cleaners or scrubbing pads, as they can scratch and wear down your molds over time.
Store your molds in a cool, dry place to prevent warping and maintain their shape for future use. Regularly inspect your molds for signs of wear and tear, like cracks or deformations, to make sure they're safe and effective for baking. If you notice any damage, it's best to replace them to avoid issues with your cookie designs.
Additionally, always follow the manufacturer's care instructions for specific cleaning and maintenance guidelines. These instructions are tailored to your specific molds and can help prolong their lifespan.
Classic Cookie Recipes
When you think of classic cookie recipes, timeless shortbread variations often come to mind.
You can also get creative with seasonal themed cookies, adding flavors that match the holidays.
With endless possibilities for flavor combinations, there's always a new twist to try in your cookie-making adventures.
Timeless Shortbread Variations
Creating timeless shortbread variations allows you to explore a world of flavors while enjoying the simplicity of this classic cookie recipe. Traditional shortbread consists of just three ingredients: butter, sugar, and flour. This combination creates a rich, crumbly texture that's perfect for molding into shapes.
To elevate your shortbread, consider adding extracts like vanilla, almond, or lemon zest, which beautifully enhance the buttery base. If you're looking for added texture, try incorporating finely chopped nuts, dried fruits, or chocolate chips. These ingredients create unique shortbread variations that cater to diverse tastes.
Using cookie molds, such as the Brown Bag Cookie Molds, lets you craft beautifully detailed shortbread shapes that are visually appealing—ideal for gifting or special occasions.
For the best results, bake your shortbread at a lower temperature of around 325°F for a longer duration. This method guarantees a delicate, melt-in-your-mouth consistency and helps prevent browning.
With these tips, you'll create irresistible shortbread variations that are sure to delight anyone who tastes them. Enjoy the creative process and let your imagination guide you!
Seasonal Themed Cookies
Seasonal themed cookies bring joy and creativity to your baking, allowing you to celebrate holidays with delicious treats. You can craft these delightful cookies using classic recipes like sugar cookies and shortbread, which serve as the perfect base for intricate designs.
By incorporating seasonal flavors like pumpkin spice for fall or peppermint for winter, you'll enhance the thematic appeal of your cookies.
To make your seasonal themed cookies visually striking, consider using cookie molds in festive shapes, such as:
- Snowflakes for winter celebrations
- Hearts for Valentine's Day
- Leaves for autumn gatherings
Once baked, decorate your cookies with royal icing in vibrant colors that reflect the season. Don't forget to add intricate patterns and details that represent various holidays or seasonal motifs.
For an extra touch of magic, sprinkle on some edible glitter or luster dust to make your cookies sparkle and shine.
With these ideas, your seasonal themed cookies won't only satisfy sweet cravings but also become a centerpiece for any celebration.
Get creative and let the seasons inspire your baking!
Creative Flavor Combinations
Exploring creative flavor combinations can elevate your classic cookie recipes to new heights. Start with a rejuvenating twist by adding lemon zest and lavender to sugar cookies. This not only enhances the taste but also fills your kitchen with a delightful aroma.
For a nutty touch, incorporate almond extract into traditional shortbread recipes; it complements the buttery texture perfectly.
If you crave chocolate, blend cocoa powder into your sugar or shortbread dough. This rich variant can be beautifully molded using cookie molds, making your treats stand out.
Spice things up by adding cinnamon or nutmeg to classic recipes for a seasonal flair. These spices make your cookies ideal for holidays and special occasions.
Don't forget about dried fruits! Combine cranberries or apricots with your classic cookie bases to introduce natural sweetness and a chewy texture.
These creative flavor combinations not only enhance the overall flavor profile but also keep your cookie baking exciting and new. So, get adventurous in the kitchen—your taste buds will thank you!
Themed Cookie Ideas

Themed cookies are a fun way to make any celebration more memorable, whether it's a holiday gathering or a birthday bash. With vibrant designs and flavors that match the occasion, you can elevate your cookie game and impress your guests.
Popular themes include:
- Christmas: Use gingerbread flavors and cookie molds shaped like trees and ornaments.
- Halloween: Create spooky treats with pumpkin spice and designs featuring ghosts or pumpkins.
- Valentine's Day: Bake heart-shaped cookies in red and pink, adding romantic flavors like raspberry or chocolate.
Using cookie molds specific to these themes can simplify your decorating process, and incorporating seasonal flavors enhances the overall experience.
Don't forget to match your colors and designs to the theme—like gold and green for Christmas or reds and pinks for Valentine's Day.
To take your themed cookies to the next level, consider using edible glitter or themed sprinkles. These details not only boost visual appeal but also make your cookies more inviting for special events.
With a little creativity, you can create themed cookies that leave a lasting impression!
Decorating Techniques
When it comes to decorating your cookies, royal icing techniques are a game changer for achieving stunning designs.
You can create uniform patterns with stenciling and add depth using layering and textures.
Let's explore these methods to elevate your cookie art to the next level!
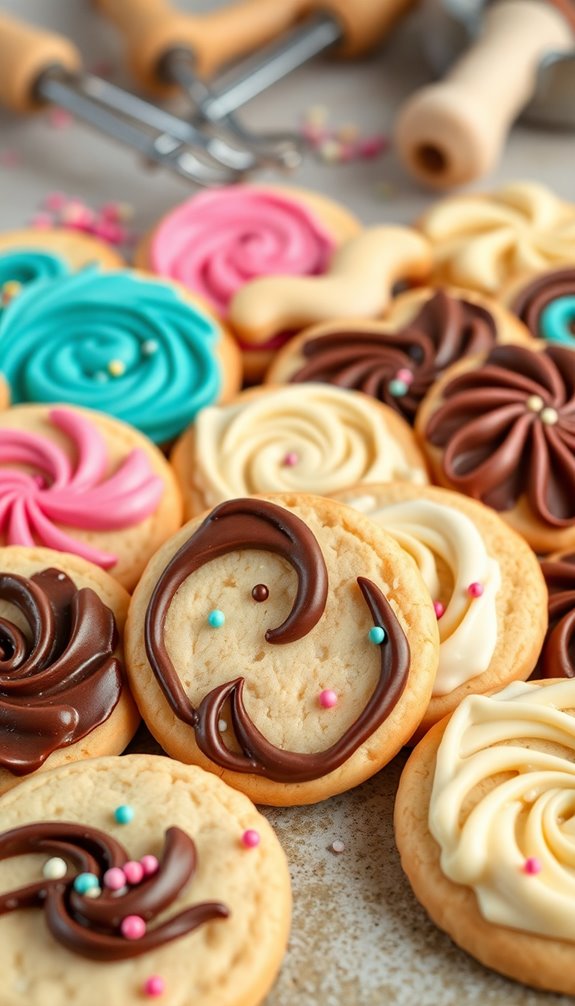
Royal Icing Techniques
Royal icing techniques are essential for anyone looking to elevate their cookie decorating skills. This versatile icing dries hard, making it perfect for intricate designs and layering without smudging.
To get started, you'll want to prepare royal icing in various consistencies:
- Flood consistency: Ideal for filling large areas.
- Medium consistency: Great for outlining your designs.
- Stiff consistency: Perfect for detailed piping work.
For smooth edges when flooding, pipe a border around the cookie, then fill in the center with a thicker batch of royal icing. Use a scribe tool to spread it evenly and achieve that flawless finish.
Don't forget about adding depth; layering different colors of royal icing can create stunning gradients and effects.
Once your designs are dry, enhance them with edible markers for those precise details.
These royal icing techniques won't only improve your skills but also make your cookie art truly stand out. With practice, you'll find that creating beautiful, edible designs is both fun and rewarding!
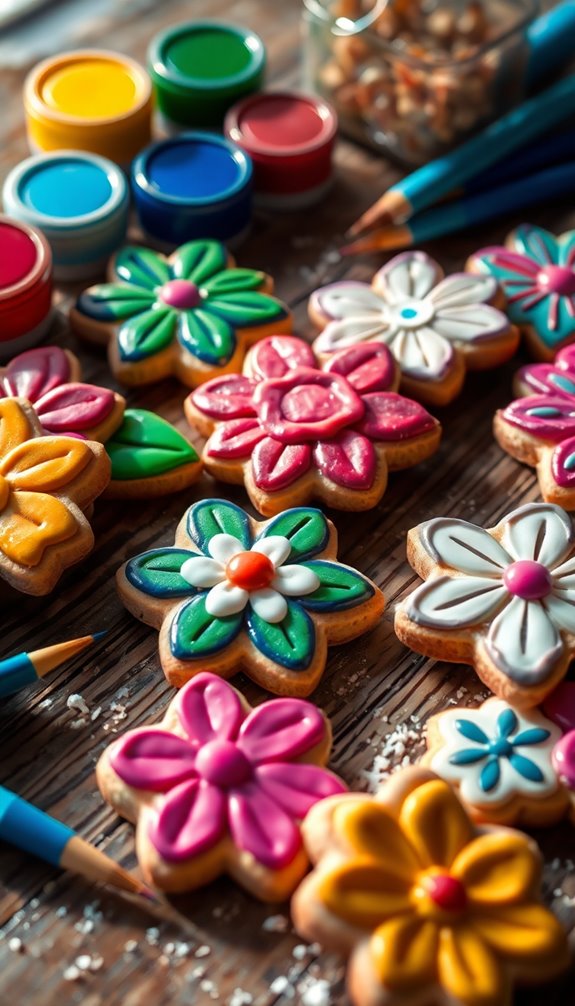
Stenciling for Patterns
Stenciling is a fantastic technique that allows you to create intricate patterns on your cookies with ease. To start, place a stencil over your cookie's surface. You can use royal icing or powdered sugar to fill in the openings efficiently. It's essential to secure the stencil in place to prevent movement that could smudge your design. A little bit of icing can anchor the stencil, keeping it steady while you work.
For the best results, choose stencils with varying hole sizes. This way, you can achieve everything from delicate lace patterns to bold geometric designs. When applying the icing, use a spatula or scraper, making smooth, even motions to guarantee the icing fills the stencil openings uniformly.
After you've decorated your cookies, allow them to dry completely before carefully removing the stencil. This typically takes about 30-60 minutes, depending on your icing's consistency. Patience is key here; removing the stencil too soon can smear your beautiful designs.
With a little practice, you'll master the art of stenciling, adding stunning patterns to your cookie creations!
Layering and Textures
Mastering layering and textures can truly elevate your cookie decorating game. By employing various layering techniques, you can create depth and dimension that makes your cookies pop. Start with a base layer of royal icing in one color, then apply a second layer in a contrasting shade to enhance visual appeal.
Here are some tips to help you along the way:
- Experiment with Consistencies: Use different icing thicknesses to achieve varied textures.
- Incorporate Patterns: Use tools like combs or brushes to create unique designs on the icing surface.
- Add Finishing Touches: Sprinkle edible glitter or apply luster dust for that extra sparkle.
You can also create stunning gradients by mixing colors, which adds dynamism to your cookies. Stenciling is another fantastic method to achieve intricate designs while ensuring consistency across multiple cookies.
Remember, layering techniques aren't just about color; they're about creating a feast for the eyes. Each layer and texture adds to the overall masterpiece, making your cookie art truly memorable.
Get creative, have fun, and watch your cookie designs come to life!
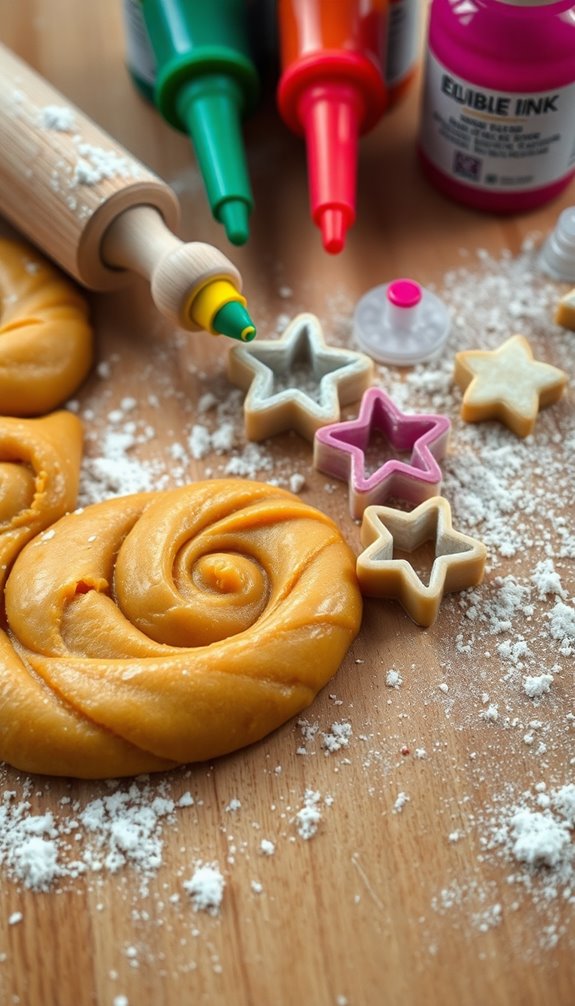
Using Eddie, The Edible Ink Printer

Eddie, The Edible Ink Printer revolutionizes the way you decorate cookies, allowing you to print intricate designs directly onto iced surfaces with ease. With its user-friendly setup, you'll find it accessible whether you're a beginner or an experienced decorator.
To get the best results, start with chilled cookie dough and various consistencies of royal icing as your base. This guarantees the surface is smooth and ready for printing.
Once you've printed your designs, don't stop there! You can enhance your cookie creations by adding layers of royal icing on top, giving your artwork texture and depth. This step not only elevates the visual appeal but also adds a delightful taste experience.
For even more inspiration and support, consider joining the Eddie user group on Facebook. This vibrant community shares tips, tricks, and completed cookie art, helping you refine your decorating skills.
With Eddie, the process of creating beautifully decorated cookies becomes not just easier, but also a lot more fun. So, get ready to impress your friends and family with your stunning edible masterpieces!
Essential Ingredients and Supplies
To create stunning cookie art, you need some key baking ingredients and tools.
Start with sugar cookies and royal icing as your base, and don't forget all-purpose flour, granulated sugar, and butter for that perfect dough.
You'll also want decorating essentials like piping bags and gel-based food coloring to bring your designs to life.
Key Baking Ingredients
When diving into the world of cookie art, having the right key baking ingredients on hand can make all the difference. Your foundation starts with sugar cookies, and the essential components for creating them are straightforward yet crucial.
- All-Purpose Flour: This ingredient forms the structure of your cookies, giving them stability.
- Granulated Sugar: It not only adds sweetness but also contributes to the texture, making your cookies delicious.
- Butter: Rich and flavorful, butter helps achieve a tender crumb when creamed with sugar.
Once you've got your sugar cookies baked, royal icing is a must for decorating. It hardens well, allowing you to create intricate designs that won't smudge.
To bring your cookie art to life, consider using gel-based food coloring. This type of coloring provides vibrant hues without changing the icing's consistency, enabling you to achieve precise and bold designs.
Decorating Tools Needed
Decorating cookies requires the right tools to turn your sweet creations into edible works of art. One of the most essential tools is a piping bag, which allows you to apply icing with precision. You'll want to have bag clips handy too, as they help manage and store your piping bags between decorations.
For intricate designs, cookie scribes or toothpicks are invaluable. They help you manipulate the icing for smoother finishes and more detailed patterns.
When it comes to cutting your cookies, opt for metal cookie cutters. They provide cleaner edges and are durable for repeated use, ensuring your cookie shapes stay consistent.
To add an extra touch of flair, consider using edible glitter. A sprinkle of this can enhance the visual appeal of your cookies, making them stand out.
Finally, stencils are great for creating uniform patterns and shapes, allowing you to achieve professional-looking designs without expert skills. With these tools at your disposal, you're well on your way to decorating cookies that aren't just delicious but also visually stunning!
Essential Cookie Supplies
Creating stunning cookie art hinges on a few essential supplies that every baker should have on hand. To craft beautiful cookies that impress, you'll want to focus on quality ingredients and tools.
Start with foundational ingredients like all-purpose flour, granulated sugar, butter, and eggs. These create a rich dough perfect for shaping and decorating.
Next, royal icing is a must-have for your cookie art; it hardens beautifully, allowing you to create intricate designs that last. For vibrant colors, opt for gel-based food coloring to maintain the icing's texture.
Don't forget these essential supplies:
- Piping bags for precise icing application
- Metal cookie cutters for easy shaping
- Edible glitter and stencils to enhance visual appeal
With these items packed in your baking bag, you'll be ready to take on any cookie recipe, whether it's for Christmas cookies or any festive occasion.
These tools will help you decorate cookies like a pro, transforming simple treats into edible masterpieces! Get ready to impress your family and friends with your newfound cookie art skills!
Cookie Dough Preparation
To make the perfect cookie dough, start by creaming together 1 cup of softened butter and 1 cup of granulated sugar until the mixture is light and fluffy. This creates a rich base for your cookie dough preparation.
Next, add in 1 large egg and 1 teaspoon of vanilla extract, ensuring you mix thoroughly for added flavor and moisture.
Now, gradually incorporate 3 cups of all-purpose flour. This step is vital as it helps create a stable structure while preventing clumping in your dough.
Once everything's combined, it's time to chill the prepared dough. Cover it and refrigerate for at least 30 minutes. Chilling is essential because it helps maintain the shape of your cookies and prevents them from spreading during baking.
After chilling, roll out the dough to a thickness of about ¼ inch. This thickness is ideal for achieving detailed designs with cookie molds.
With your dough ready, you're set to move on to creating beautiful edible designs. Remember, the key to great cookie art starts with solid cookie dough preparation!
Steps for Cookie Art Creation
Kick off your cookie art creation by baking the chilled cookie dough to a thickness of ¼ inch. Use metal cookie cutters to create uniform shapes for your art.
Once baked, it's time to bring your cookies to life! Flood the baked cookies using royal icing: pipe a border around the edges first, then fill in the center for a smooth finish.
- Let the flooded icing dry completely for several hours before adding any additional designs.
- Use tools like stencils and edible markers to add intricate details and personal touches.
- Embrace your creative freedom by experimenting with various icing colors and textures!
Once the base layer has dried, you can layer different icing techniques to enhance the visual appeal of your cookies using unique designs.
Creative Presentation Ideas
Often, the way you present your cookie art can elevate it from a simple treat to a stunning centerpiece. Start by using decorative boxes or tins to package your bag cookie art, enhancing its visual appeal and making it perfect for gifting or special occasions.
You can also arrange cookies on tiered stands or platters; this creates an attractive display that draws attention at parties or events.
To further enhance your presentation, incorporate themed decorations like seasonal flowers or colored napkins that complement your cookie designs. This helps create a cohesive look that guests will admire.
For an extra touch of glamour, consider utilizing edible glitter or luster dust. This adds sparkle and dimension, making your cookies visually striking and enticing.
If you're looking for a unique presentation option, think about creating cookie bouquets. Skewer decorated cookies with sticks and arrange them in a decorative vase. This not only showcases your creativity but also offers a fun way to display your bag cookie art.
With these creative presentation ideas, your cookie art will surely impress and delight everyone!
Conclusion
Now that you've mastered the art of brown bag cookie designs, get ready to release your inner cookie Picasso! With just a sprinkle of creativity and a dash of imagination, your edible masterpieces will have friends gasping in awe and begging for your secrets. Who knew cookies could become the talk of the town? So grab those molds, roll up your sleeves, and plunge into a world where cookies aren't just treats—they're breathtaking edible works of art!