To make your desserts turn out perfect every time, start by understanding your ingredients and their interactions. Use room temperature ingredients for even mixing, and measure them accurately to guarantee consistency. Don’t skip sifting flour, as it improves texture. Remember to substitute wisely for healthier options, and line your pans with parchment paper for easy cleanup. Be mindful of overmixing to keep desserts light. These tips are just the beginning; you’ll discover even more hacks that guarantee success!
Understand Your Ingredients for Better Results
Baking is a science, and understanding your ingredients is key to crafting perfect desserts. When you immerse yourself in baking, pay attention to ingredient interactions; they influence texture and flavor. For example, combining flour and sugar creates structure, while fats provide moisture. If you’re short on an ingredient, don’t panic! Knowing effective ingredient substitutions can save your recipe. For instance, applesauce can replace oil for a healthier option, or yogurt can stand in for sour cream. Always remember that these swaps can alter the final outcome, so consider how they’ll impact your dessert. Additionally, using gluten-free flour blends can enhance your baking experience for those with gluten sensitivities, as nutty flavors from alternative flours, such as almond flour, can elevate your baked goods. Incorporating natural sweeteners into your recipes can not only enhance flavor but also provide essential nutrients.
Use Room Temperature Ingredients for Even Mixing
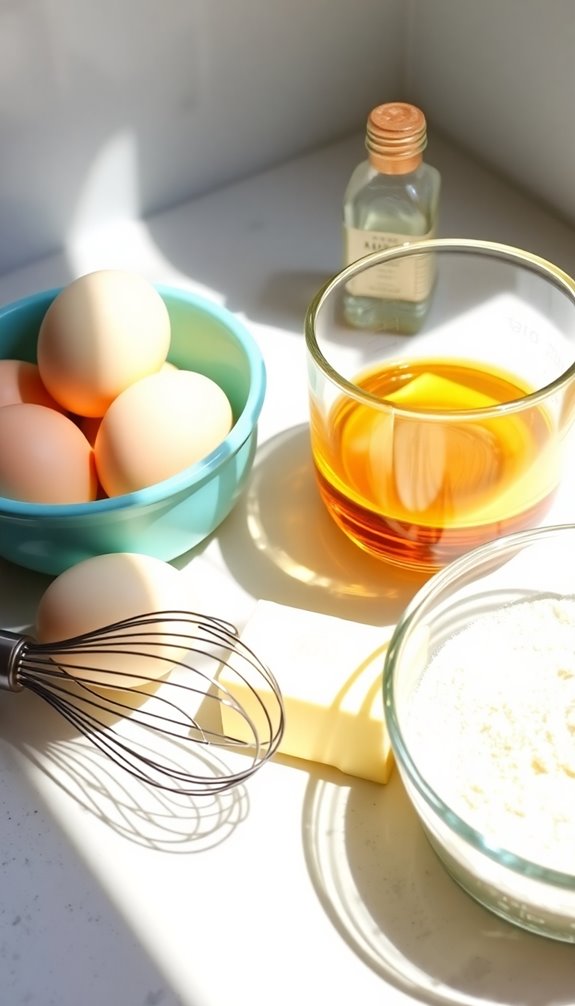
Using room temperature ingredients is essential for achieving that perfect blend in your baked goods. Common items like butter, eggs, and cream cheese mix more smoothly when they’re not cold, leading to better texture and flavor. If you’re short on time, there are quick tricks to warm them up without compromising quality. Additionally, incorporating brown sugar can enhance the moisture and chewiness of your cookies, making them even more delicious. However, it’s worth noting that granulated sugar can also provide a great texture and balance in cookies when brown sugar is not available. The right oven temperature is also crucial for achieving the desired cookie consistency and texture.
Importance Of Room Temperature
When you reach for ingredients straight from the fridge, you might unintentionally sabotage your baking efforts.
Using room temperature ingredients is vital for achieving the best results. Here are some room temperature benefits to take into account:
- Even mixing: Ingredients blend smoothly, ensuring a uniform batter. Additionally, using protein-packed cookies can enhance your baking by incorporating nutritious elements into your treats.
- Proper aeration: Room temperature butter and eggs trap air better, leading to fluffier results. This is especially important when baking cookies using self-rising flour for optimal texture.
- Enhanced flavor: Ingredients mix more thoroughly, allowing flavors to develop fully.
- Consistent baking: Ideal ingredient temperatures help your treats bake evenly, preventing soggy centers. Additionally, using Pillsbury crescent dough at room temperature allows for optimal rolling and filling, making it easier to create delicious treats like Mini Cinnis.
Common Ingredients To Consider
Room temperature ingredients play a significant role in the baking process, and knowing which ones to prepare ahead of time can make a big difference.
Butter, eggs, and dairy are baking essentials that mix evenly when they’re at room temperature, ensuring proper ingredient ratios for your recipes. This not only enhances flavor profiles but also improves texture variations in your desserts.
Be mindful of common allergens like dairy and eggs, and consider using seasonal ingredients for added freshness and nutritional benefits. Additionally, using quality ingredients can significantly elevate the overall flavor and texture of your desserts.
When storing these ingredients, follow storage tips to maintain their quality. By planning ahead and using room temperature ingredients, you’ll set yourself up for baking success every time!
Tips For Quick Heating
Achieving perfectly mixed batter is easier than you think, especially if you know a few quick heating tips. Using room temperature ingredients helps guarantee even mixing, so consider these quick heating methods:
- Microwave hacks: Warm butter or eggs in short bursts to avoid overheating.
- Warm water bath: Place eggs or dairy in a bowl of warm water for a few minutes.
- Countertime: Simply let your ingredients sit out for about 30 minutes before baking.
- Grater method: Grate cold butter for quicker incorporation into dough.
These techniques will save you time and enhance your baking results, allowing for a smoother batter that mixes beautifully and bakes evenly.
Perfect desserts start with perfectly prepared ingredients!
Measure Ingredients Accurately for Consistency
To guarantee your desserts turn out perfectly every time, measuring ingredients accurately is essential. Use measuring cups and measuring spoons for dry and liquid ingredients, ensuring you level off dry ingredients for precise measurements.
For even greater accuracy, invest in digital scales, especially when dealing with ingredient ratios that require specific weights. Remember, volume conversions can sometimes lead to discrepancies, so rely on weight conversions when possible. This way, you eliminate guesswork and achieve consistent results.
Familiarize yourself with your kitchen tools and practice measuring regularly. With these techniques, you’ll boost your baking confidence and create delicious desserts that impress every time. Consistency is key, and accurate measurements pave the way for baking success!
Substitute Ingredients Wisely for Healthier Options
When you’re baking, swapping out ingredients can make your treats healthier without sacrificing flavor.
You can explore common substitutions, discover better sweeteners, and find dairy alternatives that fit your dietary needs.
Let’s uncover how these simple changes can elevate your desserts!
Common Ingredient Substitutions
While many traditional baking recipes call for specific ingredients, you can often swap them out for healthier alternatives without sacrificing flavor or texture.
Here are some common ingredient substitutions to contemplate:
- Alternative flours: Use almond or coconut flour for gluten-free baking.
- Sugar swaps: Replace white sugar with fruit purees or natural sweeteners like maple syrup.
- Egg replacements: Try flaxseed meal or chia seeds mixed with water for vegan options.
- Dairy-free milk substitutes: Almond or oat milk can replace regular milk in most recipes.
These substitutions not only make your desserts healthier but also cater to dietary needs like gluten-free and dairy-free diets.
Embrace these options to elevate your baking game!
Healthier Sweetener Options
Choosing healthier sweeteners can transform your baking without compromising taste. Instead of reaching for refined sugar, consider using natural sweeteners like honey, maple syrup, or agave nectar.
These sugar substitutes not only add sweetness but also bring unique flavors to your desserts. If you’re looking for lower-calorie options, try stevia or monk fruit, which can sweeten without the extra calories.
Remember, when substituting, you may need to adjust the liquid in your recipe, especially with liquid sweeteners. Always start small; you can add more if needed.
Dairy Alternatives Explained
If you’re looking to create delicious desserts without dairy, there are plenty of fantastic alternatives to explore. Here are some great options to substitute in your recipes:
- Coconut milk: Rich and creamy, perfect for custards and cakes.
- Almond milk: Light and versatile, works well in most baked goods.
- Oat milk: Smooth and naturally sweet, ideal for pancakes and muffins.
- Soy milk: A protein-packed option, great for brownies and puddings.
You can also try cashew cream for frosting or dairy-free yogurt in smoothies.
For a meringue alternative, consider aquafaba usage.
If you need nut-free options, go for plant-based butter or lactose-free alternatives.
With these substitutions, you can enjoy healthier, delicious desserts!
Don’t Skip the Sifting: Why It Matters
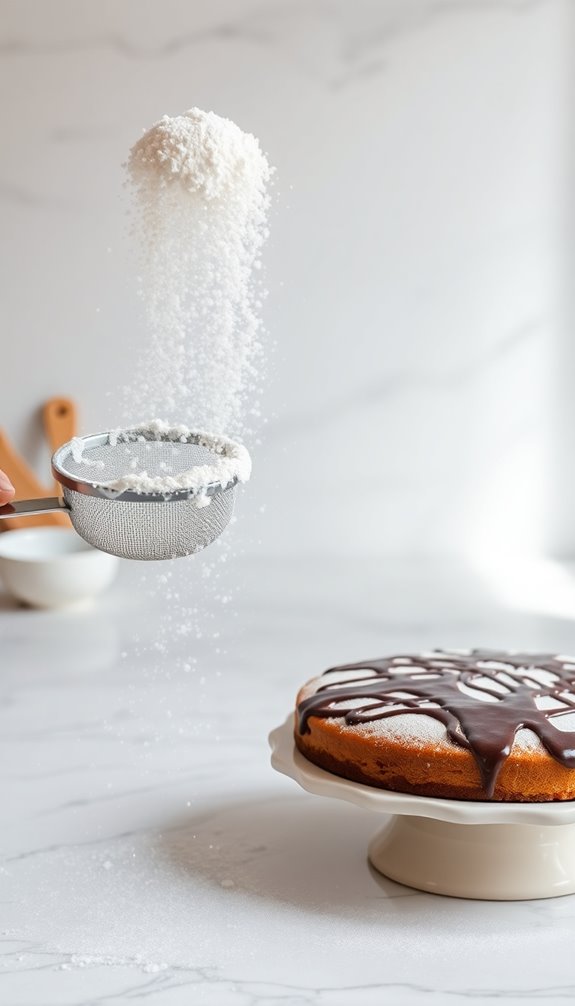
Sifting flour and other dry ingredients might seem like an unnecessary step, but it’s vital for achieving the perfect texture in your desserts. By using effective sifting techniques, you aerate the flour, which helps prevent clumps and guarantees even mixing.
This is particularly important when working with different flour types, as each has unique properties that affect your final product. For instance, cake flour is lighter and requires more sifting than all-purpose flour.
When you sift, you’re also removing any impurities or lumps that can disrupt the texture of your baked goods. So, don’t skip this vital step; it can make all the difference between a dense cake and a light, fluffy masterpiece.
Sift away for success!
Prepping Your Pans: The Right Way to Grease
After perfecting your dry ingredients, the next step is prepping your pans to secure your desserts come out flawlessly.
Proper pan greasing is essential for easy release and a beautiful presentation. Here’s how to make certain your pans are ready:
- Use butter or shortening for a rich flavor and effective greasing.
- Add flour after greasing to create an extra barrier against sticking.
- Use parchment paper for extra assurance, especially in cake pans.
- Consider non-stick spray for quick and easy application, but check for any added ingredients.
Learn the Importance of Oven Preheating
Preheating your oven is an essential step you shouldn’t skip if you want your desserts to turn out perfectly.
It guarantees your baked goods rise properly and cook evenly, so knowing the ideal temperatures is key.
Let’s also look at some common mistakes that can throw off your baking game.
Why Preheating Matters
While you might be tempted to skip the step of preheating your oven, doing so can greatly impact the outcome of your baked goods.
Embracing the preheating benefits guarantees your treats rise and bake evenly, leading to better baking consistency. Here’s why you shouldn’t overlook this vital step:
- Even Heat Distribution: Preheating allows your oven to reach the desired temperature, guaranteeing consistent results.
- Proper Texture: Many recipes rely on a hot oven to create that perfect crust or rise.
- Reduced Baking Time: Starting with a preheated oven means your items cook more efficiently, saving you time.
- Avoiding Baking Mishaps: Skipping preheating can lead to undercooked centers or burnt edges, ruining your dessert.
Ideal Temperature Guidelines
Understanding the ideal temperature for your oven is essential, as it directly affects how your desserts turn out. Each recipe specifies an oven temperature for a reason; it guarantees your ingredients react properly during baking. If your oven runs too hot or too cold, you might end up with undercooked centers or burnt edges. Always use an oven thermometer to verify accuracy.
When you preheat your oven to the recommended temperature, you set the stage for consistent baking times and textures.
For example, cakes generally thrive at 350°F, while cookies might need higher settings. By adhering to these guidelines, you’ll enhance your baking results, leading to perfectly risen cakes and evenly baked cookies every time.
Common Preheating Mistakes
Many home bakers overlook the critical step of preheating their ovens, which can lead to disappointing results.
Understanding preheating misconceptions is essential to achieving the perfect bake. Here are some common mistakes to avoid and their impact of temperature on your desserts:
- Not preheating long enough: Give your oven time to reach the desired temperature.
- Opening the oven door frequently: This causes temperature fluctuations that can ruin your bake.
- Using an oven thermometer: Trusting the built-in gauge can lead to inaccurate readings.
- Ignoring recipe instructions: Recipes often specify preheating for a reason; don’t skip this step.
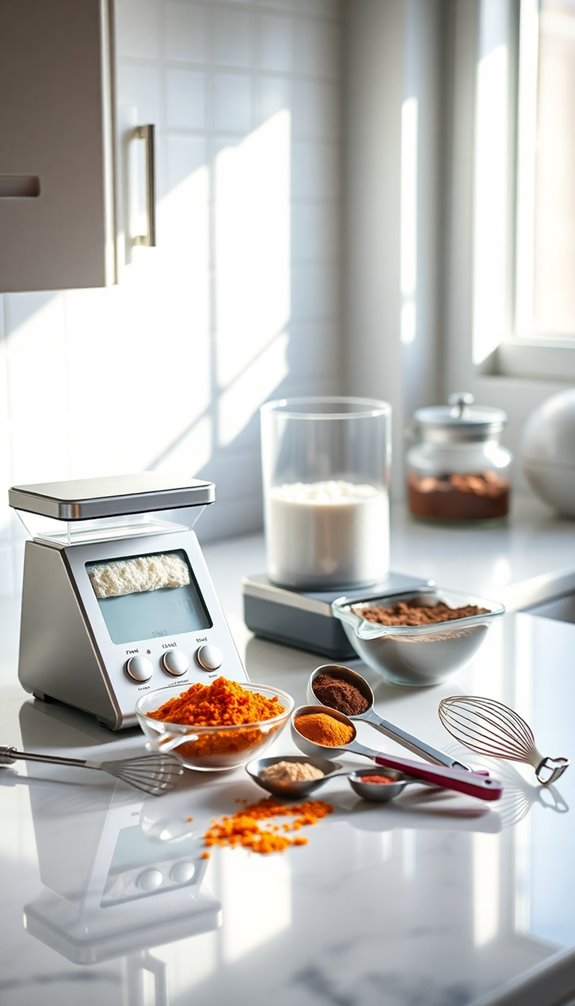
Use a Kitchen Scale for Precision Baking
If you want to elevate your baking game, using a kitchen scale is essential for precision. The kitchen scale benefits are numerous, allowing you to measure ingredients accurately, ensuring your recipes turn out just as intended.
Unlike measuring cups, which can lead to inconsistencies, a scale provides exact weights, vital for precision baking. You’ll find that even minor variations in ingredient amounts can greatly affect texture and flavor.
Weighing flour, sugar, and other components helps eliminate guesswork, giving you a solid foundation for every dessert. Plus, it’s a time-saver, as you can quickly switch between ingredients without needing to clean multiple measuring cups.
Embrace your kitchen scale, and watch your baked goods reach new heights of perfection!
Know Your Oven: Understanding Hot Spots
Even with a kitchen scale in hand, your baking can still go awry if you don’t know how your oven behaves.
Understanding hot spots is essential for achieving the perfect baking temperature. These spots can lead to uneven cooking, resulting in burnt edges or undercooked centers.
Here are some tips to help you navigate your oven:
- Calibrate your oven regularly to guarantee accurate baking temperatures.
- Rotate your pans halfway through baking to promote even heat distribution.
- Use an oven thermometer to verify the actual temperature against your settings.
- Experiment with baking positions to find the best spot for your specific recipes.
Test for Doneness: Tips Beyond the Toothpick
When it comes to testing for doneness, relying solely on a toothpick isn’t always enough.
You should look for visual cues, try the touch test, and even consider using a thermometer for accurate results. Each method gives you a clearer picture of when your dessert is perfectly baked.
Visual Cues to Observe
How can you tell when your baked goods are perfectly done? Relying on visual cues, you can confidently gauge doneness beyond the toothpick test. Pay attention to these aspects:
- Color: Look for a golden-brown hue, indicating the right baking temperature.
- Edges: The edges should pull away slightly from the pan, signaling that the center is set.
- Surface: A slightly firm, dry surface suggests the right ingredient texture has been achieved.
- Bubbling: For certain desserts, notice if there’s a gentle bubbling around the edges, indicating a well-cooked filling.
Touch Test Technique
While visual cues are essential, the touch test technique can provide an even more intuitive way to check your baked goods for doneness. This method relies on your touch sensitivity to gauge the texture of your desserts.
Gently press the surface of your cake or brownie with your fingertip; if it springs back, it’s likely done. If it leaves an indent, it might need more time.
For cookies, check the edges; they should feel firm while the center remains slightly soft.
With practice in texture testing, you’ll refine your ability to discern doneness without relying solely on a toothpick. Using this technique can elevate your baking game, ensuring perfectly baked treats every time.
Temperature Testing Method
Ever wondered if there’s a more reliable way to check your baked goods than the classic toothpick method?
Using a baking thermometer can greatly improve your temperature accuracy and guarantee your treats turn out just right. Here are some tips to help you gauge doneness effectively:
- Check the internal temperature: Different desserts have specific ideal temperatures.
- Avoid the center: Insert the thermometer in the side for more accurate readings.
- Know your targets: For example, cakes are done around 200°F and bread at 190°F.
- Calibrate your thermometer: Regularly check it against boiling water to maintain precision.
Chill Your Dough for Better Texture
Chilling your dough isn’t just a suggestion; it’s an essential step for achieving that perfect texture in your desserts. When you chill your dough, you allow the fats to solidify, which helps improve dough consistency. This results in a firmer texture that’s easier to work with and shapes better.
Plus, chilling enhances flavor and prevents spreading, ensuring your cookies or pastries hold their shape during baking.
For best results, aim to chill your dough for at least 30 minutes. If you’re working with a particularly wet dough, you might want to chill it even longer for ideal texture enhancement.
Incorporate Flavor With Extracts and Zests
To take your desserts to the next level, try incorporating extracts and zests for a burst of flavor.
Vanilla, almond, and citrus extracts can transform your treats, while fresh zests add a bright, aromatic touch.
Experimenting with these ingredients will make your baking truly shine!
Essential Extracts for Baking
While baking might seem straightforward, the right extracts and zests can elevate your desserts to a whole new level of flavor.
Using natural extracts like vanilla extract and almond extract adds depth, while citrus zest brightens up your treats.
Consider these essential extracts:
- Vanilla Extract: The classic choice for most desserts.
- Almond Extract: Perfect for adding a nutty flavor.
- Peppermint Extract: Great for holiday treats.
- Coffee Extract: Enhances chocolate desserts.
When choosing between natural extracts and artificial flavors, go for the former whenever possible.
Don’t forget about extract storage—keep them cool and dark.
If you’re in a pinch, explore extract substitutes, but be mindful of flavor combinations to maintain the intended taste.
Zesty Additions for Flavor
Adding zesty elements to your baking can truly transform your desserts, enhancing both aroma and flavor. Incorporating citrus zest—like lemon, lime, or orange—can brighten your treats, giving them a revitalizing twist.
Just a teaspoon can elevate your cake or cookie recipe, making it sing with vibrancy.
Don’t stop at zest; experiment with spice blends too. A pinch of cinnamon or nutmeg can add warmth, while cardamom or ginger can introduce an exotic flair.
Mix these flavors thoughtfully to create a unique profile that’ll impress your taste buds.
Mastering the Art of Egg Separation
How can you achieve that perfect egg separation every time? Mastering egg yolk separation is essential for successful baking, especially when it comes to egg white whipping.
Here are some tips to help you excel:
- Use cold eggs: They separate more easily when chilled.
- Crack eggs on a flat surface: This helps prevent shell shards from mixing in.
- Utilize the shell: Use the eggshell halves to transfer the yolk back and forth, removing the white.
- Try a separator tool: These gadgets can make the process effortless and mess-free.
With practice, you’ll nail egg separation, enhancing your baking results. Perfect egg whites lead to airy meringues and fluffy cakes, so give these techniques a try!
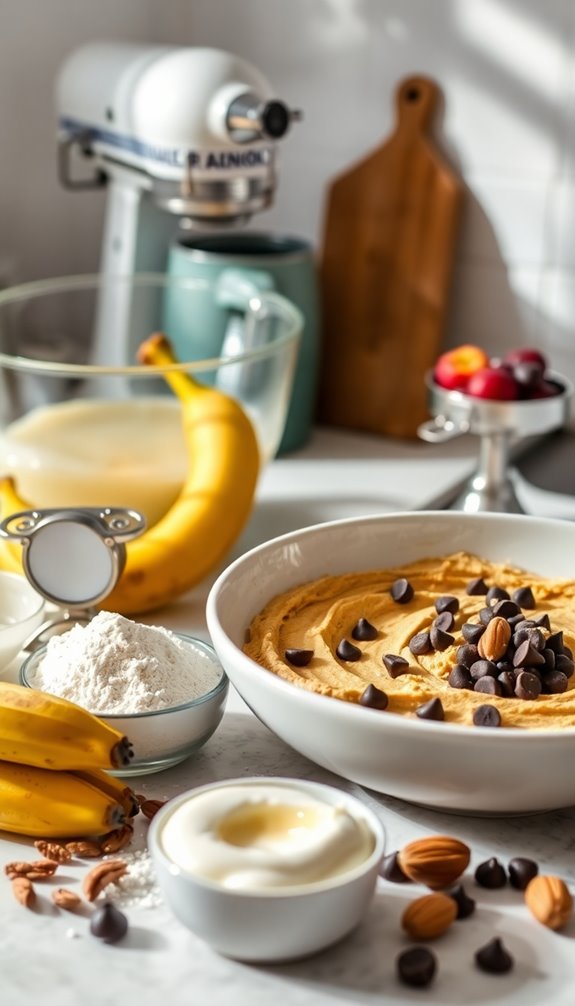
Achieve Fluffiness With Proper Mixing Techniques
To achieve that light, airy texture in your baked goods, mastering proper mixing techniques is essential. Different mixing methods can greatly influence fluffiness factors.
For instance, when creaming butter and sugar, you want to incorporate air. Beat them together until the mixture becomes pale and fluffy. This process traps air, which helps your cakes rise.
Alternatively, when folding in whipped egg whites or whipped cream, be gentle. Over-mixing can deflate those airy bubbles you’ve worked hard to create. Always use a spatula for folding, ensuring you maintain the volume.
Use Parchment Paper for Easy Cleanup
Using parchment paper can make your baking experience much smoother and more enjoyable. The parchment benefits are numerous, especially when it comes to easy cleanup and preventing sticking.
Here’s how it can transform your baking:
- Easy release: Baked goods come off effortlessly, preserving their shape.
- Less mess: No more scrubbing pans after baking; just toss the paper when you’re done.
- Even baking: Parchment helps distribute heat evenly, reducing the risk of burnt bottoms.
- Versatility: Use it for various tasks, from lining pans to making pastry bags.
Incorporating parchment paper into your baking routine not only simplifies the process but also enhances your results.
You’ll wonder how you ever baked without it!
Prevent Overmixing: Know When to Stop
After ensuring your pans are lined with parchment paper for easy cleanup, it’s time to focus on another key aspect of baking: knowing when to stop mixing your batter.
Overmixing signs can sneak up on you, leading to dense and tough desserts. When you see a few streaks of flour remaining, it’s usually time to stop—mixing until completely smooth can ruin your creation.
If you’ve made recipe adjustments, such as adding extra ingredients, keep an eye on the texture. Remember, the less you mix, the lighter your cake or cookies will be.
Trust your instincts and use gentle folds to incorporate ingredients, ensuring your baked goods turn out perfectly every time!
Decorate Like a Pro With Simple Techniques
While you might think decorating desserts requires professional training, you can achieve stunning results with a few simple techniques.
Here are some tips to elevate your cake decorating skills:
- Master frosting techniques: Use a spatula or piping bag for smooth, even layers.
- Practice your piping skills: Create beautiful borders or intricate designs with different piping tips.
- Experiment with color mixing: Blend food coloring to achieve the perfect shade for your themed designs.
- Incorporate edible decorations: Use chocolate shaping, fresh fruit, or sprinkles for added texture contrasts and visual appeal.
With these basics, you’ll be layering flavors and applying fondant like a pro in no time.
Get creative, and let your personality shine through your desserts!
Store Your Baked Goods for Maximum Freshness
To keep your baked goods tasting fresh and delicious, proper storage is essential. Start by placing your treats in airtight containers; this helps maintain moisture while preventing them from absorbing unwanted odors.
For items like cookies and brownies, consider layering parchment paper between them to avoid sticking. If you’ve baked cakes or muffins, wrap them tightly in plastic wrap before storing them in an airtight container.
Remember to store your baked goods in a cool storage area, away from direct sunlight and heat sources, to prolong their freshness.
If you need to store them for an extended period, freezing is a great option. Just make sure they’re well-wrapped to prevent freezer burn, and thaw them slowly for the best results.
Conclusion
By following these baking hacks, you’re setting yourself up for success in the kitchen. Remember, a little preparation goes a long way, and soon you’ll be whipping up desserts that impress everyone. Don’t be afraid to experiment and make adjustments along the way—after all, practice makes perfect! With these tips in your back pocket, you’ll find that baking can be both fun and rewarding. So roll up your sleeves and let your creativity shine!