Get ready to create a show-stopping Baked Alaska! Start by sculpting an ice cream dome and prepping a brownie base. Then, master meringue techniques for a crisp finish. Freeze your dessert solid, handle it gently, and bake for a golden meringue hue. Let it rest to meld flavors. Add fresh garnishes for that extra pop. Experiment with flavors and presentation to wow your guests. Elevate the visual appeal with precise torching. Don't stop here; there's more to uncover about crafting the perfect flamboyant Baked Alaska!
Ice Cream Dome Sculpting
To sculpt the ice cream dome for your Flamboyant Baked Alaska, begin by packing softened ice cream into a bowl lined with plastic wrap. Make sure the ice cream is softened to make it easier to mold into the desired dome shape. Press the ice cream firmly into the bowl, smoothing the top to create a rounded dome.
The key is to pack it tightly to maintain the dome's structure. Once shaped, place the bowl in the freezer to allow the ice cream to set and hold its form. Precision is vital here to guarantee the dome fits perfectly on the cake base later on.
This ice cream dome will serve as the centerpiece of your Baked Alaska, providing a cold and creamy contrast to the warm cake and the fluffy meringue coating. With careful sculpting and freezing, your ice cream dome will be ready to take center stage in your show-stopping dessert.
Brownie Base Preparation
For the essential Brownie Base preparation, start by melting butter and chocolate together until smooth. Once melted, whisk together flour, baking powder, and salt in a separate bowl to prepare the dry ingredients for the brownie base.
In a mixing bowl, combine eggs, sugar, and vanilla to create the vital ingredients for the brownie batter. Next, mix the melted chocolate mixture with the flour mixture in the mixing bowl until well combined. This step is important to guarantee a rich and fudgy brownie base for your Baked Alaska.
After preparing the brownie batter, pour it into a 9-inch cake pan lined with parchment paper. Smooth out the top of the batter before placing it in the oven to bake. Bake the brownie base until fully cooked and set.
Once baked, allow the brownie base to cool completely before proceeding with the next steps in creating your extravagant Baked Alaska.
Meringue Application Techniques
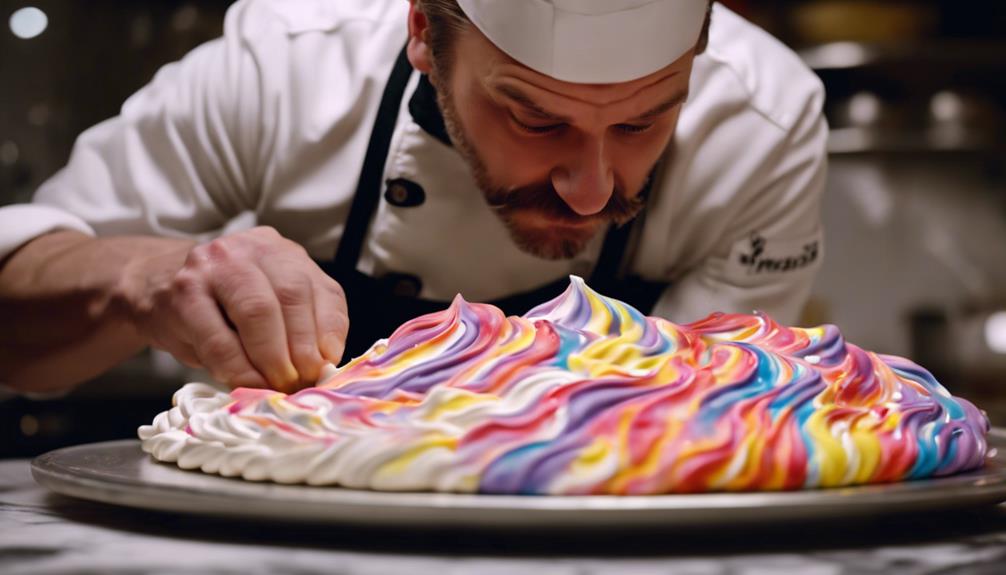
Enhance your Baked Alaska's visual appeal and texture by exploring various meringue application techniques. Piping meringue onto the dessert creates decorative swirls and peaks, adding an elegant touch to your creation. This technique allows for precise control over the design, resulting in a sophisticated presentation.
Alternatively, spooning meringue over the Baked Alaska provides a more rustic and textured finish, giving it a homemade charm. The irregularity of the spooned meringue adds a unique aesthetic to the dessert, perfect for those seeking a more relaxed look.
When it comes to baking the meringue, you can achieve a crisp outer shell while maintaining the coolness of the ice cream inside. This method ensures a delightful contrast in textures, making each bite a delightful experience.
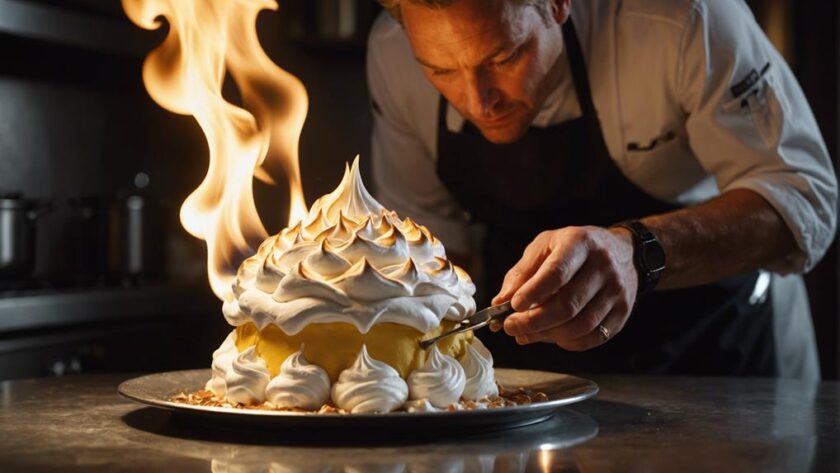
For a final touch, consider torching the meringue with a kitchen blowtorch. This not only caramelizes the surface, creating a smoky flavor, but also adds a visually appealing finish to your Baked Alaska.
Before serving, chill the meringue-covered dessert to guarantee a firm and frozen consistency, ensuring a flawless Baked Alaska experience.
Freezing and Firming the Dessert
When preparing a Baked Alaska, make sure to freeze the dessert for a minimum of 4 hours to achieve a solid ice cream consistency. Firming the Baked Alaska is vital in ensuring that the ice cream inside holds its shape when baked later.
This step is essential for maintaining the structural integrity of the dessert during the high-temperature baking process. By freezing the Baked Alaska, you create a solid base that allows the meringue to brown evenly without compromising the ice cream's texture.
Proper firming prevents the dessert from collapsing or losing its dome shape, preserving its presentation. Remember to handle the frozen dessert with care to retain its form.
Firming the Baked Alaska is a critical step in the Baked Alaska recipe that guarantees a visually stunning and delicious dessert when served.
High-Temperature Baking Process
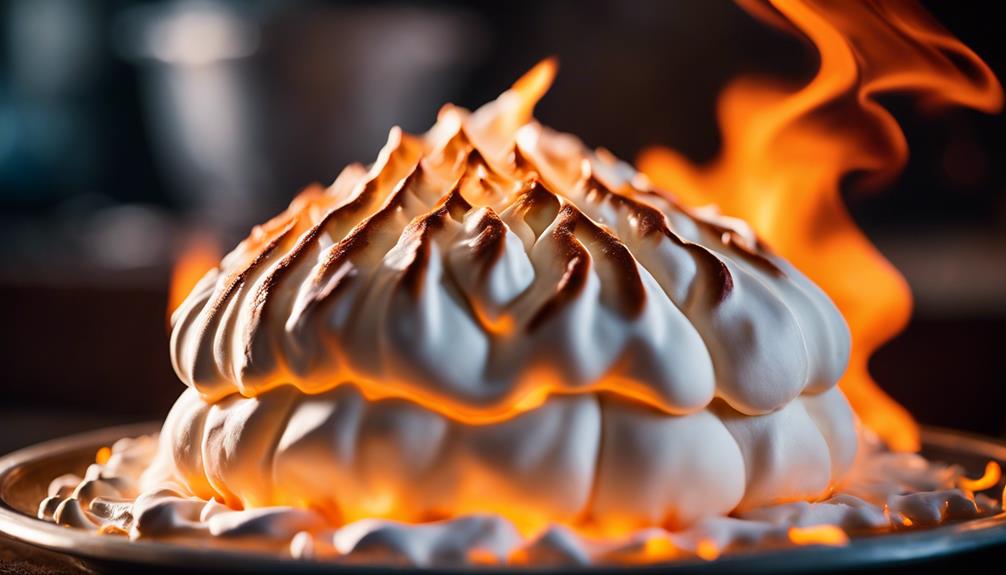
To achieve the signature look of a beautifully toasted meringue on your Baked Alaska, the dessert is baked at high temperatures ranging from 475-500 degrees Fahrenheit for a short duration of 3-5 minutes.
The high heat quickly browns the meringue coating while keeping the ice cream inside frozen. This rapid baking process guarantees a caramelized outer layer while maintaining the cold, creamy interior of the ice cream.
The short baking time prevents the ice cream from melting completely, creating a delightful temperature contrast in each bite. The high-temperature baking technique is essential to achieve the signature look of a beautifully toasted meringue on the outside of the Baked Alaska.
Make sure to monitor the baking process closely to avoid overcooking the meringue or melting the ice cream. With the right timing and temperature, you'll create a visually stunning and delicious Baked Alaska that will impress your guests.
Achieving the Golden Meringue Hue
To achieve that perfect golden hue for your Baked Alaska meringue, it's crucial to understand meringue coloring techniques.
Tips for even browning and achieving caramelized edges will elevate the visual appeal of your dessert.
Meringue Coloring Techniques
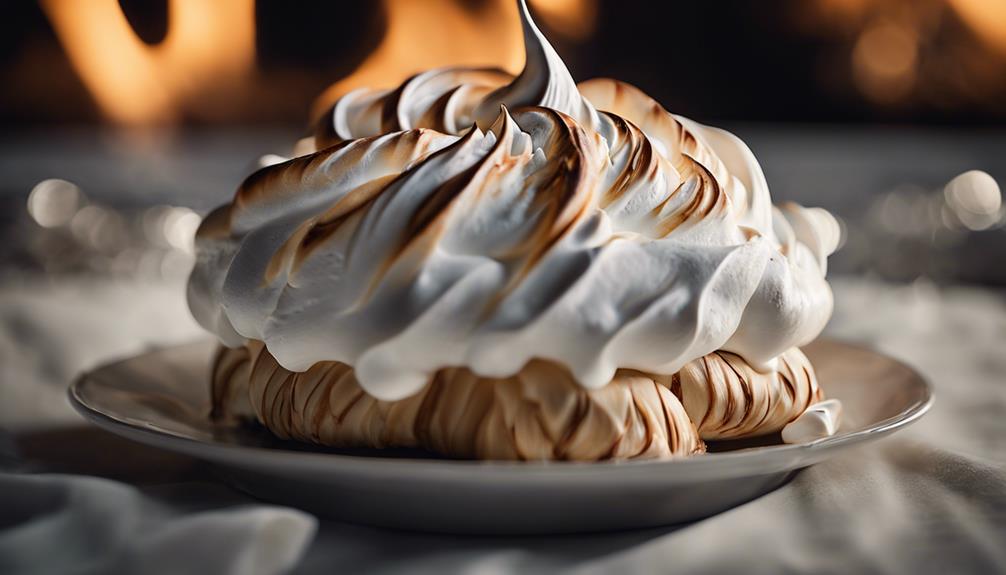
Achieving a stunning golden hue on your meringue can be accomplished by skillfully using a kitchen torch to evenly brown the coating. Once your meringue is properly whipped to a glossy and stiff consistency, it's time to add the finishing touch. The torch will allow you to carefully brown the meringue, creating that perfect golden color that's both visually appealing and delicious.
Whipping your meringue to the right texture is essential for achieving the desired coloring. By gradually adding sugar while whipping the egg whites, you establish a stable meringue structure that will hold up well under the torch's heat. This will give your meringue a beautiful golden sheen that will make your Baked Alaska truly stand out.
The golden meringue crust not only adds to the visual appeal of your dessert but also provides a delightful contrast to the cold ice cream inside.
Tips for Even Browning
For an evenly golden meringue hue on your Baked Alaska, employ a kitchen blowtorch to carefully brown the surface.
When using the kitchen blowtorch, remember to rotate the dessert continuously to guarantee all sides receive an even browning.
It's important to maintain a safe distance between the torch and the meringue to avoid burning it.
Apply gentle and consistent heat to prevent the ice cream from melting while achieving that perfect golden color on the meringue.
Aim for uniformity in the golden hue across the meringue to create a visually appealing finish for your Baked Alaska.
Achieving Caramelized Edges
To enhance the overall appearance and texture of your Baked Alaska, focusing on achieving well-caramelized edges on the meringue is key. The golden hue of the meringue not only adds visual appeal but also provides a delightful contrast to the ice cream and cake layers.
Using a kitchen torch is an effective way to achieve perfectly caramelized edges on the meringue. The torch allows for precise control over the browning process, ensuring an even caramelization throughout. Alternatively, baking the Baked Alaska in a hot oven for a short period can also result in beautifully caramelized edges on the meringue.
These caramelized edges not only offer a stunning finish to your dessert but also introduce a crunchy texture that complements the soft layers of ice cream and cake. By paying attention to this detail, you can elevate your Baked Alaska to a flamboyant and irresistible masterpiece.
Resting Period Importance
Ensuring the Baked Alaska rests in the freezer after assembly is vital for the best freezing of the ice cream before baking. This resting period allows the ice cream to solidify properly, guaranteeing a firm base for the meringue. The meringue coating can set and adhere effectively to the dessert during this time, leading to a beautifully finished product.
Additionally, the resting period allows the flavors of the ice cream and meringue to meld together, creating a harmonious taste experience.
Furthermore, the resting time enhances the presentation of the Baked Alaska as it helps the dessert hold its shape when served. By allowing the dessert to rest adequately, you ensure that it maintains the delightful temperature contrast between the cold ice cream and the warm meringue, which is essential for the overall experience.
Show-Stopping Presentation Tips
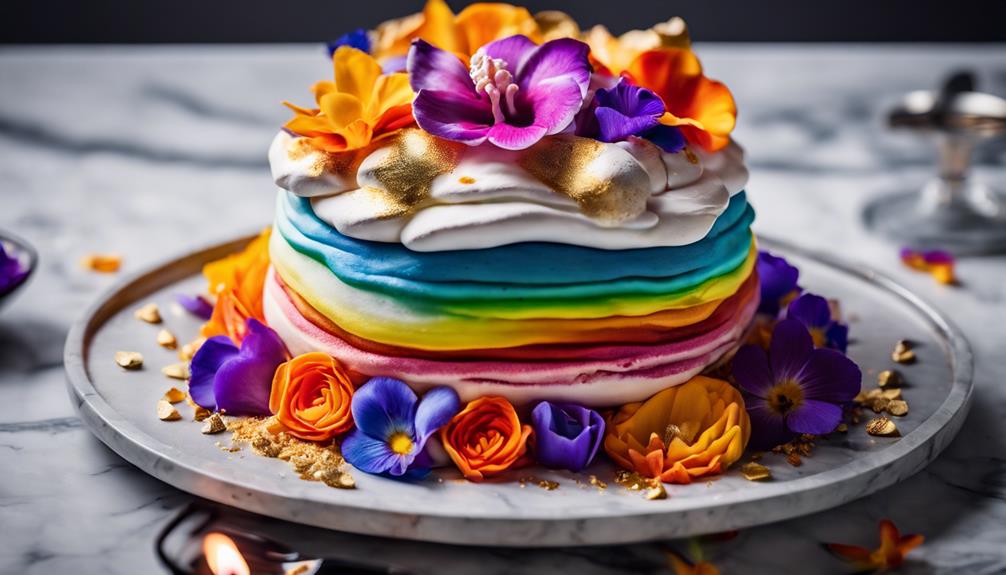
For a show-stopping Baked Alaska presentation, remember to garnish with fresh berries, mint leaves, or edible flowers to create a wow factor.
Experiment with swirling different ice cream flavors to add visual interest to your dessert.
Master the torching technique to achieve a perfectly caramelized meringue crust for that perfect finishing touch.
Garnish for Wow Factor
Consider incorporating vibrant garnishes to add a visual pop and elevate the presentation of your Flamboyant Baked Alaska. To truly wow your guests, here are some garnishing ideas to take your dessert to the next level:
- Fresh Berries: Placing a medley of strawberries, blueberries, and raspberries on top of your Baked Alaska adds a burst of color and a hint of tartness.
- Toasted Coconut Shavings: Sprinkling toasted coconut shavings over the meringue creates a contrast in textures and brings a tropical flair to your dessert.
- Cocoa Powder Dusting: Dusting the meringue with cocoa powder not only enhances the visual appeal but also adds a rich chocolatey aroma to the dish.
- Caramel Sauce Drizzle: Drizzling a generous amount of warm caramel sauce around the base of the Baked Alaska creates a decadent and indulgent finish, perfect for a flamboyant presentation.
Ice Cream Swirls
To create a show-stopping presentation for your Flamboyant Baked Alaska, focus on mastering eye-catching swirls in the ice cream dome. Utilize contrasting ice cream flavors to enhance the visual impact and create a striking pop of color. Experiment with layering different colors strategically to achieve a beautiful marbled effect in your final dessert. Try out various piping techniques to create intricate swirl patterns within the ice cream dome. By practicing these techniques, you can elevate the overall look of your Baked Alaska and impress your guests with a stunning display of artistry.
Chilling the ice cream dome before baking is essential as it helps maintain the swirls' shape and definition during the baking process. This step ensures that your carefully crafted swirls remain intact and visually appealing when the Baked Alaska is served. With a combination of vibrant colors, precise piping, and strategic layering, you can achieve an enchanting and show-stopping presentation for your Flamboyant Baked Alaska.
Torching Technique
Enhance your Flamboyant Baked Alaska's visual appeal by torching the meringue to create a caramelized crust with a show-stopping finish.
To perfect this torching technique, follow these steps:
- Prepare the Torch: Equip yourself with a kitchen torch for precise control over browning the meringue, ensuring an evenly torched surface.
- Evenly Torch the Meringue: Aim the torch flame at the meringue, moving it in a circular motion to achieve a golden brown and crispy exterior on the dessert.
- Create Theatrical Flare: The torching process adds a striking element to the Baked Alaska, making it a captivating centerpiece that will impress your guests.
- Contrasting Texture: The torched meringue not only enhances the dessert's appearance but also provides a delightful contrast in texture against the smooth ice cream and soft cake layers.
Mastering the art of torching the meringue will elevate your Baked Alaska's visual appeal, ensuring a stunning presentation that will leave a lasting impression on your diners.
Wow Your Guests With Flavor
Amaze your guests with an explosion of flavor by experimenting with unique ice cream flavors in your Baked Alaska. Consider trying unconventional options like peppermint or chocolate peanut butter to add a twist to this classic dessert. Enhance the taste by incorporating alcohol such as bourbon or Peppermint Schnapps into the mix for an extra depth of flavor that will surprise and delight your guests.
To further elevate the flavor profile, think about combining different types of frozen treats like sorbet and ice cream. This invigorating and fruity alternative can bring a new dimension to the traditional Baked Alaska experience.
Remember to soften your ice cream adequately before layering it in the cake to guarantee a smooth texture without any unwanted air pockets that could disrupt the final result.
For a unique presentation and texture, try using puff pastry as the base for your Baked Alaska. This twist won't only surprise your guests visually but also provide a delightful contrast to the creamy ice cream and fluffy meringue.
Conclusion
As you take that first bite of your flamboyant baked Alaska, savor the perfect combination of cool ice cream, rich brownie, and fluffy meringue.
Let the golden hue of the meringue remind you of a warm summer sunset, while the flavors transport you to a decadent dessert paradise.
Your creation is sure to impress and delight your guests, leaving them in awe of your culinary skills.
Enjoy every delicious moment!