You can easily whip up homemade bear claw pastries that rival your favorite bakery's delight. Start with a buttery, flaky dough using cold all-purpose flour and butter, then prepare a sweet almond paste filling. Shape the dough into the iconic claw shape, cutting slits for that signature look. After brushing with an egg wash for a golden finish, bake them until perfectly browned. Let them cool and enjoy with a dusting of powdered sugar. You'll impress your family and friends with this treat that's just as good as any store-bought version. There's plenty more to explore about this delicious pastry!
Overview of Bear Claws
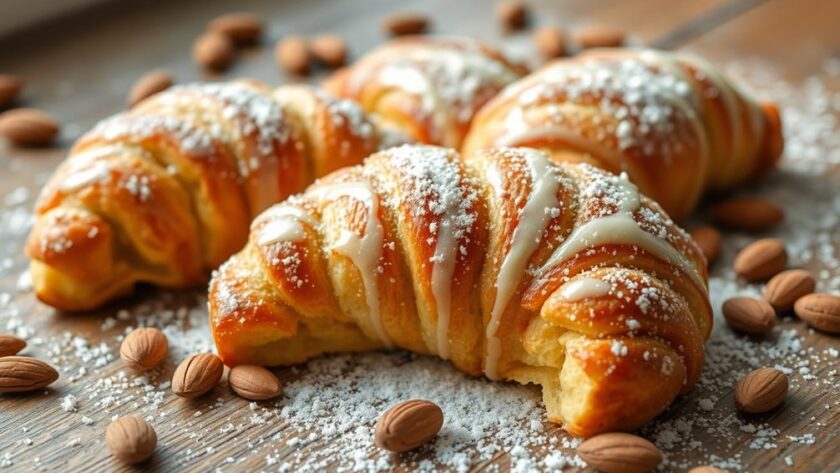
Bear claws, with their flaky layers and buttery goodness, capture the essence of a delightful pastry experience. This beloved treat, shaped like a bear's paw, is typically filled with almond paste, providing a deliciously sweet contrast to its crispy exterior.
Originating from California's German bakeries in the early 1900s, bear claws have gained popularity across North America and Europe, making them a staple in many bakeries. The rich almond flavor found in bear claws echoes the deliciousness of other almond-based desserts like Norwegian Kransekake, which also celebrate festive occasions.
When you decide to bake a homemade bear claw, you'll be rewarded with a pastry that not only looks impressive but also delights the palate. Each bite reveals a tender, flaky texture complemented by the rich almond filling. You can also explore variations, such as huckleberry bear claws or similar pastries like Brenklaue from Austria and Germany, adding a unique twist to your recipe.
Dusted with powdered sugar or glazed for extra sweetness, bear claws are perfect for breakfast or as a snack, making them a fabulous addition to brunch gatherings and festive occasions.
Essential Ingredients
Gathering the essential ingredients for homemade bear claws is crucial to achieving that perfect flaky texture and rich flavor. Start with all-purpose flour, which forms the base of your pastry, similar to how gluten-free flour serves as the foundation for cookies in a simple cookie recipe.
You'll need salted butter to create that buttery richness; however, unsalted butter can help balance the sweetness if preferred. Combine your butter with warm water and yeast to activate your dough.
Sugar adds sweetness, while almond paste provides the filling's signature rich flavor. Don't forget almond extract to enhance that nutty essence! For a creamier texture, whole milk is recommended, but you can substitute with half-and-half or plant-based alternatives if needed.
An egg wash, made from beaten egg and water, is crucial for brushing over your pastries before baking, ensuring a beautiful golden finish.
For the final touch, sprinkle sliced almonds on top for added crunch and visual appeal. If you want to elevate the presentation and taste further, consider using demerara sugar for a crunchy topping or flaked almonds as a garnish.
With these ingredients, you'll create the flaky pastry that makes bear claws a bakery favorite!
Step-by-Step Preparation
Now that you've gathered your essential ingredients, it's time to focus on the step-by-step preparation of your bear claw pastry.
Mastering the dough handling techniques is vital for achieving a flaky texture reminiscent of classic French pastries, such as those made with choux pastry.
I'll guide you through baking and serving tips to make your pastries shine.
Let's get started on creating these delicious treats!
Essential Ingredients Overview
To create delicious homemade bear claw pastries, you'll need several essential ingredients that work together to achieve their signature flaky texture and rich flavor. Start with puff pastry dough, which serves as the base for these delightful pastries. You can either make it from scratch or opt for store-bought for convenience.
Next, prepare the almond paste filling by combining softened butter, icing sugar, almond paste, almond extract, and an egg white. This mixture will provide the bear claws with their distinct and rich flavor.
When you're ready to assemble, roll out the dough and spread the filling generously. Don't forget the egg wash made from egg yolk and water; brushing this over the pastries before baking gives them a beautiful golden finish.
Finally, sprinkle sliced almonds on top for added texture and visual appeal. These ingredients come together to create flaky Danish pastries that are sure to impress your family and friends.
With these essentials on hand, you're well on your way to baking mouthwatering bear claws that taste just like those from your favorite bakery!
Dough Handling Techniques
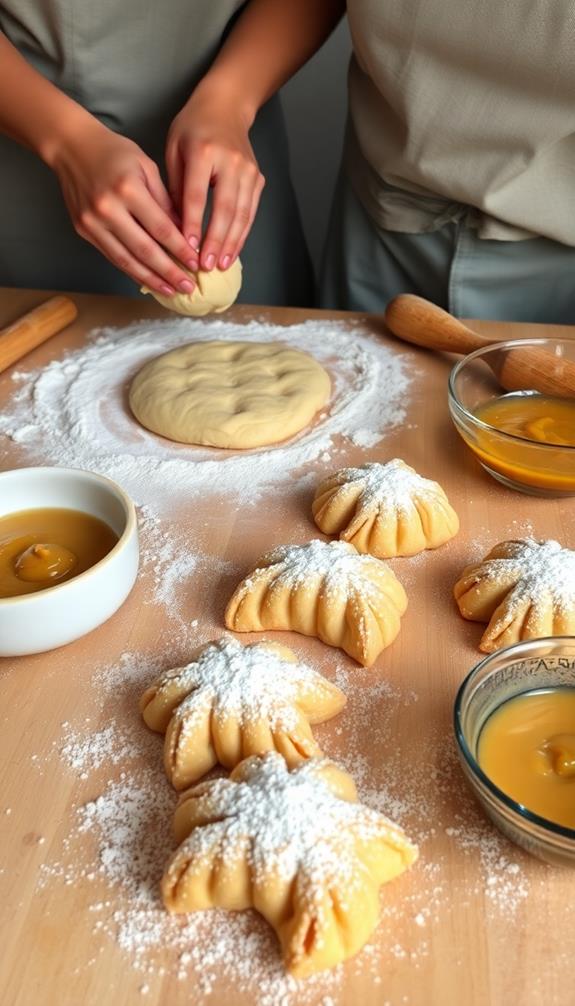
Achieving the perfect bear claw pastry hinges on mastering dough handling techniques. Start by ensuring all your ingredients, especially the cold butter, are chilled. This is essential for maintaining a flaky texture in your laminated dough.
To begin, roll the dough into a rectangle, then fold it multiple times to create layers that enhance flakiness. If the dough becomes sticky, use a bench scraper to handle it, minimizing added flour to avoid tough pastries.
Next, chill the dough for at least 4 hours or overnight. This resting period allows the gluten to relax, resulting in a tender pastry.
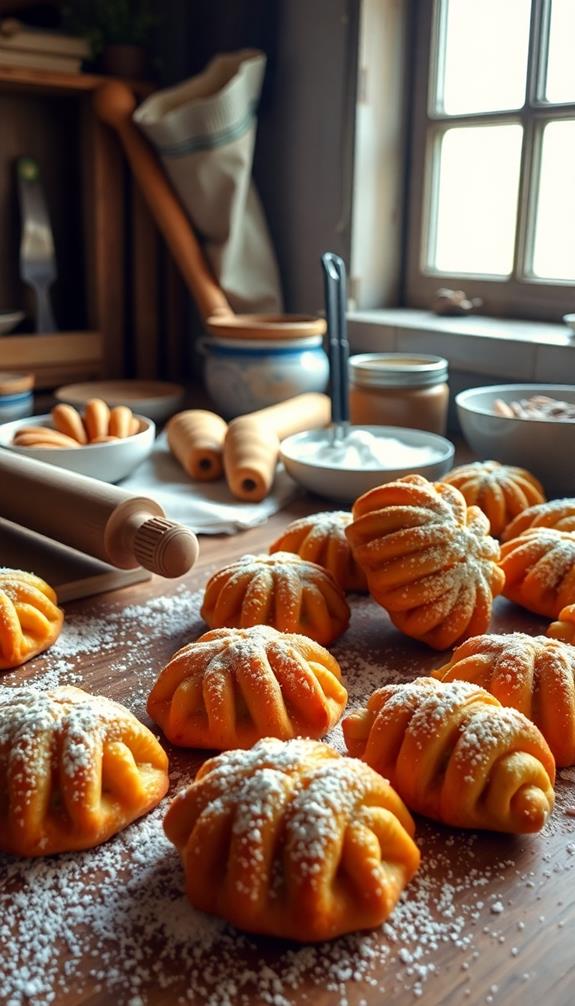
When you're ready to shape the bear claws, roll out the chilled dough and cut it into strips. Pipe the almond filling down the center of each strip, and then cut slits at the ends to form the signature claw shape.
Baking and Serving Tips
Once your dough is properly chilled and shaped, it's time to move on to baking and serving your homemade bear claws.
Start by preheating the oven to 400°F (200°C). Line your baking sheets with parchment paper to prevent sticking. Take each piece of dough, pipe the almond filling down the center, and fold the dough over to seal the edges securely.
Don't forget to cut slits in the top to create that iconic claw shape.
Place the shaped pastries on the prepared baking sheets and pop them into the preheated oven. Bake for 25-30 minutes, or until the almonds are toasted and the pastries are golden brown.
Keep an eye on them to avoid overbaking.
Once they're done, remove the bear claws from the oven and allow them to cool slightly on a wire rack. This step is essential as it helps the pastries firm up a bit.
Finally, dust them with powdered sugar or drizzle a glaze on top for an added touch of sweetness and visual appeal.
Enjoy your delicious homemade bear claws fresh out of the oven!
Baking Instructions
Baking your homemade bear claws is a straightforward process that yields delicious results. You can make these pastries even more nutritious by incorporating alternatives like nutrient-rich flours to enhance their flavor and health benefits.
Here's how to create these delightful pastries:
- Preheat your oven to 400°F (200°C) for that perfect bake.
- Line your baking sheet with parchment paper to prevent sticking.
- Roll out the chilled dough into a rectangle, then cut it into strips.
- Pipe almond filling down the center of each strip before folding and sealing the edges.
- Cut slits into the folded dough to create the claw shape, ensuring they can rise beautifully.
Once shaped, let the pastries sit in a warm area to enhance their texture.
Brush each one with an egg wash to achieve that golden brown finish, and for added crunch, sprinkle with sliced almonds.
Bake in the preheated oven for 25-30 minutes until they're golden brown.
After baking, let them cool slightly before dusting with powdered sugar for an irresistible presentation.
Enjoy the process of making these homemade bear claws, and savor the delightful flavors that will fill your kitchen!
Tips for Success
To guarantee your homemade bear claws turn out perfectly, remember that attention to detail makes all the difference. Start with cold butter when preparing the dough; this guarantees a flaky texture and keeps the layers distinct during baking.
For an added flavor twist, consider incorporating almond extract infused oatmeal cookies to elevate your pastry's flavor profile. Once you've made the dough, let it rise in a warm, draft-free environment. This helps it expand properly, giving your pastries a light, airy texture.
Before shaping your bear claws, chill the dough in the refrigerator for at least 30 minutes. This step is essential for maintaining their shape and preventing spreading.
After you shape them, don't forget to brush the pastries with an egg wash before baking. This simple step will give your bear claws a beautiful golden-brown finish, enhancing their visual appeal.
Feel free to customize your bear claws with different fillings, such as fruit preserves or chocolate, to cater to your taste preferences. Experimenting with various fillings can add a personal touch to your pastries.
Storage Recommendations
To keep your homemade bear claws fresh, store them in an airtight container at room temperature for up to 2 days.
If you're looking for a healthier twist, consider using almond flour or oats in your pastry for added fiber and protein, making them a guilt-free treat.
For longer storage, refrigerate or freeze them, but make sure they're well-wrapped to avoid freezer burn.
When you're ready to enjoy them again, gently reheat in the oven to restore their flaky texture.
Healthier ingredient swaps can elevate your baking experience!
Room Temperature Storage
Storing uneaten bear claws at room temperature is a breeze when you keep them in an airtight container. This simple method allows you to maintain their freshness and flavor for up to two days while preserving that delightful flaky texture.
Here are some tips for ideal storage:
- Use an airtight container to keep bear claws fresh.
- Store at room temperature for up to two days.
- Avoid refrigeration to maintain the flaky texture.
- If you want to refresh them, gently reheat in the oven.
- Consider freezing for long-term storage if you can't finish them quickly.
If you're looking to enjoy your homemade bear claws later, freezing is a convenient option.
Just remember, if you've added a glaze, it's best to freeze it separately. When you're ready to indulge, thaw and drizzle the glaze just before serving for the best taste and presentation.
This way, you can savor the deliciousness of your bear claws even after a few days, ensuring they remain a delightful treat whenever you crave them!
Freezing and Thawing Tips
If you want to enjoy your homemade bear claws beyond a couple of days, freezing them is a fantastic option.
To freeze unbaked bear claws, shape them and place them on a baking sheet, making sure they're spaced apart. Freeze them individually for a few hours, then transfer them to an airtight container for up to two months.
When it's time to bake, thaw your frozen bear claws by placing them in the refrigerator overnight or letting them sit at room temperature for about 1-2 hours. If you prefer baking from frozen, remember to add a few extra minutes to the baking time to guarantee they turn golden brown and are cooked through.
Once baked, any uneaten bear claws can be stored in an airtight container at room temperature for up to two days or refrigerated for 5-7 days.
For long-term storage, consider freezing your baked bear claws. Reheat them gently in the oven to restore their flaky texture before serving.
With these freezing and thawing tips, you can enjoy your delicious pastries whenever you want!
Community Engagement
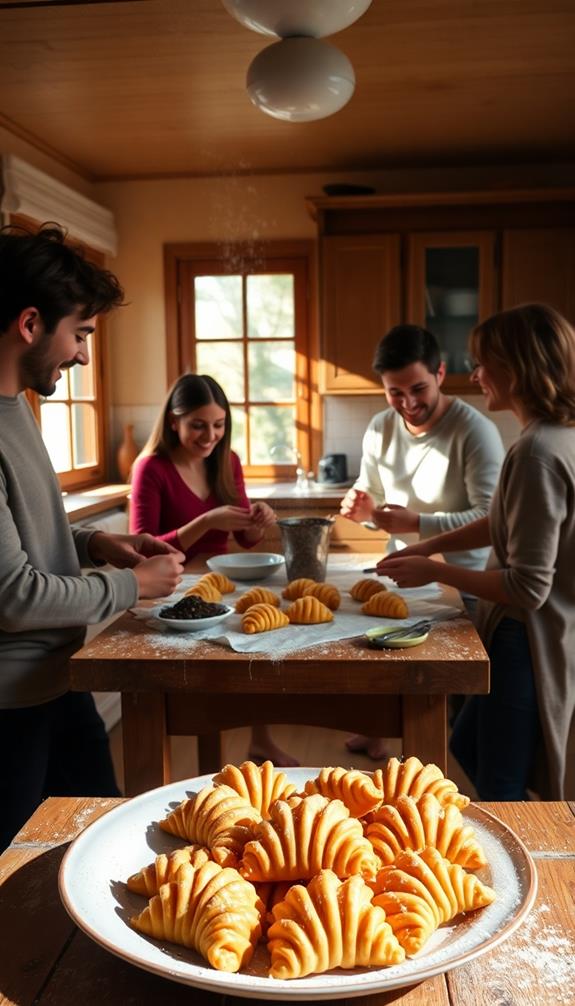
Engaging with the baking community can elevate your homemade bear claw experience and connect you with fellow enthusiasts. By sharing your creations and insights, you not only enhance your skills but also contribute to the collective knowledge of bear claw preparation.
Exploring unique flavors and festive treats, like creative festive vegan cookie recipes, can inspire new ideas in your baking journey.
Here are some ways to get involved:
- Share personal experiences with your bear claw recipes on social media using hashtags like #houseofnasheats.
- Participate in discussions about challenges and triumphs in baking, fostering a supportive environment.
- Leave feedback and reviews on recipe sites to help others learn from your journey.
- Subscribe to newsletters from baking blogs for updates on new recipes and community events.
- Join online forums or groups dedicated to baking where you can ask questions and share variations and advice.
Conclusion
Making homemade bear claws is like crafting a warm hug in pastry form. As you roll out the dough and fill it with sweet almond goodness, you're not just baking; you're creating a comforting treat that brings smiles to the table. Remember, the best moments often come from the simplest joys—like enjoying a fresh bear claw over coffee with a friend. So, gather your ingredients, and let your kitchen be filled with the delightful aroma of homemade pastries!